You know those days when a craving hits, and it’s not just for *any* sweet treat, but for something truly, utterly comforting? Something that tastes like pure joy and maybe a little bit of sunshine? That’s exactly how I feel about these cookie ice cream sandwiches. Honestly, if I could bottle the feeling of biting into one of these, I’d be a millionaire! They’re that good. Forget those store-bought ones that are always a little too hard or too crumbly. We’re talking about homemade perfection, where the cookie is perfectly soft and chewy, cradling a generous scoop of your favorite ice cream, all bound together with a whisper of sweetness. I’ve been making these for years, and they’re a constant hit, especially with my family. They’re so much better than a plain cookie or a scoop of ice cream on its own, and honestly, they’re easier than you might think. If you love a good Chocolate Chip Cookie and you’re a fan of ice cream, then this is your soulmate recipe. It’s basically a dream come true for anyone who enjoys a delightful cookie ice cream sandwich.
What is cookie ice cream sandwich?
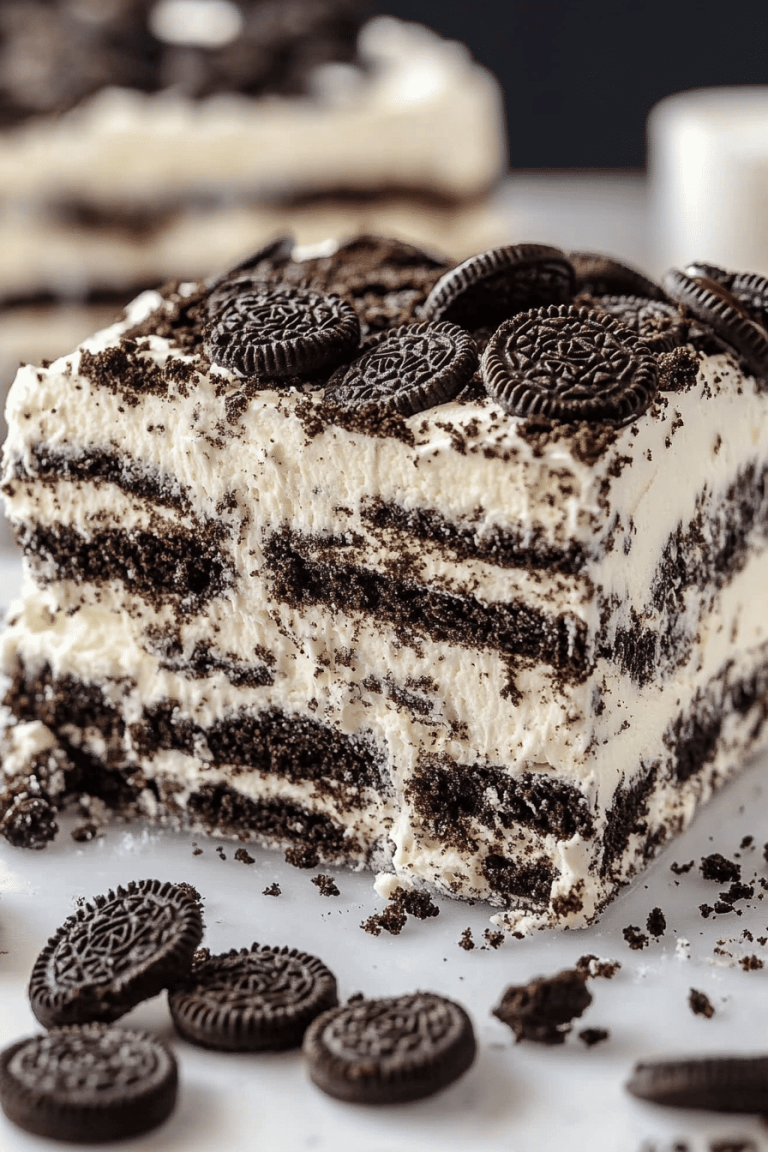
So, what exactly are we talking about when I say “cookie ice cream sandwiches“? Think of it as the best of both worlds, elevated. It’s not just two cookies slapped around some ice cream. We’re talking about a specifically designed cookie, baked just right – soft enough to bend without breaking, but sturdy enough to hold its delicious cargo. This cookie is then generously filled with your choice of ice cream. The magic happens when the cookie and ice cream meld together slightly, creating this incredible, soft, almost fudgy texture in the center. It’s the kind of treat that’s perfect for a warm summer afternoon, a fun birthday party, or even just a Tuesday night when you need a little extra cheer. It’s essentially a hug in edible form, a delightful fusion of two beloved desserts into one perfect package. My kids often call them “happy cookies,” and honestly, I can’t think of a better description.
Why you’ll love this recipe?
There are so many reasons why I’ve fallen head-over-heels for this cookie ice cream sandwich recipe, and I just know you will too! First off, the flavor is out of this world. The cookies themselves have this perfect balance of sweet and rich, with hints of vanilla and brown sugar that just sing. When you pair that with creamy, cold ice cream – oh my goodness. It’s pure bliss. What I love most about this is how surprisingly simple it is. You don’t need any fancy equipment or super-special ingredients. The cookies bake up beautifully, and the assembly is a breeze. Plus, it’s incredibly cost-effective! Baking your own cookies is always more budget-friendly than buying pre-made treats, and you get to control exactly what goes into them. And the versatility! You can use any ice cream flavor you fancy – vanilla, chocolate, mint chip, strawberry, you name it. You can even roll the edges in sprinkles or chopped nuts for an extra pop of texture and flavor. Compared to other Dessert Recipes, this one hits all the right notes: it’s impressive without being complicated, incredibly delicious, and always a crowd-pleaser. It’s my go-to when I want to make something special that feels like a real treat, but I don’t want to spend hours in the kitchen.
How do you make cookie ice cream sandwich?
Quick Overview
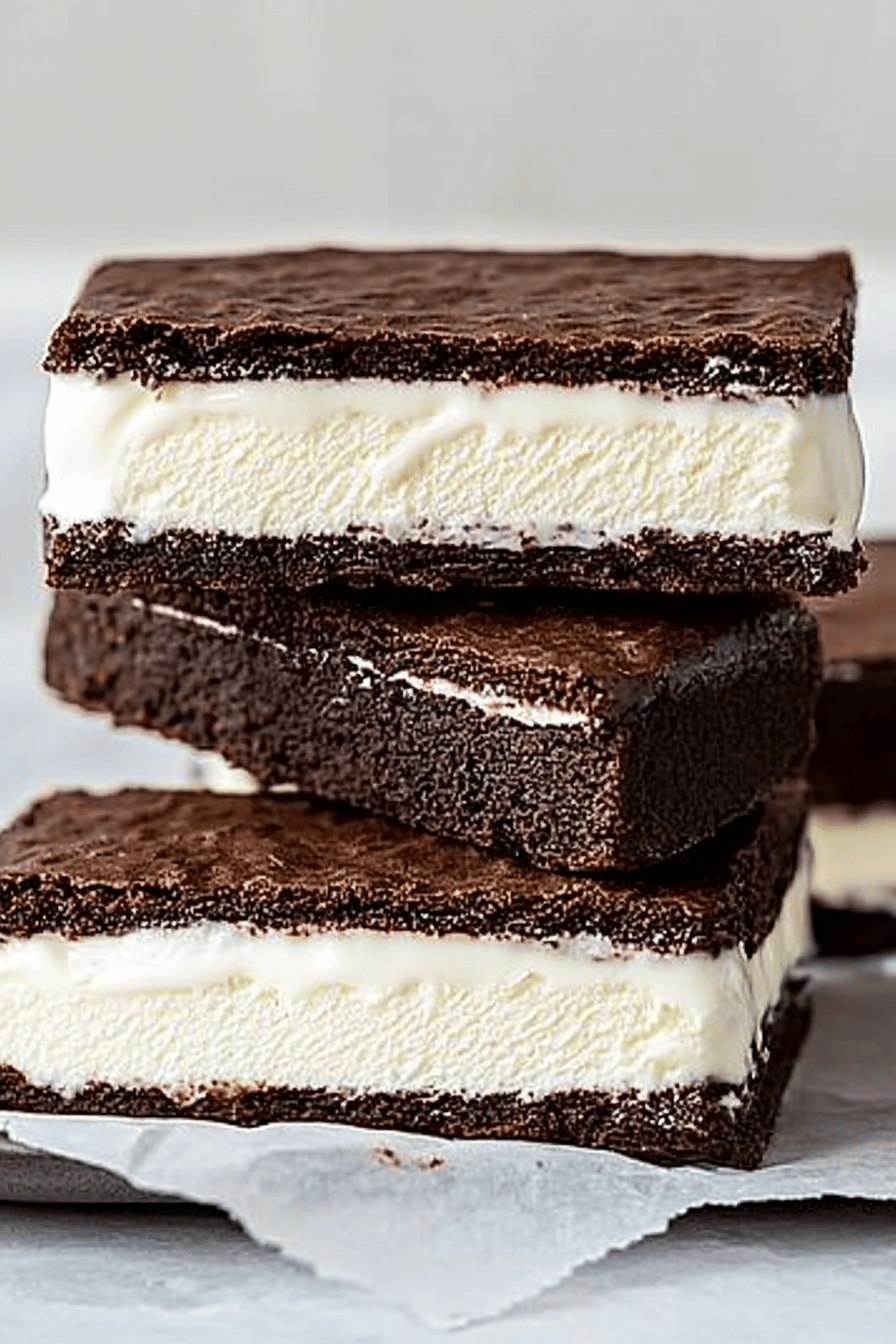
Making these delightful cookie Ice Cream sandwiches is a two-part process, but don’t let that intimidate you! We’ll bake some wonderfully soft and chewy cookies, let them cool just enough, then sandwich them with your favorite ice cream. The real trick to perfection lies in getting the cookie texture just right – they need to be soft enough to bite through easily, but not so delicate that they fall apart. Once baked and cooled slightly, you’ll scoop your ice cream, press two cookies together, and then, if you like, add a little something extra around the edges. It’s a straightforward process that yields incredibly rewarding results. This method ensures you get that perfect cookie-to-ice-cream ratio every single time.
Ingredients
For the Cookie Dough: For the Cookie Dough: For the Cookie Dough: For the Cookie Dough: For the Cookie Dough:
We’re aiming for a cookie that’s soft, chewy, and has a wonderful depth of flavor.
– 1 cup (2 sticks) unsalted butter, softened: Make sure it’s softened, not melted! This is key for the texture. I always use good quality butter; it really makes a difference.
– 3/4 cup granulated sugar: For sweetness and structure.
– 3/4 cup packed light brown sugar: This is what gives our cookies that lovely chewiness and caramel notes. Don’t skip this!
– 2 large eggs: Room temperature eggs incorporate better.
– 2 teaspoons vanilla extract: Use pure vanilla extract if you can; the flavor is so much richer.
– 2 1/2 cups all-purpose flour: Spooned and leveled, not scooped. Scooping can pack too much flour in.
– 1 teaspoon baking soda: Our leavening agent.
– 1/2 teaspoon salt: Balances the sweetness.
For the ice cream Filling:
This is where you get to play! I usually go with classic vanilla bean because it’s so versatile, but feel free to get creative.
– 1.5 quarts of your favorite ice cream: Choose something that’s firm but scoopable. Let it soften slightly on the counter for about 10-15 minutes before scooping.
For the Optional Edging:
This is pure fun and adds a little extra flair and texture!
– Sprinkles, mini chocolate chips, chopped nuts, or shredded coconut: Whatever makes your heart sing!
Step-by-Step Instructions
Step 1: Preheat & Prep Pan
First things first, let’s get our oven ready. Preheat it to 375°F (190°C). Then, grab a couple of baking sheets and line them with parchment paper. Parchment paper is a lifesaver here – it prevents sticking and makes cleanup a breeze. You don’t want your beautiful cookies getting stuck!
Step 2: Mix Dry Ingredients
In a medium bowl, whisk together the flour, baking soda, and salt. Give it a good whisk so everything is evenly distributed. This ensures our cookies rise evenly. Set this bowl aside for now.
Step 3: Mix Wet Ingredients
In a large bowl, cream together the softened butter, granulated sugar, and light brown sugar until light and fluffy. This usually takes a good 2-3 minutes with an electric mixer. Then, beat in the eggs one at a time, making sure each is fully incorporated before adding the next. Stir in the vanilla extract.
Step 4: Combine
Gradually add the dry ingredients to the wet ingredients, mixing on low speed (or by hand with a spatula) until just combined. Be careful not to overmix! Overmixing can lead to tough cookies, and we want these to be wonderfully soft. A few streaks of flour are okay; they’ll disappear as the dough sits for a moment.
Step 5: Prepare Filling
While the cookie dough is chilling for a few minutes (or if you’re in a hurry, you can skip this and go straight to scooping!), take your ice cream out of the freezer to soften slightly. We want it firm enough to scoop into balls, but soft enough to easily spread and sandwich. Aim for about 10-15 minutes on the counter.
Step 6: Scoop & Shape Cookies
Drop rounded tablespoons of dough onto your prepared baking sheets, leaving about 2 inches between them. You can use a cookie scoop for uniform size, which is helpful when making sandwiches. Gently flatten the tops a little with the palm of your hand or the bottom of a glass. We want them to bake into a nice, round cookie shape, not too tall and domed.
Step 7: Bake
Bake for 9-11 minutes, or until the edges are lightly golden brown and the centers look set but still slightly soft. Don’t overbake! Remember, they’ll continue to bake a little on the hot baking sheet. We want that chewy center. Let them cool on the baking sheets for about 5 minutes before transferring them to a wire rack to cool completely. This cooling step is CRUCIAL for making sandwiches without them falling apart.
Step 8: Assemble the Sandwiches
Once the cookies are completely cool (this is important – warm cookies will melt the ice cream instantly!), it’s time for the fun part. Pair up your cookies so you have matching sizes. Scoop a generous amount of ice cream onto the flat side of one cookie. Then, place another cookie on top, flat side down, and gently press to form a sandwich. The ice cream should spread out a bit to the edges.
Step 9: Add Edging & Freeze
If you’re using the optional edging, now’s the time! Roll the edges of the ice cream sandwich in your chosen sprinkles, mini chips, or nuts. This not only looks pretty but adds a fun textural element. Once assembled, place the cookie ice cream sandwiches on a parchment-lined baking sheet and pop them back into the freezer for at least 30 minutes to firm up. This step is non-negotiable if you want them to hold their shape when you serve them!
Step 10: Slice & Serve
When you’re ready to enjoy, let the cookie ice cream sandwiches sit at room temperature for just a minute or two to soften slightly. Then, slice them in half using a sharp knife (dipping the knife in hot water and drying it between cuts can help get clean slices). Serve immediately and watch them disappear!
What to Serve It With
These cookie ice cream sandwiches are truly a standalone star, but they do pair beautifully with other things, depending on the occasion! For a casual breakfast (yes, I’ve been known to have one with my coffee on a weekend morning!), they’re perfect on their own or alongside a fresh fruit salad. For a more elaborate brunch spread, imagine them sliced and served as mini delights on a platter, perhaps with a pitcher of fresh-squeezed orange juice or mimosas. As a decadent dessert, they’re fantastic after a rich meal. I love serving them with a drizzle of raspberry coulis or a dollop of whipped cream. And for cozy snacks? They’re simply divine with a warm mug of hot chocolate on a chilly evening. My family loves having these during movie nights – it’s always a huge hit and so much more fun than just popcorn. We’ve also done themed ice cream flavors for parties, like mint chocolate chip with chocolate cookies for St. Patrick’s Day, or strawberry ice cream with vanilla cookies for summer birthdays.
Top Tips for Perfecting Your Cookie Ice Cream Sandwiches
After making countless batches of these beauties, I’ve picked up a few tricks that I swear by. First, for the cookies: chilling the dough for at least 30 minutes before baking can help prevent them from spreading too much and ensures a thicker, chewier cookie that’s perfect for sandwiches. When mixing the wet and dry ingredients, remember that “just combined” is the golden rule. Overmixing develops gluten, which makes cookies tough, and we want tender, soft cookies here. Trust me on this one; a few flour streaks are fine! For assembly, the key is to have your cookies completely cool. If they’re even slightly warm, the ice cream will turn into a puddle faster than you can say “ice cream sandwich.” When scooping the ice cream, use an ice cream scoop that’s slightly larger than the cookie; this way, when you press the cookies together, the ice cream will distribute evenly to the edges, making for a neat and appealing sandwich. I’ve also found that if you’re making a big batch, it’s easier to scoop the ice cream onto one cookie, place it on a parchment-lined baking sheet, freeze it for 15-20 minutes until firm, then top with the second cookie and press. This prevents the ice cream from melting too much while you work. For ingredient swaps, if you want to make these dairy-free, I’ve had success using a good quality plant-based butter and a non-dairy ice cream. The texture might be slightly different, but the flavor is still amazing. Don’t be afraid to experiment with different cookie flavors too – a double chocolate cookie with mint chip ice cream is a winner in my book!
Storing and Reheating Tips
Storing these cookie ice cream sandwiches is pretty straightforward, but there are a few things that help keep them in tip-top shape. If you’ve got leftovers (which is rare in my house!), the best way to store them is in the freezer. Make sure they’re completely firm before wrapping. I usually place them back on a parchment-lined baking sheet in the freezer until solid, then wrap each one individually in plastic wrap or foil, or place them in an airtight container with parchment paper between layers. They’ll keep well in the freezer for about 2-3 weeks. If you plan on eating them soon, you can store them in an airtight container in the refrigerator for about 2-3 days, but be aware that the cookies might soften a bit from the moisture. I don’t recommend storing them at room temperature for long periods, especially if they have ice cream in them! As for “reheating,” well, you don’t reheat ice cream sandwiches! The beauty is in their cold, creamy goodness. The only thing you might do is let them sit out for a few minutes before serving if they’ve been frozen solid, just so they’re a little easier to bite into. For the glaze, if you’ve added one, it’s best to add it just before serving or just before freezing if you want it to set nicely.
Frequently Asked Questions
Final Thoughts
I really hope you give these cookie ice cream sandwiches a try. They’re more than just a dessert; they’re a little slice of happiness that brings people together. The perfect balance of a soft, chewy cookie and creamy ice cream is just unbeatable. They’re simple enough for a weeknight treat but impressive enough for guests. If you love this recipe, you might also enjoy my classic chocolate chip cookies or my no-bake cheesecake bars for more easy and delicious dessert ideas. Don’t forget to tell me how yours turn out in the comments below – I absolutely love hearing about your baking adventures and seeing your creations! Happy baking, and even happier eating!
Classic Chocolate Chip Cookie Ice Cream Sandwiches
Ingredients
For the Chocolate Chip Cookies
- 1.25 cups all-purpose flour
- 0.5 teaspoon baking soda
- 0.25 teaspoon baking powder
- 0.25 teaspoon salt
- 0.5 cup unsalted butter, room temperature
- 0.375 cup granulated sugar
- 0.25 cup packed light brown sugar
- 2 large egg yolks
- 0.5 teaspoon vanilla extract
- 1.5 cups mini chocolate chips, divided
For Assembly
- 1.5 quarts vanilla ice cream, softened
Instructions
Make the Chocolate Chip Cookies
- Preheat oven to 350°F (180°C). Line baking sheets with parchment paper or silicone baking mats.
- In a medium bowl, whisk together the flour, baking soda, baking powder, and salt.
- In a large bowl with an electric mixer, cream together the butter and granulated sugar until light and fluffy.
- Beat in the egg yolks and vanilla extract until well combined.
- Gradually add the dry ingredients to the wet ingredients, mixing until just combined. Do not overmix.
- Fold in 0.5 cup of the mini chocolate chips.
- Scoop dough into 1.5 tablespoon balls. Flatten slightly and press additional mini chocolate chips onto the tops. Place on prepared baking sheets.
- Bake for 7-10 minutes, or until the edges are lightly golden and the centers are still soft. Remove from oven and let cool on baking sheets for 5 minutes before transferring to a wire rack to cool completely.
- Once cooled, place cookies in the freezer for 20-30 minutes to firm up.
Assemble the Ice Cream Sandwiches
- Spread about 1/4 cup of softened ice cream onto the flat side of one cookie. Top with another cookie and gently press.
- Place the assembled sandwiches back in the freezer for 2-3 hours, or until the ice cream is firm.
- Optional: Roll the sides of the frozen sandwiches in the remaining 1 cup of mini chocolate chips.
- Freeze until ready to serve.