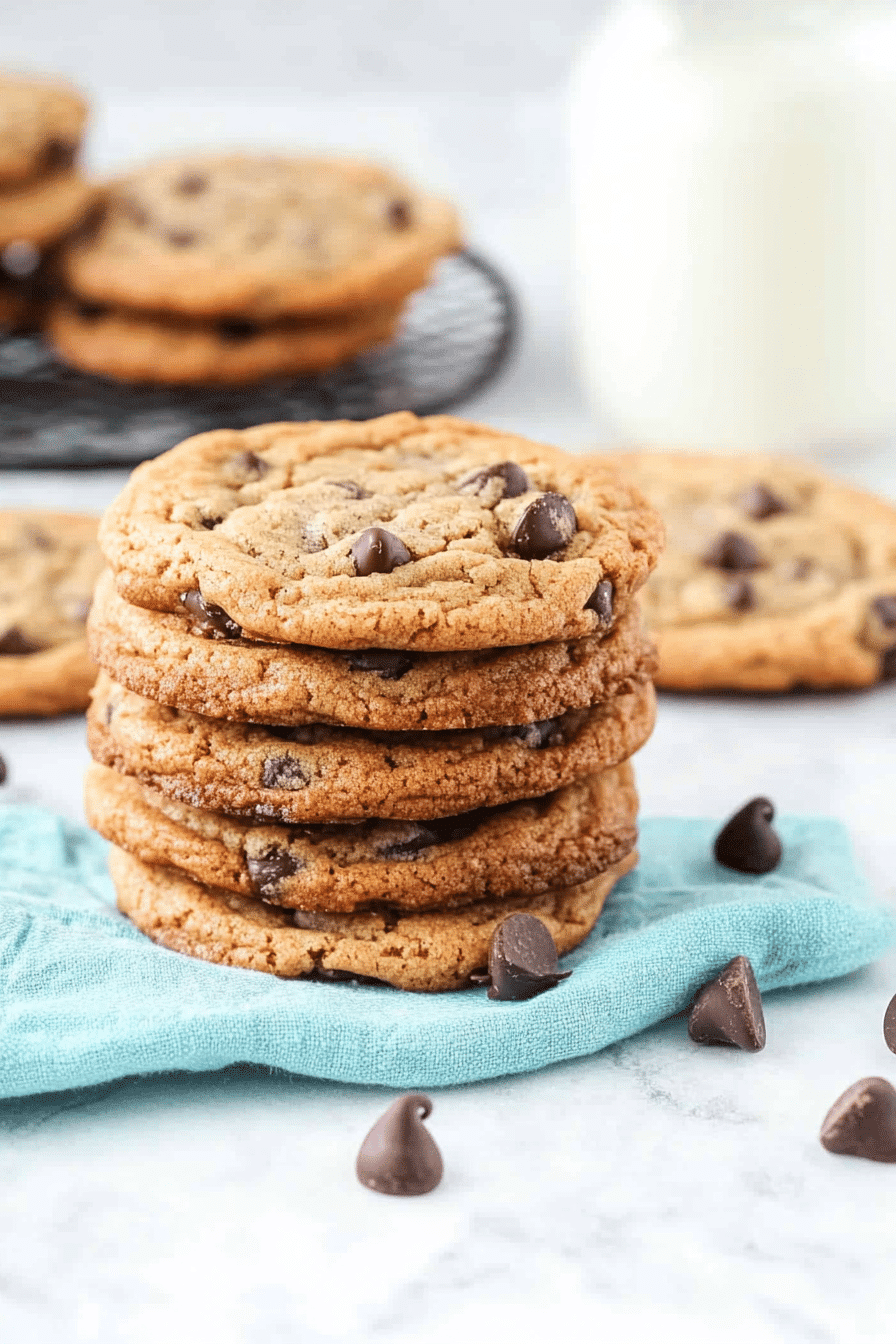
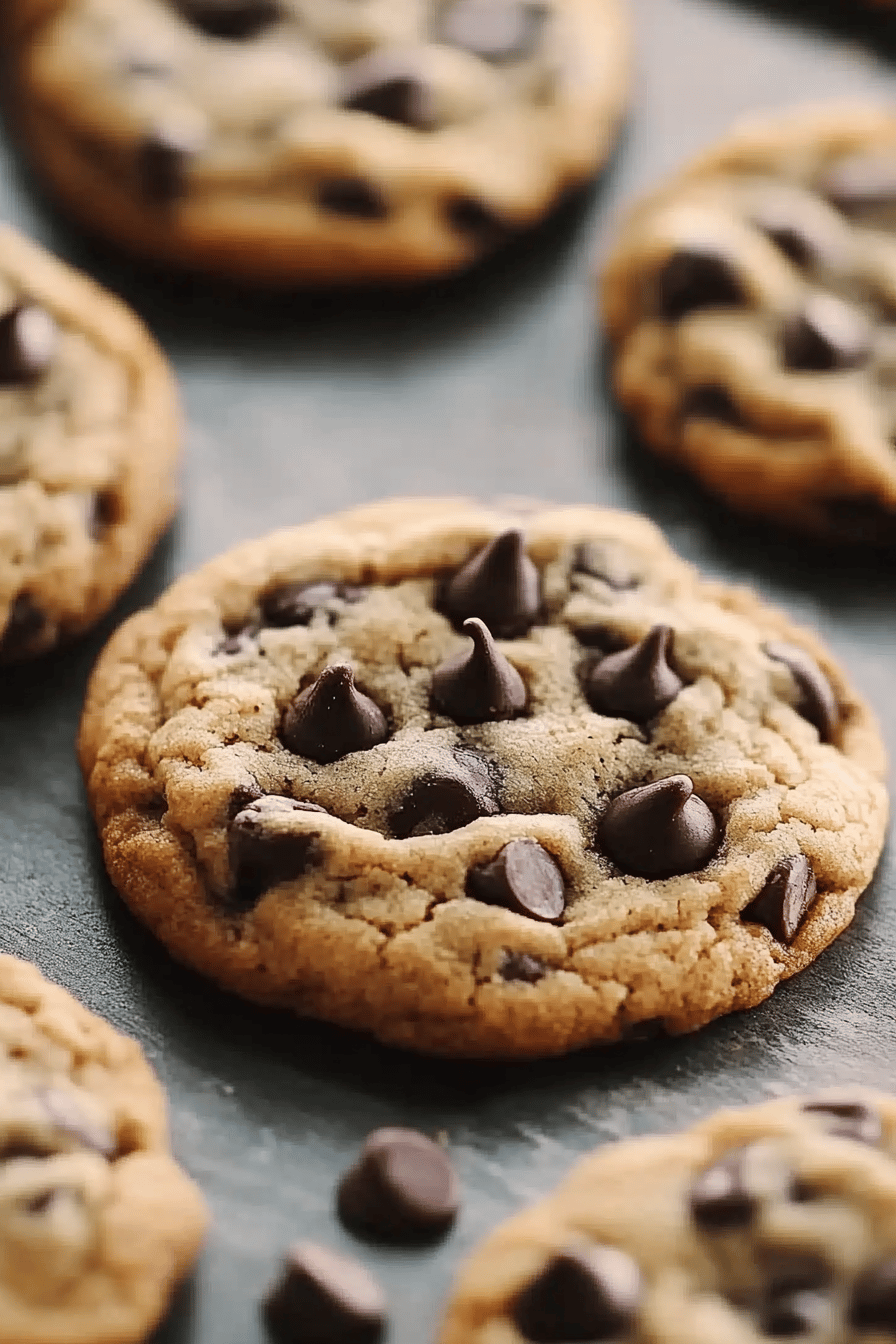
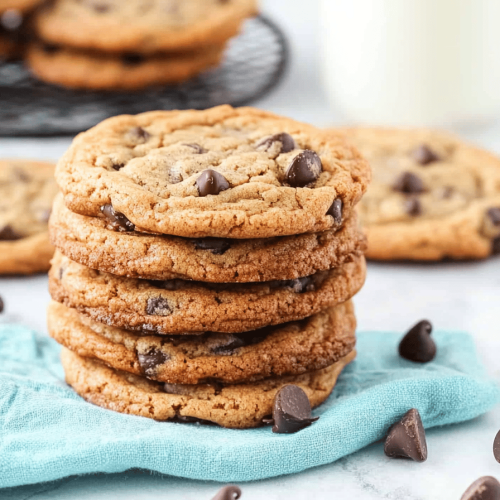
Oh, where do I even begin with these chocolate chip cookies? It feels like just yesterday I was a kid, sneaking a warm one right off the cooling rack while my mom wasn’t looking. The smell of butter, sugar, and melting chocolate wafting through the house – it’s pure magic, isn’t it? This recipe isn’t just my go-to for a sweet treat; it’s a whole memory bank in cookie form. I’ve tried so many variations over the years, from fancy salted caramel versions to those super-thin, crispy ones that shatter when you bite them, but honestly, nothing beats the comforting perfection of a classic Chocolate Chip Cookie done right. This one has that perfect balance of chewy in the center and slightly crisp on the edges, with pockets of gooey chocolate that make you close your eyes in pure bliss. It’s the kind of cookie that makes a bad day better and a good day even more amazing. Forget those fancy desserts; sometimes, all you really need is a perfectly baked, utterly delicious chocolate chip cookie.
What are some of the best chocolate chip cookies?
So, what makes these particular Chocolate Chip cookies so special? Think of it as the ultimate crowd-pleaser, the quintessential comfort dessert that never goes out of style. It’s essentially a perfectly balanced cookie dough, rich with butter and brown sugar, studded generously with chocolate chips, and baked until it achieves that ideal texture we all dream of. It’s not overly complicated; it’s the kind of recipe that feels like an old friend. The name itself, “chocolate chip cookies,” is humble, but the result is anything but. It’s the simple, honest goodness of quality ingredients coming together in a way that feels both nostalgic and incredibly satisfying. It’s what you bake when you want something reliably delicious, something that brings smiles to faces without any fuss.
Why you’ll love this recipe?
What are some of the reasons why this chocolate chip cookie recipe has earned a permanent spot in my recipe box?flavor is absolutely divine. We’re talking about a deep, buttery richness from the browned butter (trust me, it’s worth the extra step!), a lovely caramel note from the brown sugar, and, of course, those glorious bursts of melted chocolate. It’s not too sweet, which I find is a common pitfall with some recipes. Then there’s the simplicity. I know baking can sometimes seem daunting, but this recipe is surprisingly straightforward. Even if you’re relatively new to baking, you can absolutely nail these. I’ve made them with my nieces and nephews, and they had a blast helping out. It’s also incredibly cost-efficient. You likely have most of the ingredients already in your pantry, and the ones you might need to grab are pretty standard and budget-friendly. Whatversatility. These cookies are perfect on their own, but they’re also fantastic crumbled over Ice Cream, dunked in milk (a childhood ritual I still haven’t outgrown!), or even sandwiched with a little buttercream for a special treat. If you’re a fan of my classic sugar cookies, you’ll adore the comforting familiarity here, but with that irresistible chocolatey twist. This recipe stands out because it strikes that perfect balance between being a little bit special and wonderfully everyday-friendly. It’s the cookie you’ll want to make again and again.
How to Make These Amazing Chocolate Chip Cookies
Quick Overview
Making these chocolate chip cookies is a wonderfully straightforward process that yields incredibly rewarding results. You’ll cream together butter and sugars, mix in your eggs and vanilla, then gently combine your dry ingredients. The magic happens when you fold in the chocolate chips. We’ll be chilling the dough for optimal flavor development and texture, then baking them until they’re just golden. It’s a simple, logical flow that ensures you get those perfect cookies every time, even if you’re short on time or a baking novice. The payoff for a little bit of patience is huge!
Ingredients
For the Cookie Dough:
1 cup (2 sticks) unsalted butter, softened (or browned, for extra depth!)
1 cup packed light brown sugar
½ cup granulated sugar
2 large eggs, at room temperature
2 teaspoons pure vanilla extract
2 ½ cups all-purpose flour
1 teaspoon baking soda
½ teaspoon salt
2 cups (about 12 ounces) good-quality chocolate chips (a mix of semi-sweet and dark is divine!)
Optional Add-ins:
½ cup chopped nuts (walnuts or pecans are lovely)
½ teaspoon flaky sea salt for topping, *after* baking
Step-by-Step Instructions
Step 1: Preheat & Prep Pan
First things first, let’s get that oven ready! Preheat it to 375°F (190°C). While the oven is heating, grab your baking sheets and line them with parchment paper or silicone baking mats. This is a lifesaver for easy cleanup and ensures your cookies don’t stick. I always find it best to have everything prepped before you start mixing – it makes the whole process so much smoother.
Step 2: Mix Dry Ingredients
In a medium bowl, whisk together the flour, baking soda, and salt. Whisking helps to aerate the flour and distribute the leavening agent evenly, which is key for consistent cookie rise. You don’t want pockets of baking soda or salt in your cookies; it can lead to an odd flavor or uneven texture. Just a gentle whisk until everything is well combined is perfect.
Step 3: Mix Wet Ingredients
In a large bowl, or the bowl of your stand mixer fitted with the paddle attachment, cream together the softened butter, light brown sugar, and granulated sugar. Beat on medium speed until the mixture is light and fluffy, about 3-4 minutes. This process incorporates air, which is crucial for cookie texture. Scrape down the sides of the bowl as needed. Then, add the eggs one at a time, beating well after each addition. Stir in the vanilla extract. The mixture should look smooth and emulsified.
Step 4: Combine
Gradually add the dry ingredients to the wet ingredients, mixing on low speed just until combined. Be careful not to overmix here! Overmixing develops the gluten in the flour too much, which can lead to tough cookies. Stop mixing as soon as you no longer see streaks of flour. It’s better to have a few tiny streaks than to overwork the dough. If you’re adding nuts or other mix-ins, gently fold them in now with a spatula.
Step 5: Chill the Dough (This is important!)
This is my secret weapon for perfect chocolate chip cookies! Cover the bowl with plastic wrap and refrigerate the dough for at least 30 minutes, or up to 2-3 days. Chilling the dough allows the flour to hydrate, the butter to firm up, and the flavors to meld beautifully. This results in cookies that spread less and have a richer, more complex flavor. If you’re in a rush, even 15 minutes in the freezer will help!
Step 6: Scoop & Shape
Once the dough is chilled, scoop rounded tablespoons of dough onto your prepared baking sheets, leaving about 2 inches between each cookie. I like to use a cookie scoop for uniformity, but two spoons work just fine. For extra-beautiful cookies, you can gently press a few extra chocolate chips onto the tops of the dough balls before baking.
Step 7: Bake
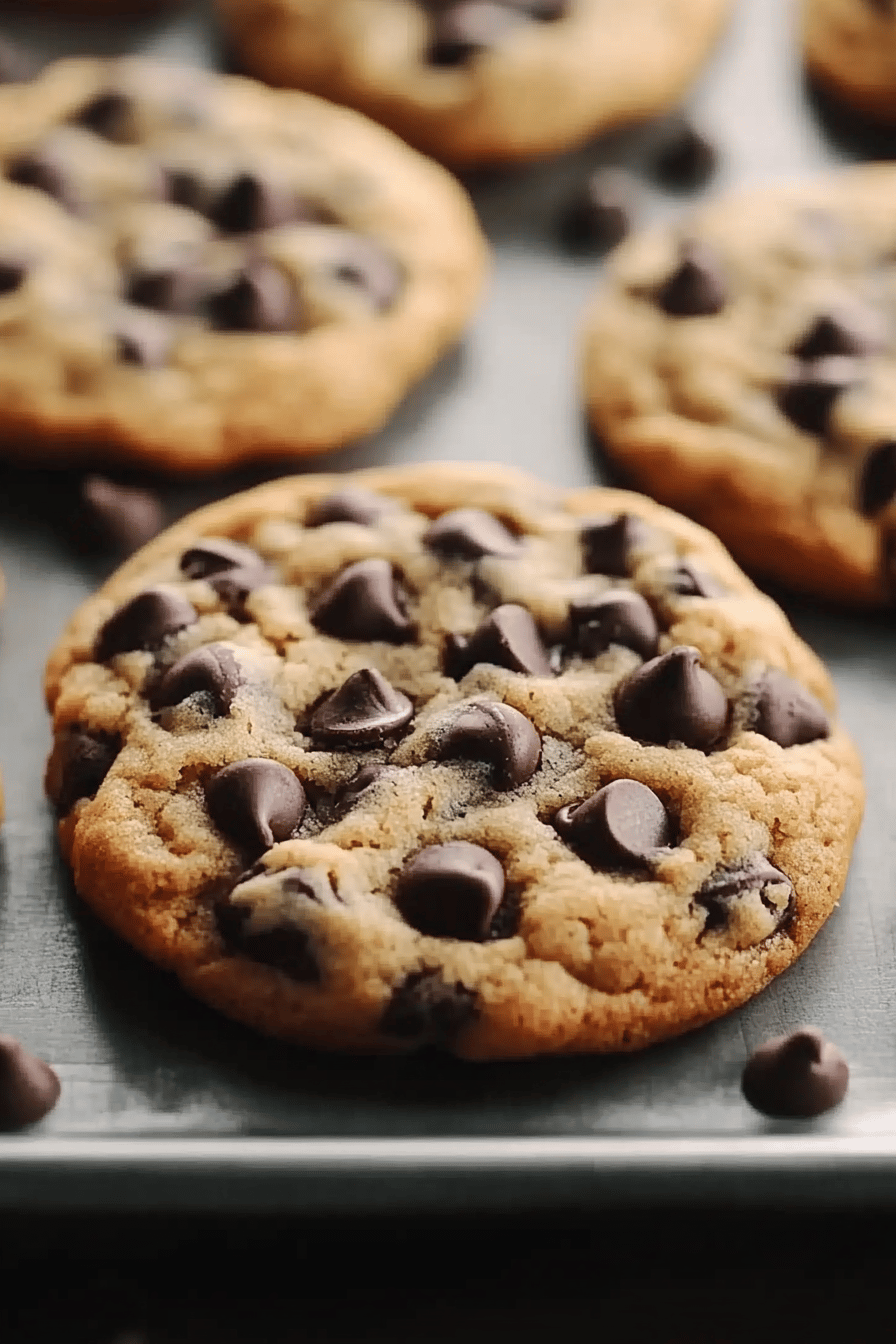
Bake for 9-12 minutes, or until the edges are golden brown and the centers still look slightly soft and underbaked. They will continue to set up as they cool. Ovens vary, so keep an eye on them. For perfectly chewy cookies, you want to pull them out just as the centers are still a little gooey. If you prefer crispier cookies, bake for a minute or two longer.
Step 8: Cool & Finish
Let the cookies cool on the baking sheets for about 5 minutes before transferring them to a wire rack to cool completely. This allows them to firm up. If you’re using flaky sea salt, sprinkle it over the warm cookies right after they come out of the oven – it’s pure bliss!
Step 9: Enjoy!
And there you have it! Your perfect batch of homemade chocolate chip cookies is ready to be devoured. Enjoy them warm, at room temperature, or however your heart desires!
What to Serve It With
These chocolate chip cookies are so versatile, they fit into almost any occasion! For a simple, comforting start to the day, I love to pair them with a hot cup of coffee or a glass of cold milk. They’re perfect with a creamy latte if you’re feeling fancy. For brunch, especially if you’re having a more casual gathering, these cookies are a huge hit. They look lovely on a platter alongside fresh fruit or yogurt parfaits. If you want to make them a bit more elegant for brunch, a light dusting of powdered sugar can be lovely. As a dessert, they are simply unbeatable. Serve them warm, maybe with a scoop of vanilla bean ice cream for that classic hot-and-cold sensation. A small glass of milk is, of course, non-negotiable for many! And for those cozy, quiet evenings when you just need a little pick-me-up, these cookies are your best friend. I often have one (or two!) with a cup of herbal tea after the kids are in bed. My family also loves them crumbled over a bowl of fresh berries. It’s such a simple yet decadent combination.
Top Tips for Perfecting Your Chocolate Chip Cookies
I’ve been making these chocolate chip cookies for years, and through trial and error, I’ve picked up a few tricks that I think really make a difference. So, let’s dive into some of my favorite tips!
Butter Matters: The quality of your butter really shines through here. Always use unsalted so you can control the salt level yourself. For an extra layer of nutty, complex flavor, try browning your butter! To do this, melt the butter in a saucepan over medium heat. Keep stirring until it turns a rich golden brown and smells nutty. It takes about 5-7 minutes. Pour it into a heatproof bowl to cool slightly before using. It adds a touch of sophistication that’s totally worth it.
Sugar Harmony: The ratio of brown sugar to granulated sugar is crucial for texture. Brown sugar brings moisture and that lovely caramel flavor, contributing to chewiness. Granulated sugar helps with spread and crispness. Stick to the ratios in the recipe for that perfect balance. If you’re using dark brown sugar, you’ll get an even richer flavor, but it can make the cookies a bit denser.
Room Temperature Everything: Make sure your eggs and butter are at room temperature. This helps them emulsify properly, creating a smoother, more consistent dough. If you forget to take your eggs out, you can place them in a bowl of warm water for about 10 minutes. For the butter, if it’s too soft, your cookies might spread too much. It should be pliable but not melty.
Don’t Overmix: I can’t stress this enough! Once you add the flour, mix only until *just* combined. A few streaks of flour are okay because they’ll disappear during baking. Overmixing develops gluten, leading to tough, dense cookies. A gentle hand is key here.
Chill Out: Seriously, don’t skip the chilling step! It’s not just for texture; it allows the flavors to deepen. The longer the dough chills, the more complex the taste becomes. If you have time, let it chill for at least 24 hours. It makes such a noticeable difference. If you’re in a hurry, 30 minutes in the fridge is the minimum, but if you can manage longer, do it!
Chocolate Chip Choices: Use good-quality chocolate! I love a mix of semi-sweet and dark chocolate chips for depth. You can also chop up a good chocolate bar for chunks, which melt into gorgeous puddles. Don’t be afraid to add more than the recipe calls for if you’re a true chocolate lover! I’ve even added a tablespoon of unsweetened cocoa powder to the dry ingredients for a double chocolate version, which is also amazing.
Baking Nuances: Keep an eye on your cookies! Ovens are notoriously different. I usually pull mine out when the edges are set and golden, but the centers still look a bit soft. They’ll firm up on the hot baking sheet and then on the cooling rack. If your cookies tend to spread too much, try chilling the dough longer or even chilling the scooped balls for 15-20 minutes before baking.
Salt Sprinkle: That sprinkle of flaky sea salt on top is a game-changer. It balances the sweetness and makes all the chocolate flavors pop. Maldon sea salt is my favorite for this.
Storing and Reheating Tips
Proper storage is key to keeping these delicious chocolate chip cookies tasting fresh and amazing. Once they’re completely cooled, here’s what I do:
Room Temperature: These cookies are best stored in an airtight container at room temperature for about 3-4 days. You can layer them between sheets of parchment paper to prevent them from sticking together, especially if they have a lot of melty chocolate. Don’t seal them while they’re still even slightly warm, as this can create condensation and make them soggy. If they start to feel a little dry after a couple of days, you can pop one in the microwave for about 10-15 seconds to revive that gooey center.
Refrigerator Storage: While I generally prefer them at room temperature, if your kitchen is particularly warm, you can store them in the refrigerator for up to a week. Make sure they are in an airtight container. They’ll be firmer straight from the fridge, so you might want to let them sit out for 15-20 minutes before enjoying, or give them a quick zap in the microwave. The texture will be a bit chewier from the fridge.
Freezer Instructions: These cookies freeze beautifully, which is perfect for having a stash ready for any craving! You can freeze the baked cookies or even the unbaked dough balls. For baked cookies, wrap them tightly in plastic wrap, then place them in a freezer-safe bag or container for up to 3 months. Thaw them at room temperature. For unbaked dough balls, place them on a parchment-lined baking sheet and freeze until solid, then transfer them to a freezer bag. You can bake them directly from frozen, just add a few extra minutes to the baking time.
Glaze Timing Advice: If you decide to add any kind of glaze or topping, I recommend doing it just before serving for baked cookies. For storage, it’s best to keep them plain and add any finishing touches when you’re ready to eat them. Most glazes don’t hold up well to long-term storage, especially if they’re soft.
Frequently Asked Questions
Final Thoughts
Honestly, if you’ve been searching for that perfect, go-to chocolate chip cookie recipe, I truly believe this is it. It’s the kind of recipe that brings comfort, joy, and deliciousness into your kitchen. It’s simple enough for a weeknight craving but special enough for guests. The smell alone as they bake is enough to make anyone feel good. I hope you’ll give them a try and love them as much as my family and I do. If you’re a fan of this recipe, you might also enjoy my classic chewy brownie recipe or my soft-baked oatmeal raisin cookies – they share that same homemade, comforting feel. Let me know in the comments below how your cookies turned out, or if you have any special variations you love! Happy baking, and enjoy every single bite!
Classic Chocolate Chip Cookies
Ingredients
Cookie Dough
- 0.75 cup unsalted butter softened
- 0.5 cup granulated sugar
- 0.5 cup packed brown sugar
- 2 large eggs
- 1 teaspoon vanilla extract
- 2.5 cups all-purpose flour
- 1 teaspoon baking soda
- 0.5 teaspoon salt
- 2 cups semi-sweet chocolate chips
Instructions
Baking Instructions
- Preheat oven to 375°F (190°C). Line baking sheets with parchment paper.
- In a large bowl, cream together the softened butter, granulated sugar, and brown sugar until light and fluffy.0.75 cup unsalted butter
- Beat in the eggs one at a time, then stir in the vanilla extract.0.75 cup unsalted butter
- In a separate bowl, whisk together the flour, baking soda, and salt.0.75 cup unsalted butter
- Gradually add the dry ingredients to the wet ingredients, mixing until just combined.0.75 cup unsalted butter
- Stir in the chocolate chips.0.75 cup unsalted butter
- Drop rounded tablespoons of dough onto the prepared baking sheets.
- Bake for 8-10 minutes, or until the edges are golden brown and the centers are still slightly soft.
- Let the cookies cool on the baking sheets for a few minutes before transferring them to a wire rack to cool completely.