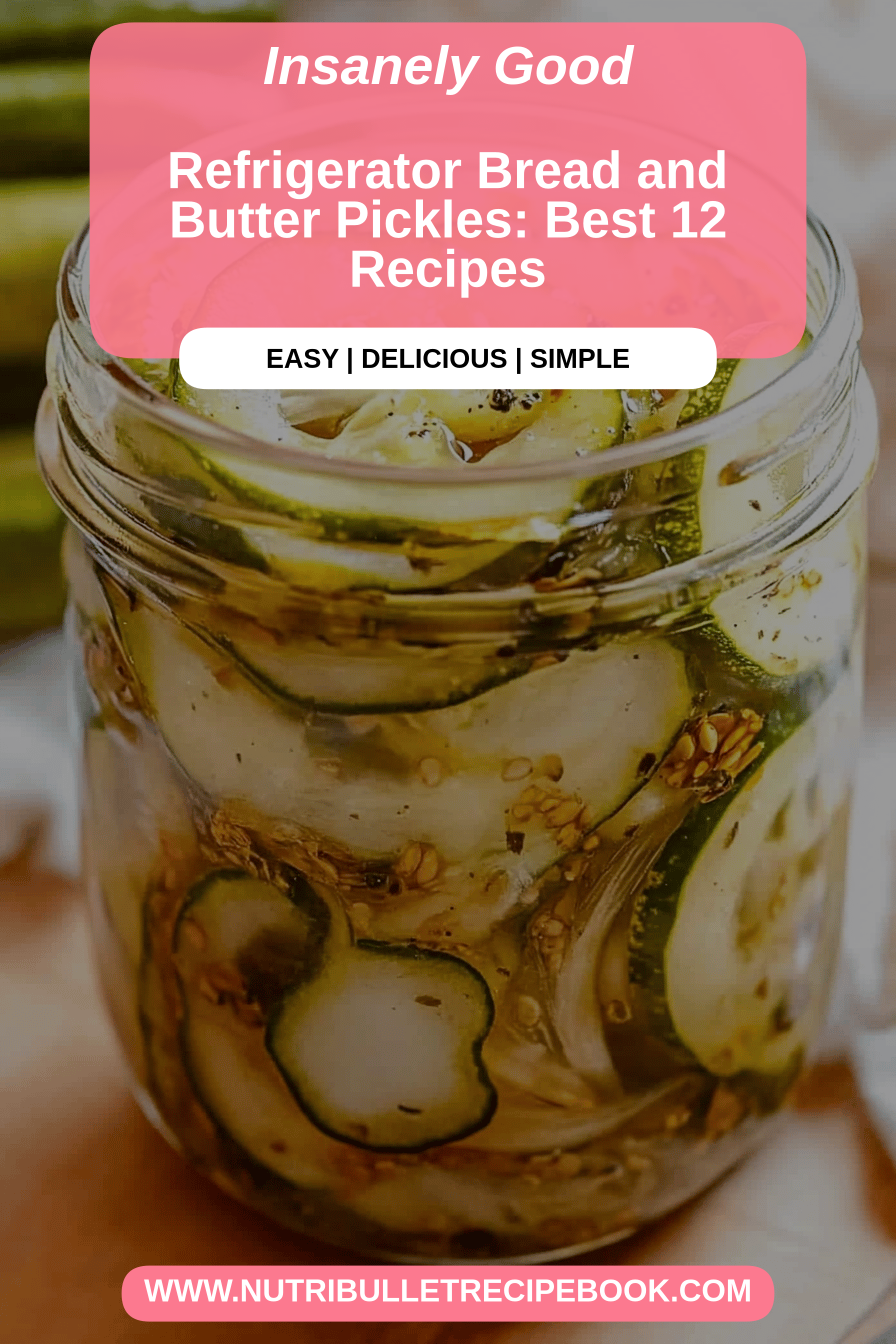
You know those moments when a craving hits, something tangy, sweet, and just perfectly crunchy? For me, that craving almost always leads me straight to my pantry, not for a bag of chips, but for a jar of homemade bread and butter pickles. There’s something magical about slicing into a cucumber and transforming it into this vibrant, flavor-packed treat. Forget those store-bought versions that taste… well, a little sad. My grandma’s recipe for bread and butter pickles is pure sunshine in a jar. It’s the kind of recipe that smells like summer days and tastes like pure comfort. I remember helping her make these as a little kid, standing on a stool, mesmerized by the colorful slices mingling in the brine. It’s so much more than just a pickle; it’s a memory, a tradition, and honestly, it’s ridiculously easy to make. If you’ve ever thought making pickles was too complicated, you’re in for a delightful surprise!
What are bread and butter pickles?
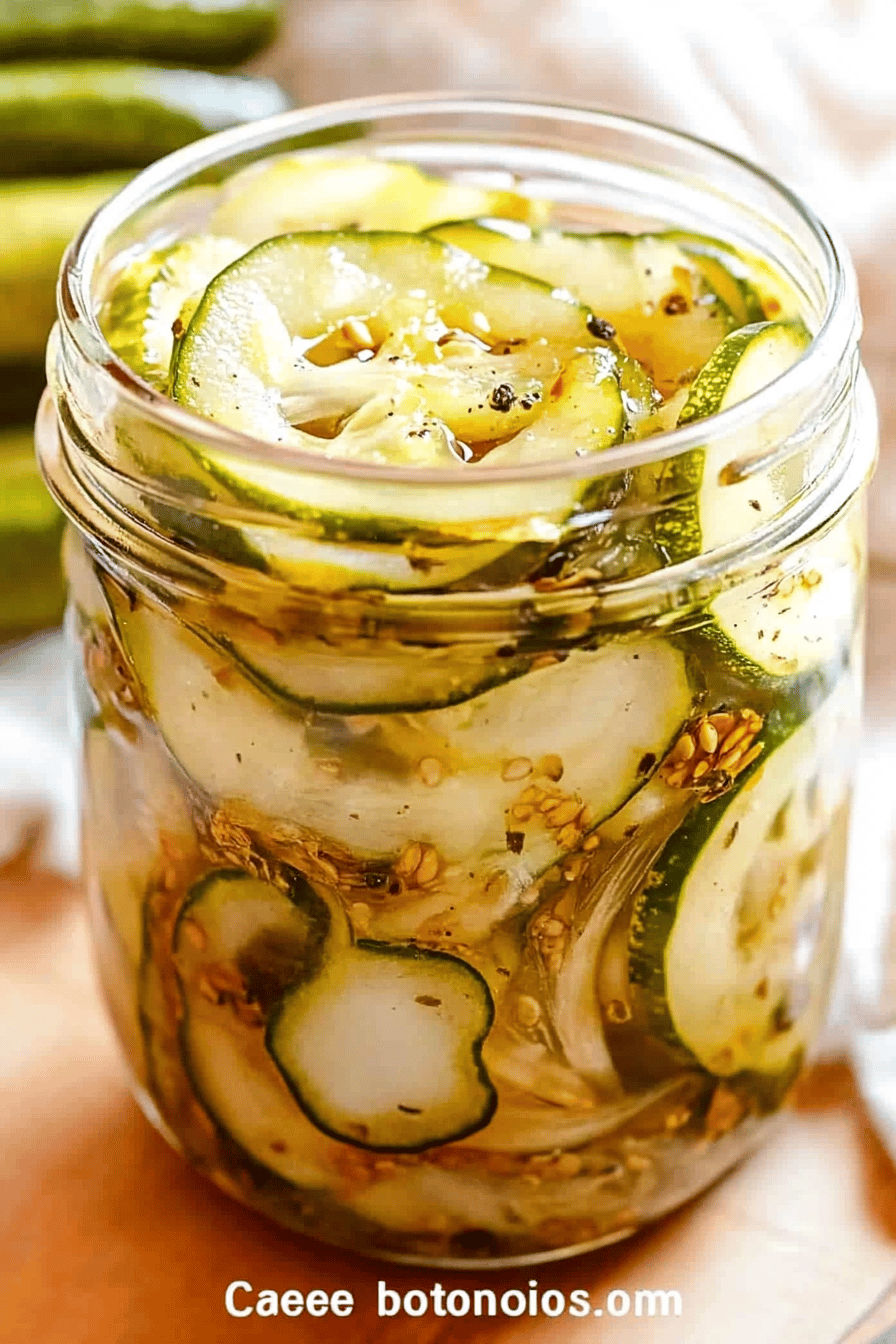
So, what exactly are these delightful little things? Think of bread and butter pickles as the sweet and tangy cousins in the pickle family. They get their name from the classic sandwich combination, and honestly, they’re just as versatile! Unlike dill pickles, which are brined with dill and garlic for a savory punch, bread and butter pickles take a detour towards sweetness. The signature flavor comes from a combination of sugar, vinegar, and spices like mustard seed, celery seed, and sometimes a pinch of turmeric for that beautiful golden hue. It’s essentially a sweet pickle relish, but in sliced form, giving you that satisfying crunch with every bite. They’re not intensely sour, nor are they overwhelmingly sweet; it’s this perfect balance that makes them so addictive. It’s that happy medium that appeals to almost everyone, kids included!
Why you’ll love this recipe?
Let me tell you, there are so many reasons why this bread and butter pickle recipe has become my absolute go-to. First off, the flavor profile is just out of this world. That perfect balance of sweet, tangy, and subtly spiced is something you just can’t find in a jar from the grocery store. It’s bright, it’s fresh, and it makes anything it accompanies taste a million times better. Secondly, and this is a big one for me, it’s incredibly simple. I mean, truly, ridiculously easy. You don’t need any fancy equipment or complicated techniques. It’s the kind of recipe that makes you feel like a kitchen wizard without breaking a sweat. Plus, it’s so budget-friendly! Cucumbers are usually pretty affordable, and the rest of the ingredients are pantry staples. You get so much bang for your buck. What I love most about this is its versatility. I don’t just slap these on a ham sandwich (though they are divine on one!). I toss them into Potato Salad, chop them up for tuna salad, serve them alongside grilled meats, or even just eat them straight from the jar when no one’s looking! It’s a far cry from the often one-note flavor of some other recipes, and the freshness you get from making them yourself is unbeatable. This is my secret weapon for elevating everyday meals.
How do I make bread and butter pickles?
Quick Overview
Making these pickles is a two-day affair, but don’t let that scare you! The actual hands-on time is minimal. You’ll basically slice your cucumbers, let them sit with salt to draw out moisture, rinse them, and then simmer them in a sweet and tangy vinegar brine with gorgeous spices. That’s it! It’s a gentle process that ensures the cucumbers retain a delightful crispness while soaking up all that amazing flavor. It’s this hands-off brining and simmering that truly makes them special and ensures they’re not mushy. Trust me, the minimal effort is so worth the incredible result.
Ingredients
For the Pickles:
3 pounds pickling cucumbers (about 6-8 medium-sized cucumbers)
1/4 cup kosher salt, plus more for brining
1 large yellow onion, thinly sliced
2 tablespoons pickling spice blend (or make your own: mustard seeds, celery seeds, peppercorns, coriander seeds, red pepper flakes)
1 teaspoon ground turmeric (for color and a hint of earthiness)
1/2 teaspoon ground ginger (optional, but adds a lovely warmth)
For the Brine:
2 cups granulated sugar
2 cups apple cider vinegar (or white vinegar for a sharper bite)
1 cup water
Step-by-Step Instructions
Step 1: Prepare the Cucumbers
Wash your cucumbers thoroughly. You can peel them if you prefer a smoother texture, but I honestly love the little bit of texture the skin adds, so I usually leave it on. Slice them thinly, about 1/8 inch thick. A mandoline slicer is your best friend here for uniform slices, but a sharp knife works too! In a large bowl, toss the cucumber slices with 1/4 cup kosher salt. This step is crucial for drawing out excess water, which prevents soggy pickles. Cover the bowl and let them sit for about 2 hours at room temperature. You’ll see a good amount of liquid drawn out.
Step 2: Rinse and Drain
After 2 hours, drain the cucumbers in a colander. Rinse them really well under cold running water to remove all the salt. This is important so your pickles aren’t too salty! Gently squeeze out as much excess water as you can. You can press them lightly with your hands or use the colander to help. Pat them dry with paper towels.
Step 3: Prepare the Onion and Spices
While the cucumbers are salting, thinly slice your yellow onion. If you’re using a pickling spice blend, measure it out. If you’re making your own, combine your seeds and spices in a small bowl. I often add a tiny bit of ground ginger for a subtle warmth that really complements the sweetness. It’s a little trick I picked up from my mom!
Step 4: Make the Brine
In a large non-reactive pot (stainless steel or enamel is perfect, avoid aluminum), combine the granulated sugar, apple cider vinegar, and water. Stir to dissolve the sugar. Place the pot over medium heat and bring it to a gentle simmer, stirring occasionally. You want the sugar to be completely dissolved.
Step 5: Combine and Simmer
Add the drained and rinsed cucumber slices and the sliced onion to the pot with the brine. Add your pickling spices, turmeric, and ginger (if using). Stir gently to combine everything. Bring the mixture back to a simmer, then reduce the heat to low. Let it simmer uncovered for about 10-15 minutes, stirring occasionally. The cucumbers should become tender but still have a slight crispness. Don’t overcook them, or they’ll get mushy!
Step 6: Jar and Cool
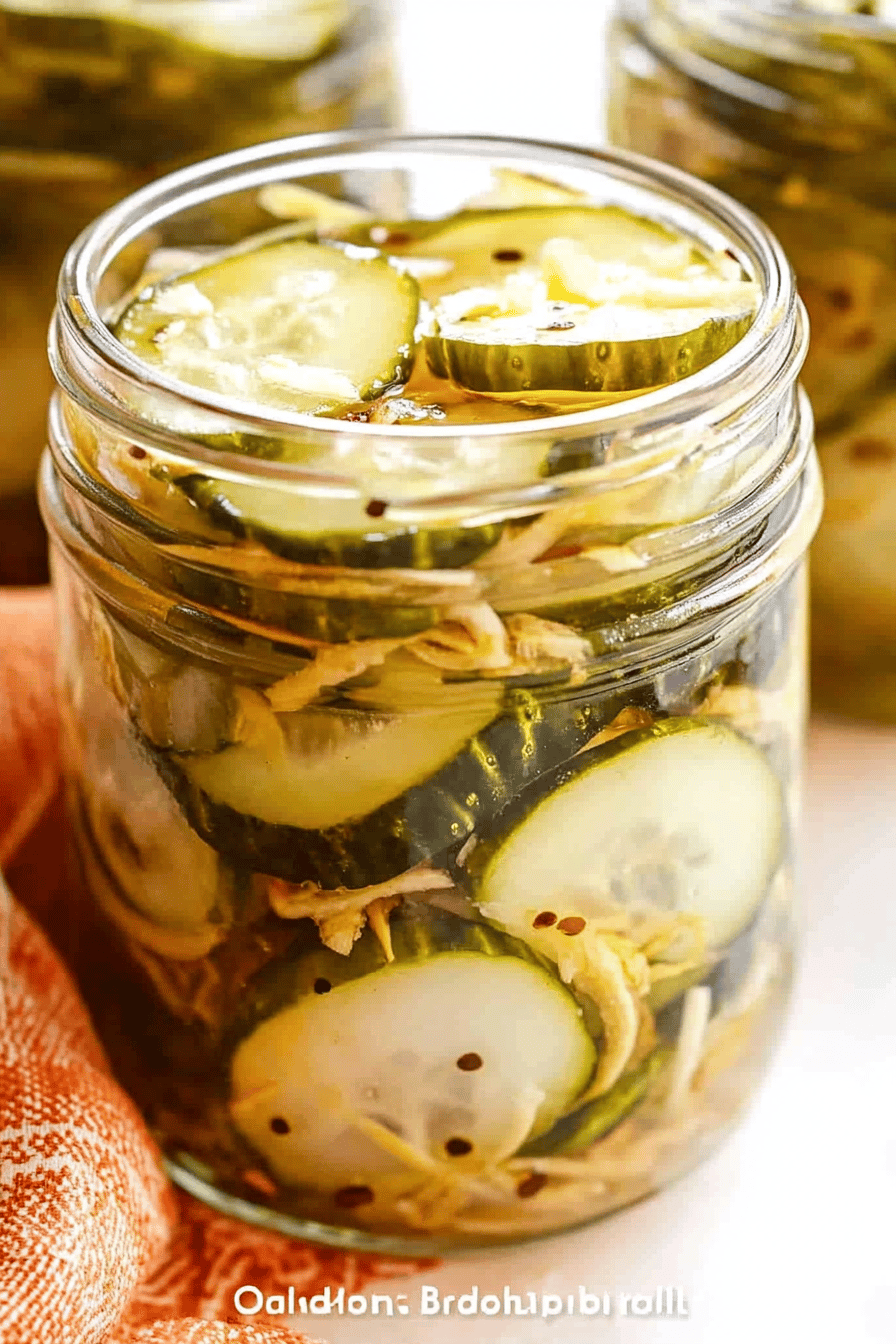
Carefully ladle the hot pickles and brine into clean jars. Leave about 1/2 inch of headspace at the top. Make sure each jar gets a good mix of cucumbers and onions. Wipe the rims of the jars clean with a damp cloth, then secure the lids tightly.
Step 7: Chill and Mellow
Let the jars cool on the counter for an hour or two, then transfer them to the refrigerator. The flavors really meld and deepen as they chill. It’s best to let them sit for at least 24 hours before digging in, but honestly, the wait is tough! They’re usually best after a few days.
What to Serve It With
Oh, the possibilities! Bread and butter pickles are surprisingly versatile. For breakfast, they’re a delightful little zing alongside scrambled eggs or a breakfast burrito. Just a few slices can cut through the richness beautifully. For brunch, I love them as part of a charcuterie board or alongside some savory quiche. They offer a refreshing counterpoint to richer dishes. As a dessert? I know, it sounds odd, but hear me out! They’re fantastic with sharp cheeses like cheddar or gouda, served after a meal. The sweet and tangy notes are a sophisticated end to a dinner. And for cozy snacks? This is where they truly shine for me. They are an absolute game-changer piled high on a classic ham and cheese sandwich. They also make burgers and hot dogs sing! I often serve them alongside pulled pork or Fried Chicken. My kids go crazy for them on mini sliders, and honestly, I sometimes just grab a fork and raid the jar while I’m standing at the counter. It’s that addictive!
Top Tips for Perfecting Your Bread and Butter Pickles
I’ve made these pickles more times than I can count, and I’ve picked up a few tricks along the way that I think make all the difference. First, when prepping your cucumbers, don’t skip the salting and rinsing step. It’s the absolute key to avoiding watery, mushy pickles. I learned that the hard way early on! Make sure you’re using pickling cucumbers; they have a firmer texture and fewer seeds. For the onions, slicing them thinly is important so they soften nicely in the brine. If you’re not a fan of oniony pickles, you can reduce the amount or omit them entirely, though they do add a lovely depth. When it comes to the spices, don’t be afraid to play around. My grandma always used a specific blend, but I’ve found that adding a pinch of red pepper flakes gives them a tiny kick that I really enjoy. Also, ensure your pot is non-reactive. Aluminum pots can react with the vinegar and give your pickles an off-flavor or a metallic taste. I learned that one after a batch tasted… weird!
For the brine, I prefer apple cider vinegar because it has a nice fruity tang, but white vinegar works just as well if you want a more classic sharp pickle flavor. Always dissolve the sugar completely before adding the cucumbers. If the sugar isn’t dissolved, it can lead to uneven flavoring. When simmering, keep an eye on the cucumbers. You want them to soften slightly but still retain a good crunch. Overcooking is the enemy of a good pickle! I usually aim for about 10-15 minutes of simmering. The time can vary depending on how thick you sliced your cucumbers. For jars, make sure they are clean and sterilized if you plan on long-term storage, though these tend to disappear so quickly in my house that I rarely worry about long-term canning. Wiping the rims clean before sealing is essential to ensure a good seal. And the hardest part? Waiting. Seriously, the longer they sit in the fridge, the better they get. The flavors really marry and deepen beautifully. Give them at least 24 hours, but a few days is even better. If you find they’re not sweet enough for your taste after a few days, you can always stir in a little more sugar directly into the jar, but I find the 2-cup ratio is usually spot on.
Storing and Reheating Tips
Storing these homemade bread and butter pickles is pretty straightforward, but there are a few things to keep in mind to ensure they stay delicious. Once they’re completely cooled, they should go straight into the refrigerator. They’ll last for a good 2-3 weeks this way, sometimes even longer if they’re made with clean jars and handled properly. I like to use glass jars with tight-fitting lids for storage. This helps maintain their freshness and prevents them from picking up any weird smells from other things in the fridge. Don’t leave them out at room temperature for extended periods, as this can affect their texture and safety, especially with the sugar and vinegar brine.
I honestly don’t have much experience with freezing these because they never last long enough! But if you were going to try, I’d suggest ensuring they are very well drained and sealed in airtight freezer bags or containers, perhaps without the brine if you’re worried about texture changes upon thawing. They might lose a bit of their crispness after freezing and thawing, so they’d be best used in applications where texture is less critical, like chopped into salads or relishes. When it comes to serving, they’re best served cold or at room temperature. There’s no need to reheat them; in fact, reheating would likely make them lose that lovely crispness. If they seem a little too stiff or tightly packed in the jar, just give them a good stir before serving. The glaze (which is essentially the brine they’re packed in) is packed with flavor, so make sure to scoop some of that up with your pickles!
Frequently Asked Questions
Final Thoughts
There you have it – my absolute favorite recipe for bread and butter pickles! I genuinely hope you give this a try. It’s one of those recipes that’s so rewarding because it tastes so much better than anything you can buy. The process is simple, the ingredients are readily available, and the result is just pure deliciousness. Whether you’re a seasoned pickle-maker or a complete newbie, I promise you can do this. Think of the satisfaction of pulling out a jar of your own homemade pickles for your next barbecue or just for a late-night snack. It’s a little bit of culinary magic that I think everyone should have in their repertoire. If you love this, you might also enjoy my quick refrigerator dill pickles or my spicy garlic dill pickles for more pickling adventures! I can’t wait to hear how yours turn out, so please, leave a comment below and tell me all about it, or share your favorite ways to enjoy these tangy-sweet gems!
Bread and Butter Pickles
Ingredients
Main Ingredients
- 2.5 pounds cucumbers thinly sliced
- 2 large onions thinly sliced
- 0.5 cup salt
- 2 cups white vinegar 5% acidity
- 1.5 cups granulated sugar
- 1 tablespoon celery seed
- 1 teaspoon mustard seed
- 0.5 teaspoon turmeric
Instructions
Preparation Steps
- Wash cucumbers and onions. Slice cucumbers thinly and slice onions thinly. Combine sliced cucumbers and onions in a large bowl. Sprinkle with salt and toss to coat. Let stand for 2-3 hours at room temperature, stirring occasionally. Drain thoroughly and rinse well.
- In a large pot, combine vinegar, sugar, celery seed, mustard seed, and turmeric. Bring to a boil over medium-high heat, stirring until sugar is dissolved. Reduce heat and simmer for 5 minutes.
- Add the drained cucumbers and onions to the pot with the brine. Return to a boil, then reduce heat and simmer for 10 minutes, stirring occasionally.
- Carefully ladle the hot pickles and brine into clean jars, leaving about 0.5 inch headspace. Seal the jars tightly.
- Allow pickles to cool to room temperature, then refrigerate for at least 24 hours before serving. Pickles will keep in the refrigerator for up to a month.