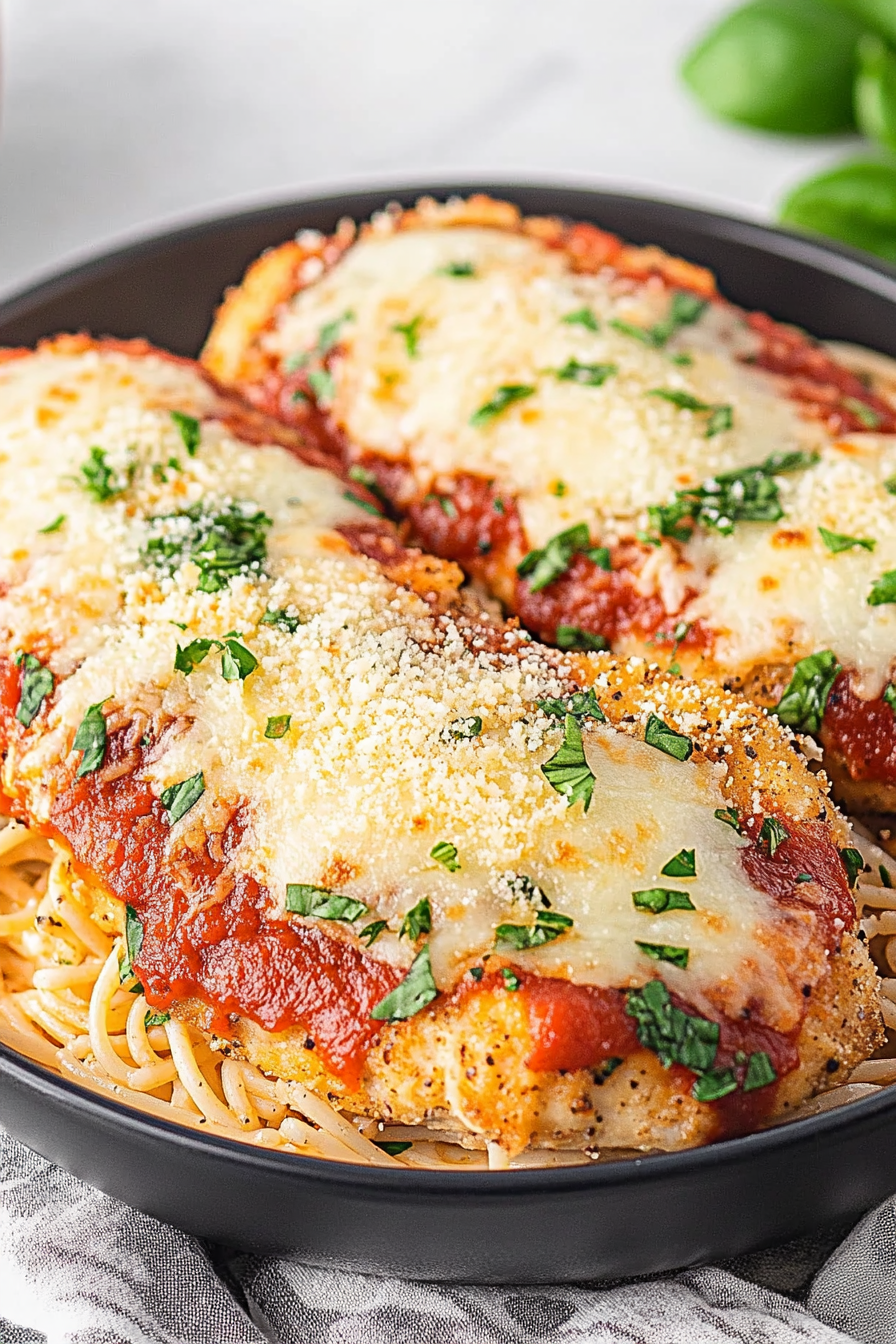
Some meals feel like a hug on a plate, you know? And for me, when that craving hits for something comforting, cheeAir Fryer chicken parmesan.. Forget the takeout menus or the hours spent in the kitchen. This recipe is my absolute go-to for when I want that classic Italian restaurant experience without any of the fuss. Honestly, I used to think making perfect chicken parm was a weekend-only kind of deal, requiring multiple pans and a whole lot of attention. But then I discovered the magic of the air fryer, and my weeknights have been SO much better. It’s the kind of dish that makes even the pickiest eaters at my table ask for seconds, and that, my friends, is pure gold in my book!
What is air fry chicken parmesan?
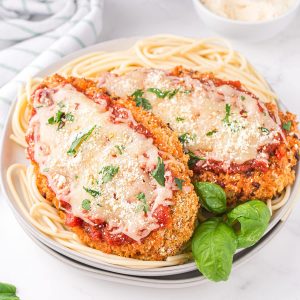
So, what exactly are we talking about when we say Air Fryer Chicken parmesan? Think of it as the classic, beloved dish you know and adore, but reimagined for your modern kitchen. We’re talking about tender, juicy chicken cutlets, coated in a crispy, golden-brown breading, smothered in a rich marinara sauce, and topped with gooey, melted mozzarella cheese. The “air fryer” part is where the real game-changer happens. Instead of deep-frying or baking for ages, the air fryer circulates hot air around the chicken, creating an incredible crunch and perfect cooking without all the excess oil. It’s essentially a shortcut to deliciousness, capturing all the authentic flavors and textures we love, but in a fraction of the time and with much less mess. It’s Italian comfort food, made super accessible.
Why you’ll love this recipe?
Oh, where do I even begin with why this Air Fryer Chicken parmesan is about to become your new favorite? Let’s break it down:
First off, the flavor is just out of this world. That crispy coating on the chicken? It’s perfection. It holds up beautifully to the marinara and cheese, offering a satisfying crunch with every single bite. And speaking of the chicken, it stays incredibly moist and tender inside. No dry, sad chicken here, I promise! The marinara sauce, when it simmers just right, adds that essential tangy sweetness, and of course, the melted mozzarella is that gooey, cheesy goodness we all dream about. It truly tastes like it came from a fancy Italian place!
Then there’s the simplicity. Seriously, this recipe is a lifesaver on busy nights. The Air Fryer does most of the heavy lifting. You prep the chicken, give it a quick dip in the coatings, and then the air fryer works its magic. It’s so much quicker than traditional methods, and cleanup is an absolute breeze compared to dealing with a greasy stovetop or a messy oven. I can whip this up even when I’m feeling exhausted after a long day.
And let’s talk cost-efficiency. Chicken cutlets are generally pretty budget-friendly, and the pantry staples like breadcrumbs, eggs, and marinara sauce are things most of us already have on hand. Compared to ordering takeout or even buying a pre-made frozen version, this homemade option is significantly kinder to your wallet, and you get such superior quality and taste.
The versatility is another huge plus. While it’s fantastic served with pasta (hello, spaghetti night!), you can also totally switch things up. Serve it over a big salad for a lighter meal, tuck it into a sub roll for an epic chicken parm sandwich, or even serve it alongside roasted vegetables for a complete, hearty dinner. It’s adaptable to whatever you’re in the mood for or whatever you have in your fridge. I’ve even made mini versions for appetizers! It really stands out because it delivers that “wow” factor without demanding hours of your time, making it a true weeknight warrior.
How to Make Air Fryer Chicken Parmesan
Quick Overview
This recipe is all about achieving that classic chicken parmesan flavor and texture with the speed and ease of your air fryer. We’ll bread tender chicken cutlets until they’re wonderfully crisp, then briefly cook them in the air fryer. Finally, we’ll top them with marinara and cheese and give them a quick melt in the air fryer or under the broiler. It’s a straightforward process that delivers maximum deliciousness with minimal effort, perfect for busy home cooks who want restaurant-quality results.
Ingredients
For the Chicken & Breading:
Two boneless, skinless chicken breasts (about 1 to 1.5 pounds total): I always look for ones that are relatively uniform in thickness. If they’re super thick, you can pound them a little thinner for more even cooking. It’s worth the extra minute!
1 cup all-purpose flour: This is our first layer, giving the egg something to cling to.
2 large eggs: Whisked well. This is the glue that holds everything together.
1.5 cups Panko breadcrumbs: Don’t skimp here! Panko gives you that superior crunch that regular breadcrumbs just can’t match. I often mix in a tablespoon or two of grated Parmesan cheese into these breadcrumbs for an extra layer of savory flavor.
1 teaspoon salt: Essential for bringing out all the flavors.
1/2 teaspoon black pepper: Freshly ground is always best!
1/2 teaspoon garlic powder: For that subtle garlic kick in the breading.
1/2 teaspoon dried oregano: Adds that classic Italian herb note.
For Topping:
1.5 cups marinara sauce: Use your favorite store-bought sauce or, even better, a homemade batch! I love one with a little bit of a chunky texture.
1 cup shredded mozzarella cheese: Low-moisture, part-skim mozzarella melts beautifully without getting watery. You can also use a mix of mozzarella and provolone for extra flavor.
1/4 cup grated Parmesan cheese: For sprinkling on top, adding another salty, nutty dimension.
Fresh basil leaves, for garnish (optional): Adds a pop of color and fresh aroma.
Step-by-Step Instructions
Step 1: Preheat & Prep Air Fryer
First things first, let’s get that air fryer warmed up. You want it to be nice and hot so your chicken gets that immediate crisp. Set your air fryer to 380°F (190°C). If your air fryer has a “preheat” setting, use that! If not, just let it run empty for about 5 minutes. While it’s heating, line your air fryer basket with parchment paper made for air fryers (the kind with holes, so air can circulate!) or a light coating of cooking spray. This prevents sticking and makes cleanup a dream.
Step 2: Mix Dry Ingredients
Grab three shallow dishes or plates. In the first dish, put your all-purpose flour. In the second dish, whisk your eggs until they’re nice and frothy. In the third dish, combine the Panko breadcrumbs, salt, black pepper, garlic powder, and dried oregano. Give it all a good stir with a fork to make sure those seasonings are evenly distributed throughout the breadcrumbs. This mix is going to give us that gorgeous, flavorful crust.
Step 3: Prepare Chicken Cutlets
Now for the chicken. If your chicken breasts are on the thicker side, I like to slice them horizontally to create thinner cutlets. If they’re still a bit uneven, place each cutlet between two pieces of plastic wrap and gently pound them with a meat mallet or the bottom of a heavy pan until they’re about ½ inch thick. This ensures they cook evenly and quickly. Pat the chicken dry with paper towels – this helps the breading stick better.
Step 4: Bread the Chicken
This is the fun part! Working with one cutlet at a time, dredge it in the flour, shaking off any excess. Then, dip it into the whisked eggs, letting any excess drip back into the bowl. Finally, press the chicken firmly into the Panko breadcrumb mixture, making sure it’s fully coated on all sides. Don’t be shy; really get those crumbs to stick! Place the breaded cutlets on a clean plate or baking sheet as you work, and try not to stack them if you can help it.
Step 5: Air Fry the Chicken
Carefully arrange the breaded chicken cutlets in a single layer in your preheated air fryer basket. You don’t want to overcrowd the basket, or the chicken won’t get crispy; it will steam instead. Cook in batches if necessary. Air fry for about 8-10 minutes, flipping the cutlets halfway through, until they are golden brown and cooked through. The internal temperature should reach 165°F (74°C). I always do a quick check with a thermometer just to be sure!
Step 6: Add Toppings
Once the chicken is cooked and golden, carefully remove it from the air fryer basket and place it back onto your plate or baking sheet. Spoon a generous amount of marinara sauce over each chicken cutlet, then sprinkle evenly with the shredded mozzarella and grated Parmesan cheese. Make sure you get a good amount of sauce and cheese on there – it’s the best part!
Step 7: Melt the Cheese
Now, you have a couple of options for melting the cheese. You can carefully place the sauced and cheesed chicken back into the air fryer basket at 350°F (175°C) for another 2-3 minutes, just until the cheese is melted and bubbly. OR, if you have other things cooking or want to get them on plates faster, you can pop them under a preheated broiler for a minute or two until the cheese is perfectly melted and slightly golden. Keep a close eye on it to prevent burning!
Step 8: Garnish and Serve
Once the cheese is beautifully melted and gooey, carefully remove the chicken from the air fryer or baking sheet. Garnish with fresh basil leaves if you’re using them. This is my favorite part – seeing that beautiful, golden chicken topped with bubbling cheese and fresh herbs. It just looks so inviting!
Step 9: Slice and Enjoy
Let the chicken rest for just a minute or two before slicing and serving. This helps the juices redistribute, making it even more tender. Serve your glorious air fryer chicken parmesan immediately. The warmth, the textures, the flavors – it’s pure magic. Trust me, this is going to be a hit!
What to Serve It With
This air fryer chicken parmesan is so versatile, it’s practically a meal on its own, but let’s talk about some of my favorite ways to round out the meal. When I’m serving this for a weeknight dinner, it’s almost always with a big bowl of spaghetti tossed with a little extra marinara sauce. The sauce from the chicken kind of makes its own sauce for the pasta, which is just divine. A simple side salad with a light vinaigrette is also a must for me; it adds a lovely freshness and cuts through the richness of the chicken parm.
For a more casual, fun meal, I love turning this into a sandwich! I’ll toast up some crusty Italian rolls, place a piece of the chicken parm inside, maybe add a little extra sauce and cheese, and wrap it in foil to steam a bit. It’s honestly better than most deli sandwiches. For a lighter option, I’ll serve it over a bed of zucchini noodles or even a big pile of sautéed spinach. My kids actually love it served with some roasted sweet potato fries – they love the combo of savory and sweet!
And if you’re feeling fancy or hosting guests, this pairs wonderfully with some garlic bread (obviously!) and a side of roasted broccoli or asparagus. It feels like a special occasion meal, but it’s so easy to pull off thanks to the air fryer. It’s a true crowd-pleaser, and I always get rave reviews when I serve it this way. It just makes everyone happy!
Top Tips for Perfecting Your Air Fryer Chicken Parmesan
Over the years, I’ve learned a few little tricks that take this air fryer chicken parmesan from good to absolutely phenomenal. These are the things I always do now because they make such a difference.
For the chicken itself, make sure you pound those cutlets to an even thickness. This is SO important for ensuring they cook through without the outside getting burnt. I usually aim for about half an inch. If you have very thick breasts, slicing them horizontally is key. And don’t skip patting them dry! Moisture is the enemy of crispiness.
When you’re breading, don’t be afraid to really press those Panko crumbs onto the chicken. This is what gives you that amazing crunch. I also like to add a bit of grated Parmesan cheese right into the Panko mix. It adds this extra layer of salty, nutty flavor that is just irresistible. And for the eggs, give them a really good whisk! It helps create a better coating.
For the air frying step, the most crucial tip is not to overcrowd the basket. I know it’s tempting to try and cram it all in, but trust me, it’s worth cooking in batches. You need that hot air to circulate around each piece of chicken to get it truly crispy. If you stack them or pack them too tightly, you’ll end up with soggy chicken, and nobody wants that. Also, give them a good flip halfway through to ensure even browning on both sides.
When it comes to the marinara sauce, use a good quality one. If yours is a little thin, you can simmer it down for a few minutes to thicken it up before spooning it over the chicken. And when you add the cheese, don’t go too crazy with the sauce before the cheese, or it can make the breading underneath a bit soggy. A good, generous spoon of sauce, then a good pile of cheese is the way to go. You can also add a pinch of red pepper flakes to your marinara if you like a little heat!
Finally, for melting the cheese, I love using the air fryer for a final blast at a slightly lower temp (around 350°F). It gives the cheese that perfect melt without overcooking the chicken. Just a few minutes are all you need. If you don’t have time for that, the broiler works in a pinch, but watch it like a hawk! These little adjustments have made all the difference for me, and I hope they help you make the most delicious air fryer chicken parmesan too.
Storing and Reheating Tips
Okay, so if you’re lucky enough to have any leftovers (which, let’s be honest, doesn’t happen often in my house!), storing and reheating this air fryer chicken parmesan is super simple. First, let it cool down completely before you try to store it. Trying to put hot food into an airtight container is a recipe for condensation, which we want to avoid if we’re aiming for crispiness.
For refrigerator storage, I recommend storing the chicken parm in an airtight container. You can place a piece of parchment paper between layers if you’re stacking them to prevent sticking. It will stay good in the fridge for about 3-4 days. The breading will soften up a bit, which is natural, but it’s still incredibly tasty!
If you need to freeze it, that’s totally doable too! Wrap individual pieces of the cooked chicken parmesan tightly in plastic wrap, then place them in a freezer-safe bag or container. It should keep well in the freezer for about 1-2 months. When you’re ready to reheat from frozen, it’s best to let it thaw in the refrigerator overnight first, or you can try reheating it directly from frozen in the air fryer or oven, but it will take longer.
Reheating is where we can bring back some of that glorious crispiness. The best method is usually the air fryer or a conventional oven. Pop the leftovers into your air fryer at around 350°F (175°C) for about 5-8 minutes, or until heated through and the breading has regained some of its crispness. In a conventional oven, preheat to 375°F (190°C) and bake for about 10-15 minutes, on a baking sheet. Microwaving is an option for a quick reheat, but it will definitely make the breading softer. I usually reserve that for when I’m really in a pinch!
Now, a word on the glaze. If you’ve stored the chicken with the sauce and cheese already on, that’s fine. But if you’re planning on freezing it, I’d recommend storing the chicken un-sauced and un-cheesed, and then adding fresh sauce and cheese once it’s reheated. This will give you the best texture. Just reheat the breaded chicken as described above, then top with warm marinara and cheese and melt it under the broiler or in the air fryer for a few minutes. It’s a little extra step, but totally worth it for that near-fresh experience!
Frequently Asked Questions
Final Thoughts
So there you have it – my absolute favorite way to make air fryer chicken parmesan! I truly believe this recipe is a game-changer. It delivers all those incredible flavors and textures we crave from this Italian classic, but in a way that’s so much more manageable for busy weeknights. The crunch of the breading, the tender chicken, the rich marinara, and that bubbly, melted cheese – it’s pure comfort and joy in every bite. It’s the kind of meal that makes you feel good about what you’re serving your family, and it’s so rewarding to see everyone’s happy faces around the table.
If you love this recipe, you might also enjoy my Crispy Baked Zucchini Fries for a delicious side dish, or my Sheet Pan Sausage and Peppers for another easy weeknight wonder. There are so many ways to bring delicious Italian-inspired flavors into your home without spending hours in the kitchen!
I can’t wait for you to try this air fryer chicken parmesan. Please, if you do make it, come back and leave a comment below to let me know how it turned out! I love hearing your feedback, seeing your photos, and learning about any little twists you might have added. Happy cooking, and enjoy every single cheesy, crispy bite!
Air Fryer Chicken Parmesan
Ingredients
Main Ingredients
- 24 ounce chicken cutlets (or well-pounded chicken breasts)
- 0.33 cup all-purpose flour
- 2 large eggs (whisked)
- 0.33 cup Panko bread crumbs
- 0.33 cup Italian bread crumbs
- 1.5 cup mozzarella cheese (shredded and divided)
- 0.75 cup tomato sauce or spaghetti sauce
- Optional garnishes: Chopped parsley, chopped basil, grated parmesan, red pepper flakes
- Olive oil or canola oil cooking spray
- pasta (optional)
Instructions
Preparation Steps
- Remove any fat and pound the chicken to an even thickness if needed. TIP: You will want to use thin cutlets for this recipe. They cook the best and most evenly. If you are using regular chicken breast, be sure to pound them thin and even. (this may affect your cooking time)
- Pat the chicken dry and lay on a plate. Salt and pepper the chicken pieces (Optional).
- Prepare the flour and egg by placing them separately in large, shallow bowls: put the flour in one and the egg in another.
- In another bowl mix together the panko bread crumbs and the bread crumbs.
- Preheat the air fryer at 380 degrees F. for 5 minutes.
- Coat each piece of chicken in flour, then dip in the egg mixture.
- Let the excess egg drip off each piece, then press each piece gently into the panko mixture, until fully coated. TIP: I like to flip it a few times and press the chicken into the mixture to make sure it is heavily coated in the panko and bread crumb mixture.
- Place the chicken pieces in a single layer in the air fryer basket. (Don’t crowd the pieces; fry in batches if necessary). Spray with a thin coat of olive oil or canola oil spray.
- Cook for about 7-8 minutes and flip and spray with cooking oil again. Cook for about another 7-8 minutes or until the chicken is cooked to 165 degrees. TIP: All air fryers cook very differently. You are looking for the chicken to be fully cooked with an internal temp of 165 degrees and the panko to be browned and crispy.
- Top each piece of chicken to the edges with spaghetti sauce.
- Sprinkle shredded mozzarella cheese on top of each piece of chicken.
- Put back in the air fryer and cook until the cheese is melted, 2 or 3 minutes.
- Garnish with fresh basil, parsley, grated parmesan, and additional red pepper flakes, optional. Best when served warm. Serve over pasta (optional)

