I still remember the first time I baked this red velvet cake—my kitchen filled with the scent of cocoa and a subtle tang of buttermilk wafting through the air. It’s funny how such a vibrant red and creamy texture can bring such joy to everyone around the table. To me, red velvet cake isn’t just a dessert; it’s a celebration of colors and flavors that somehow feels both fancy and down-home cozy at once. If you’re used to classic chocolate cakes, you’re in for a sweet surprise—this one’s got that tender crumb with just a hint of cocoa and a softness that makes you want to dive right in. Honestly, it’s become my go-to whenever I want to impress guests without sweating the details. My kids beg for it on birthdays, and I catch myself sneaking little slices in the quiet evenings. I swear, once you try this red velvet cake, it’ll be a staple you reach for like your favorite sweater—comforting, reliable, and full of warmth.
What is red velvet cake?
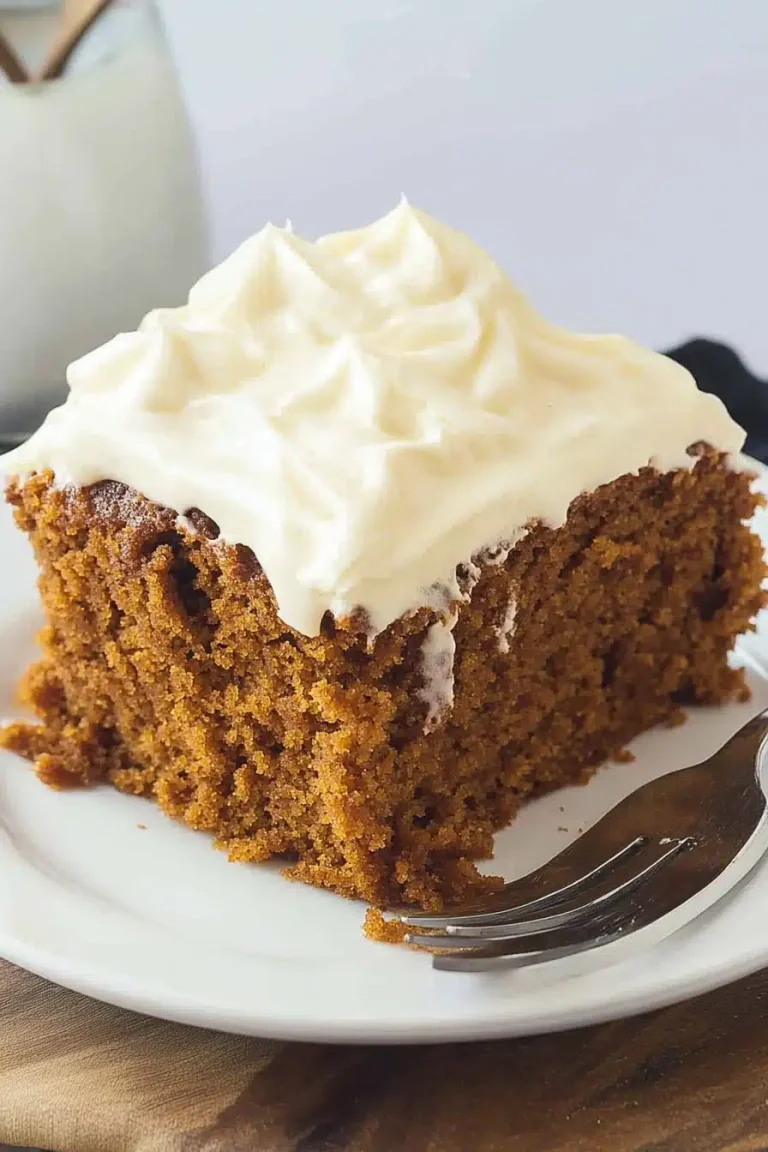
Think of red velvet cake as a charming twist on a traditional chocolate cake, but with its own unique personality. The “red velvet” name might sound fancy, but it’s essentially a mild cocoa cake with a beautifully soft, buttery texture. What really makes it stand out is the subtle tang from buttermilk and vinegar, which balances out the sweetness and makes the crumb almost melt in your mouth. That bold red color? It’s not just for show—it adds an eye-catching pop that somehow makes every slice feel like a special occasion. Traditionally, this cake is layered with rich cream cheese frosting, which complements that slight cocoa flavor perfectly. It’s the kind of cake you remember from special family gatherings or those moments when you wanted something a little extra. I love how approachable it feels, unlike some fancy cakes that seem intimidating to bake. Red velvet cake is friendly, festive, and honestly, one of the most satisfying treats you can share.
Why you’ll love this recipe?
What I love most about this red velvet cake is how it strikes the perfect balance between indulgence and simplicity. From the very first bite, you’ll notice its tender crumb and just the right hint of cocoa—not overpowering, but enough to keep your taste buds intrigued. The texture is buttery and moist, not dry or crumbly like some cakes can be. And the cream cheese frosting? Absolute magic. It’s tangy and sweet, with just enough richness to make each bite feel like a mini celebration.
Another thing that wins me over every time is how easy it is to pull together. You don’t need a fancy stand mixer or complicated ingredients—most of them you might already have in your pantry, which makes this a true “weeknight cake” or an “impromptu dessert” fixture around my house. I’ve made this cake countless times when friends drop in and it disappears in minutes—there’s something so universally comforting about it.
It’s also budget-friendly. No crazy imported ingredients or special substitutions needed. Just reliable staples like flour, cocoa powder, buttermilk, and eggs play starring roles here. The versatility is a huge plus, too—make it for birthdays, holidays, or just to brighten up a Monday night dinner. I even experimented once by swapping out a little buttermilk for almond milk, which made the texture even softer and added a subtle depth that my family couldn’t get enough of.
If you like chocolate cakes but want something with a gentle twist that feels special, this recipe is a keeper. And if you’re more of a vanilla or spice cake person, try pairing this with a hint of cinnamon in your frosting—it’s a game-changer.
How do I make a Red Velvet Cake?
Quick Overview
Making this red velvet cake is more straightforward than it looks. The trick lies in layering simple components carefully and not rushing through the mixing process. First, you’ll prep your pans and mix dry and wet ingredients separately, then combine them gently to keep the batter light. The red color comes alive during baking, and while it smells like chocolate heaven, the taste is lighter than a traditional chocolate cake. The swirl of cream cheese frosting takes this cake over the top by adding creamy tang and sweetness—trust me, it’s worth every second.
Ingredients
For the Main Batter:
- 2 ½ cups all-purpose flour – aim for fresh, high-quality flour to keep the crumb tender
- 1 ½ cups granulated sugar – balances the tang and cocoa just right
- 1 tsp baking soda – helps with leavening and texture
- 1 tsp fine salt – a pinch to bring out all the flavors
- 1 tbsp unsweetened cocoa powder – not too much, just enough for that signature hint
- 1 ½ cups buttermilk – the star for moisture and tang (if you don’t have it, mix milk with lemon juice to substitute)
- 1 ½ cups vegetable oil – keeps it moist without heaviness
- 2 large eggs – at room temp for better mixing
- 2 tbsp red food coloring – gel-based works best for a vibrant color without extra liquid
- 1 tsp pure vanilla extract – for warmth and depth
- 1 tsp white vinegar – reacts with baking soda to give that tender crumb
For the Filling:
- 8 oz cream cheese, softened – the tangy base
- ½ cup unsalted butter, softened – helps with smooth texture
- 1 ½ cups powdered sugar – sifted for silkiness
- 1 tsp vanilla extract – rounds out the creaminess
- Optional: a small pinch of salt to balance sweetness
For the Glaze (optional):
- ½ cup cream cheese, softened – lighter layer for glazing
- ¼ cup powdered sugar – adjust for consistency
- 1 tbsp heavy cream or milk – to thin as needed
- ½ tsp vanilla extract – for extra flavor
Step-by-Step Instructions
Step 1: Preheat & Prep Pan
Set your oven to 350°F (175°C) early so it can heat up while you prep. Grease two 9-inch round cake pans with butter or cooking spray, then lightly dust with flour or line them with parchment paper. I always do this on baking days because a well-prepped pan means a clean release and no crumbled edges—trust me, it saves a ton of grief during slicing.
Step 2: Mix Dry Ingredients
In a large bowl, sift together the flour, cocoa powder, baking soda, salt, and sugar. Sifting helps avoid lumps and ensures everything’s evenly distributed. I usually whisk it a bit more after sifting just to be sure. This base is what gives the cake that even rise and soft crumb.
Step 3: Mix Wet Ingredients
In another bowl, whisk the buttermilk, oil, eggs, vanilla, vinegar, and red food coloring until everything is homogenous. It’ll have this mesmerizing bright red shade that always makes me smile. If your kitchen is cold, let your eggs come to room temperature first; it helps the batter come together smoother.
Step 4: Combine
Pour the wet ingredients into the dry and gently fold together with a spatula or wooden spoon. The key here is to mix until just combined—no overworking! Overmixing can lead to a dense or tough cake, which you definitely want to avoid. The batter will look creamy and smooth at this stage, with that gorgeous red tone peeking through.
Step 5: Prepare Filling
While the batter rests, prepare the cream cheese filling. Beat the softened cream cheese and butter together until smooth and creamy, then gradually add powdered sugar. When you get a thick, spreadable consistency, mix in the vanilla and a pinch of salt. If it feels too thick, a splash of milk helps. I like to taste-test this part—it’s the best frosting and sometimes I’m tempted to just eat it by the spoonful.
Step 6: Layer & Swirl
Pour half the red velvet batter into your prepared pan, then dollop about a third of the cream cheese filling over it. Add the rest of the batter on top, and for a beautiful finish, use a skewer or knife to swirl the filling into the batter gently—don’t overdo it or you lose the marbled effect. This swirl gives every bite a little surprise, and it’s a joy to look at once the cake’s sliced.
Step 7: Bake
Bake the cake for 30-35 minutes, but start checking at 28 minutes—ovens can be sneaky! Insert a toothpick near the center: if it comes out with just a few moist crumbs, your cake’s done. Be careful not to overbake; you want it moist, not dry. The top should spring back lightly when pressed.
Step 8: Cool & Glaze
Let the cakes cool in their pans for about 15 minutes, then run a knife around the edges before flipping them out onto a wire rack. Waiting until cool to glaze is a must unless you want your glaze to melt away. For the glaze, whisk the softer cream cheese with powdered sugar and vanilla, thinning with milk until it spreads easily but isn’t runny. Spread it thinly over the top and sides once fully cooled for that velvety finish.
Step 9: Slice & Serve
Use a long serrated knife for neat slices—gently saw back and forth rather than pressing down. I often chill the cake slightly for cleaner cuts, especially when guests are coming. Serve it slightly chilled or at room temp; both ways show off the cream cheese tang wonderfully. It’s pure joy seeing faces light up with the first bite.
What to Serve It With
For Breakfast: A slice of this cake with a strong cup of black coffee or a creamy latte is a delightful weekend treat. I like to warm my slice for just a few seconds in the microwave—it’s like a little sweet hug first thing in the morning.
For Brunch: Dress it up with fresh berries and a dollop of whipped cream. Pair with a crisp mimosa or a glass of cold brew iced coffee for a perfect afternoon indulgence at a brunch gathering.
As Dessert: After dinner, serve alongside vanilla bean ice cream or a drizzle of raspberry sauce for a crowd-pleasing finale. The creaminess of the frosting pairs beautifully with tart fruit flavors.
For Cozy Snacks: Cut a small square and enjoy with a cup of herbal tea or hot chocolate. It’s the kind of treat that makes rainy afternoons feel like a little celebration, especially when cuddled up in cozy socks.
In my family, we have this tradition of having the first slice on the day it’s baked—sometimes with extra frosting sneaked by the kids before anyone else sees it. My husband swears the cake tastes even better on day two, when the flavors really meld together. I like pairing it with not-too-sweet drinks to keep the balance just right.
Top Tips for Perfecting Your Red Velvet Cake
Ingredient Quality: I can’t stress enough how much using fresh flour and high-quality cocoa powder affects the crumb and chocolate notes. Even just slight staleness makes a difference.
Mixing Method: When combining wet and dry, fold slowly and stop as soon as everything’s combined. I learned after many tries that rushing this step can mess with the cake’s delicate fluffiness. The batter should feel smooth and pour easily from your spoon.
Swirl Technique: For that perfect marbled effect, add filling in dollops rather than spreading it flat. Use a toothpick or the tip of a knife for gentle swirling—too much swirling makes it look like brownie batter and you lose the pretty contrast.
Color Tips: I prefer gel food coloring over liquid—it gives a vibrant red without watering down the batter. Also, avoid using cocoa powders that are heavily Dutch-processed if you want the classic tangy lift; natural cocoa works best.
Baking Tips: Oven temperatures vary wildly, so if your red velvet is browning too fast, lower the heat a bit or place it on a lower rack. I always bake on the middle rack for even heat and check my cake 5 minutes before the timer for safety.
Glaze Variations: The glaze can be thinned for drizzling or thickened for spreading thicker layers. Adding a teaspoon of lemon zest or orange extract jazzes it up surprisingly well. For extra smoothness, I sift powdered sugar before mixing. If you’re in a rush, a simple dusting of powdered sugar works wonders too and keeps it light.
One lesson I learned the hard way: don’t skip the vinegar—it’s subtle but crucial for the tender crumb and reaction with baking soda. And if you want a moist cake, make sure not to overbake. I often peek in early because even a couple minutes off can change the texture.
Storing and Reheating Tips
Room Temperature: Wrap your cake tightly with plastic wrap or store in a cake dome to keep it moist. It will last well for up to 2 days this way. I usually bring it out of the fridge at least 30 minutes before serving so it’s soft and flavorful.
Refrigerator Storage: Place the cake in an airtight container or cover loosely with plastic wrap. It keeps well for 4-5 days, which is great if you want to enjoy it over several nights. Just be aware that refrigeration can sometimes dry out the edges slightly, so a slice with a smear of frosting tastes best.
Freezer Instructions: Red velvet cakes freeze beautifully. Slice the layers or wrap the whole cake tightly in plastic, then in aluminum foil to avoid freezer burn. Freeze for up to 3 months. When ready to use, thaw overnight in the fridge and bring to room temperature before serving. This works great if you want to bake ahead for special occasions.
Glaze Timing Advice: For storing longer term, I suggest freezing the cake without glaze, then glazing once thawed for freshest taste and appearance. If you plan to eat it within a day or two, glaze before refrigerating—it keeps the cake moist and adds that creamy tang.
Frequently Asked Questions
Final Thoughts
Red velvet cake holds a special spot in my heart because it combines so many wonderful things: that unforgettable red hue, the tender crumb, and the sweet-tangy cream cheese frosting that makes every bite feel a bit like a celebration. I love how approachable it is at the same time—no fancy equipment, no complicated techniques, just pure, honest flavors that bring people together. If you’re new to red velvet or looking to find a new favorite, I hope this recipe becomes your go-to, the one you bake when you want to see happy faces around your table.
Feel free to experiment with the frosting, try it as muffins, or even enjoy it just as it is with a hot cup of coffee. And hey, don’t be shy about sharing your own twists—I read every comment and love hearing how you’ve made this your own. Happy baking, and I can’t wait to hear how your red velvet cake turns out!
red velvet cake
Ingredients
Main Ingredients
- 16.25 oz red velvet cake mix I used Duncan Hines
- 14 oz sweetened condensed milk
- 8 oz cream cheese brick style, softened (lite okay)
- 0.25 cup unsalted butter softened (half of 1 stick)
- 2.5 cup confectioners’ sugar
- 0.5 tsp vanilla extract
- 0.5 tsp salt or to taste
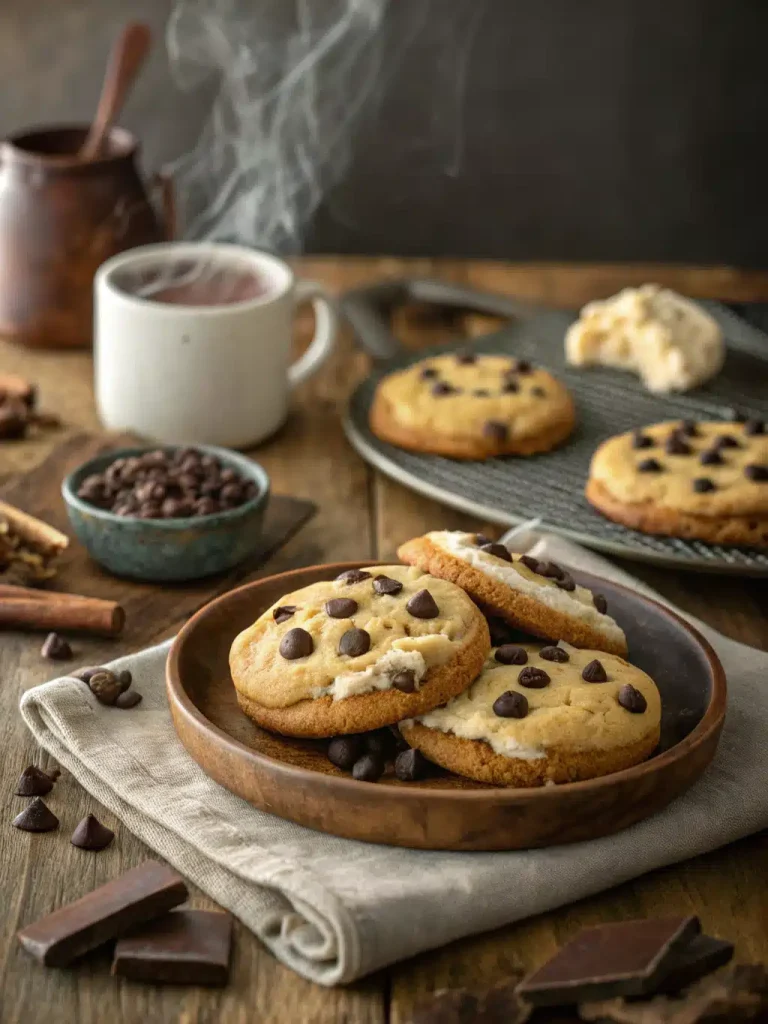
- 0.75 cup mini semi-sweet chocolate chips mini preferred, regular size may be substituted
Instructions
Preparation Steps
- Preheat oven to 350°F. Line a 9×13-inch pan with aluminum foil and spray with cooking spray; set aside.
- Prepare the cake mix according to package directions, likely adding 3 eggs, water, and oil, then pour into prepared pan and bake for 25 to 28 minutes until a toothpick comes out clean.
- Remove cake from oven and let cool for 5 minutes. Using the blunt end of a wooden spoon, poke approximately 60 holes evenly spaced all over the cake surface.
- Slowly pour sweetened condensed milk over the poked holes, ensuring an even distribution into the holes.
- Place cake in the refrigerator for at least 10 minutes to cool before frosting to prevent melting.
- In a mixing bowl fitted with a paddle attachment, beat softened cream cheese, butter, confectioners’ sugar, vanilla extract, and salt on medium-high speed until fluffy. Add more sugar if needed for desired consistency.
- Spread the cream cheese frosting evenly over the cooled cake using a spatula or knife.
- Sprinkle mini semi-sweet chocolate chips evenly over the frosting.
- Refrigerate the cake for at least 4 hours or overnight before serving for best flavor and texture.