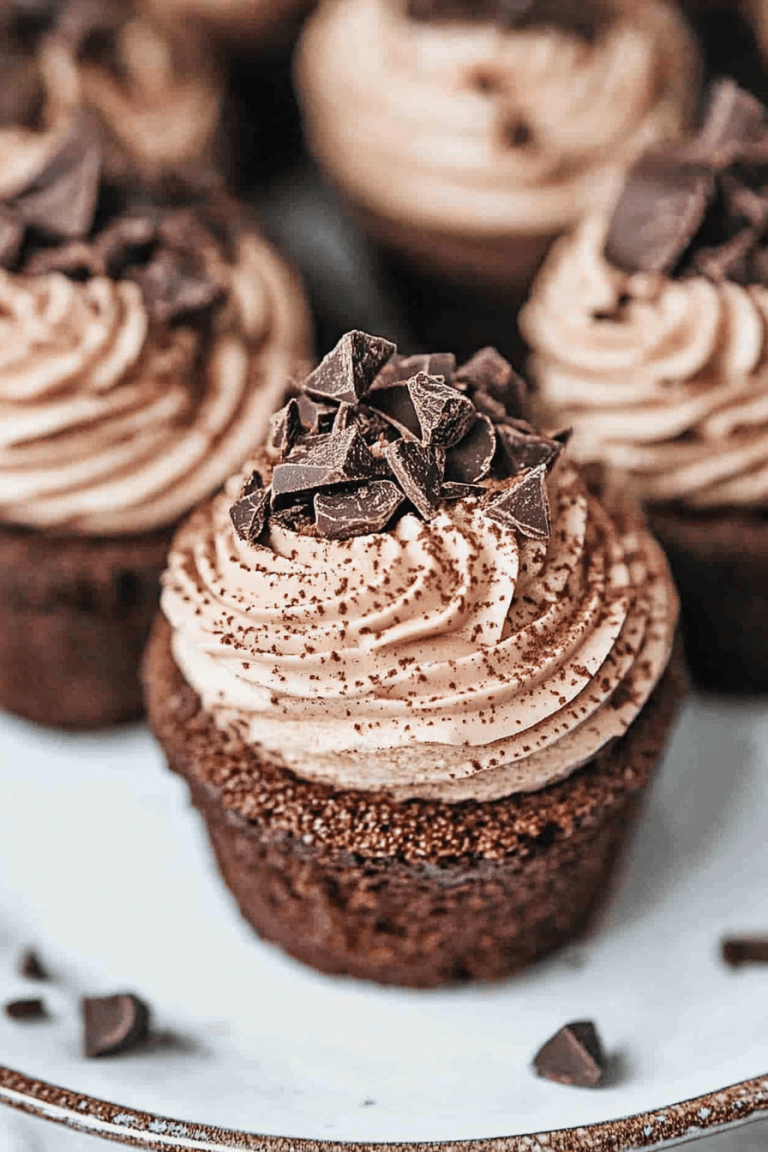
There’s something magical about an ice cream cake that takes me right back to those carefree summer afternoons throwing backyard parties with my cousins. It’s the kind of dessert that feels like a celebration even on a random Tuesday night — creamy, cool, and indulgent, with just the right touch of cake to hold it all together. I’m telling you, this ice cream cake has saved my sanity more times than I can count, especially when the summer heat hits and I want something sweet but don’t want to turn on the oven for hours. It’s like the best of both worlds—cake and ice cream in one luscious slice. Trust me, if you’ve ever loved a classic birthday cake or a simple bowl of ice cream, this is the mash-up you didn’t know you were craving.
What is ice cream cake?
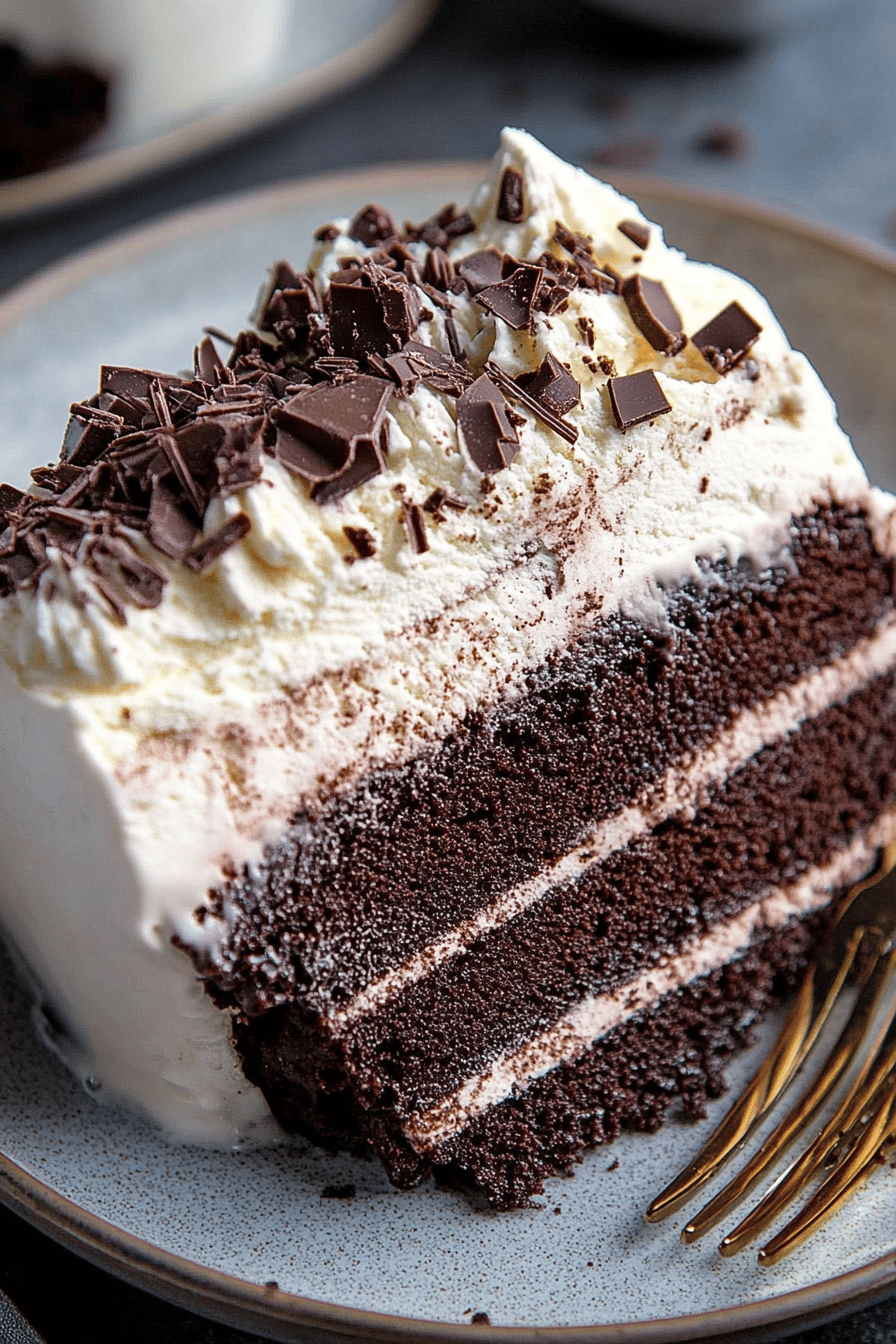
Think of ice cream cake as the ultimate mashup between two all-time favorites: a traditional cake and smooth, dreamy ice cream. It’s essentially layers of cake sandwiched with creamy ice cream, frozen solid but melt-in-your-mouth soft when you serve it. The idea is to combine the rich, spongy texture of cake with the cool refreshment of ice cream—sort of like a frozen indulgence that the whole family can enjoy without the pressure of perfect baking skills. The concept dates back decades and can be found in many variations, but at its heart, it’s a cool, no-fuss dessert that feels fancy enough for celebrations yet easy enough to make any day special.
Why you’ll love this recipe?
What I love most about this ice cream cake is how it feels like a treat without turning into a kitchen marathon. First off, the flavor profile is a perfect balance of rich vanilla cake with creamy, slightly sweet ice cream — it’s that combo that hits every spot: smooth, sweet, and just a little bit nutty if you throw in some crushed toppings. You can tweak it for chocolate lovers or fruit fans too, which makes it super versatile.
Secondly, it couldn’t be simpler. No complicated frosting or perfectly timed baking. Once your layers are ready, it’s mostly assembly and freezing, which makes it a lifesaver on busy days when I want a homemade dessert without the fuss. Plus, it’s surprisingly cost-efficient. The ingredients—basic cake mix, your choice of ice cream, and a few toppings—are easy to find and affordable. Whenever I feel like spoiling my kids (or just myself), this recipe is my go-to.
Another plus? The versatility. You can dress it up with fresh berries, drizzle chocolate sauce, or sprinkle nuts—each time it feels fresh and new. I’ve also played around with dairy-free ice creams and it’s still just as decadent. If you’ve ever loved a classic birthday cake or crave that perfect summer dessert, this ice cream cake might just become your new obsession. Oh, and bonus: slice sizes are totally flexible. Feeling indulgent? Go big. Want a little sweet pick-me-up? Smaller slice, no judgment.
How do you make ice cream cake?
Quick Overview
This ice cream cake is basically about layering your favorite cake with ice cream, freezing it to perfect solidity, and then adding a simple glaze or decoration on top. The magic lies in keeping things chill—literally! There’s no crazy baking marathon, just a well-timed bake, ice cream assembly, and freezer work to bring it all together. The process is so flexible that you can change up your layers or mix-ins any way you like, making this a seriously fun recipe to tweak!
Ingredients
For the Cake:
- I always go for the classic vanilla cake mix because it pairs so well with any ice cream flavor.
- Ingredients needed for the cake mix (usually eggs, oil, and water) – fresh and at room temp for the fluffiest cake.
For the Filling:
- 1.5 quarts of your favorite ice cream – slightly softened so it’s easy to spread (Ben & Jerry’s Chunky Monkey is a longtime favorite in my household).
- Mix-ins like crushed cookies, nuts, or fruit pieces (optional) – these add texture fun.
For the Glaze:
- 1 cup heavy cream – for a luscious whipped topping or drizzle.
- 1 cup powdered sugar – adjust for sweetness.
- 1 teaspoon vanilla extract – adds warmth to the glaze.
- Optional chocolate sauce or sprinkles for extra pizzazz.
Step-by-Step Instructions
Step 1: Preheat & Prep Pan
Preheat your oven to 350°F (175°C). Grease a 9-inch springform pan or line a regular cake pan with parchment paper. Using a springform pan is my favorite because it makes removing the cake so much easier — no mess, no crumbling!
Step 2: Mix Dry Ingredients
In a large bowl, mix the dry cake mix ingredients thoroughly according to the box instructions. I usually whisk them just to break up any lumps and ensure even rising.
Step 3: Mix Wet Ingredients
In a separate bowl, combine the eggs, oil, and water (or as directed). Give it a good whisk until everything is combined nicely but don’t overdo it — a few lumps are fine here.
Step 4: Combine
Slowly fold the wet ingredients into the dry mix with a spatula. Be gentle—overmixing can make the cake tough. The batter should be velvety and smooth, just like a thick pancake batter. Trust me, the fluffiness depends on this step!
Step 5: Bake
Pour the cake batter into your prepared pan and bake for about 30-35 minutes. Use a toothpick to check doneness — it should come out mostly clean with a few moist crumbs. The smell at this stage? Pure homey happiness.
Step 6: Cool Completely
Let the cake cool completely in the pan. I’ve learned the hard way that if it’s not cool, the ice cream layers melt too fast and turn into a mess.
Step 7: Prepare the Filling
Once cooled, remove the cake from the pan. Soften your ice cream until it’s spreadable but not melty. Spread a generous layer over the cake, smoothing it down carefully. If you want, sprinkle in cookies, nuts, or even chocolate chips at this point for an extra surprise.
Step 8: Freeze & Layer
Pop the cake and ice cream combo into the freezer for about 1-2 hours, just to set the bottom layer. Then, add another thin cake layer if you want, or keep layering ice cream for a more indulgent treat. Each time, freeze it solid before adding the next.
Step 9: Glaze & Decorate
Whip up your cream, sugar, and vanilla extract into a soft glaze. Spread it evenly over the frozen cake — this adds beautiful shine and contrast. Sprinkle your favorite toppings or drizzle chocolate sauce for that extra wow factor!
Step 10: Slice & Serve
The best way to slice an ice cream cake? Dip a sharp knife in hot water and wipe it dry between cuts. This keeps the edges clean and pretty. Serve immediately or let it sit a few minutes at room temp until it’s soft enough to dig in but still holding its shape.
What to Serve It With
For Breakfast: Warm coffee and a fresh fruit side make this feel a little bit special but not too heavy. Sometimes I add a thin layer of jam under the ice cream for a sweet surprise that kicks off the day right.
For Brunch: Serve slices with a dollop of freshly whipped cream and fresh berries. A sparkling mimosa or a fruity iced tea completes the casual elegance, perfect for sunny weekends or celebrations.
As Dessert: This ice cream cake shines after dinner — I love adding a drizzle of rich chocolate or caramel sauce, topped with crushed nuts and a few mint leaves. It feels indulgent without being too heavy, especially on warm nights.
For Cozy Snacks: My kids often grab a small slice after school with a cold glass of milk. It’s like having a little scoop of nostalgia and comfort all at once—plus they think it’s a fun secret treat!
Top Tips for Perfecting Your Ice Cream Cake
Cake Baking: Don’t rush the cooling! I learned the hard way that a warm cake melts your ice cream filling, turning your masterpiece into a puddle. Patience here really pays off.
Mixing Advice: Overmixing the batter can make your cake tough—stop as soon as the ingredients come together. The batter should feel thick but smooth, almost like a thick smoothie texture.
Ice Cream Prep: Let it soften to a spreadable consistency but not liquefy. Too soft and it’ll soak into your cake layers; too hard and you’ll be scraping the bottom of the tub forever!
Swirl and Layer: Have fun swirling different flavors or add mix-ins between layers. I usually swirl chocolate and peanut butter ice cream for a grown-up twist—looks beautiful and tastes like heaven.
Ingredient Swaps: Feel free to swap in dairy-free or low-guilt ice cream options. Coconut-based ice cream worked surprisingly well once, making this even creamier than usual. I also like using gluten-free cake mix when I have guests with allergies.
Glaze Variations: Whipped cream is classic, but sometimes I add a little lemon zest or a splash of coffee to the glaze for a flavor punch. Or skip the glaze altogether and dust with cocoa powder for a rustic look.
Storing and Reheating Tips
Room Temperature: Keep it covered and enjoy within 15-20 minutes after slicing—it starts to soften fast.
Refrigerator Storage: Cover tightly in an airtight container and it’ll stay good for 1-2 days, but remember it softens quite a bit, so best to eat sooner rather than later.
Freezer Instructions: Wrap the cake tightly in plastic wrap, then foil for a good seal against freezer burn. It can hang out for up to 2 weeks and still taste fresh. When ready, thaw in the fridge for a couple hours or at room temp for 20 minutes so it’s easier to slice.
Glaze Timing Advice: I’ve found it’s best to add the glaze just before serving to keep its light texture. If you need to store the glazed cake, cover gently to avoid smudging and keep it refrigerated.
Frequently Asked Questions
Final Thoughts
Honestly, this ice cream cake recipe has become one of those sweet rituals in my kitchen. It’s the kind of dessert that makes every get-together feel a little more special without the fuss that usually comes with cake baking. The balance of cold ice cream with soft cake just can’t be beat—not to mention the joy it brings when everyone bites into that creamy, cool slice after a warm day. If you enjoy this, you might also want to try my no-churn ice cream or classic chocolate sheet cake recipes for easy, delicious treats. I can’t wait to hear how yours turns out—be sure to leave a comment or share any fun twists you’ve added. Happy scooping and baking!
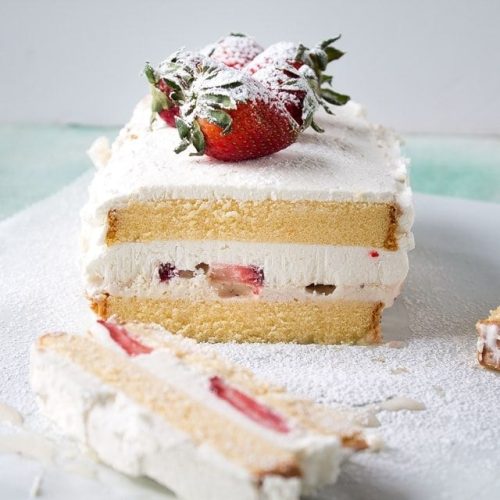
strawberry ice cream cake
Ingredients
Main Ingredients
- 1 cake all-butter pound cake cut into 8 slices
- 2 cups strawberry ice cream
- 10 whole strawberries sliced
- 1 cup cold heavy whipping cream
- 1 teaspoon pure vanilla extract
- 1 tablespoon sugar
Instructions
Preparation Steps
- Line 9×5-inch loaf pan with aluminum foil; leave an overhang on opposite sides to lift out the cake.
- Combine the heavy cream, sugar and vanilla in a large bowl and whip them together until stiff peaks form.
- Place half of cake slices in a single layer at the bottom of prepared pan.
- Using a spatula, spread the ice cream over the cake slices.
- Layer sliced strawberries over ice cream.
- Spread half of the prepared whipped cream over strawberries.
- Layer the rest of the cake slices over the cream.
- Spread the rest of the whipping cream on top and on the sides.
- Set in the freezer for 6 hours or overnight.
- Lift cake out of the pan, cut and serve.