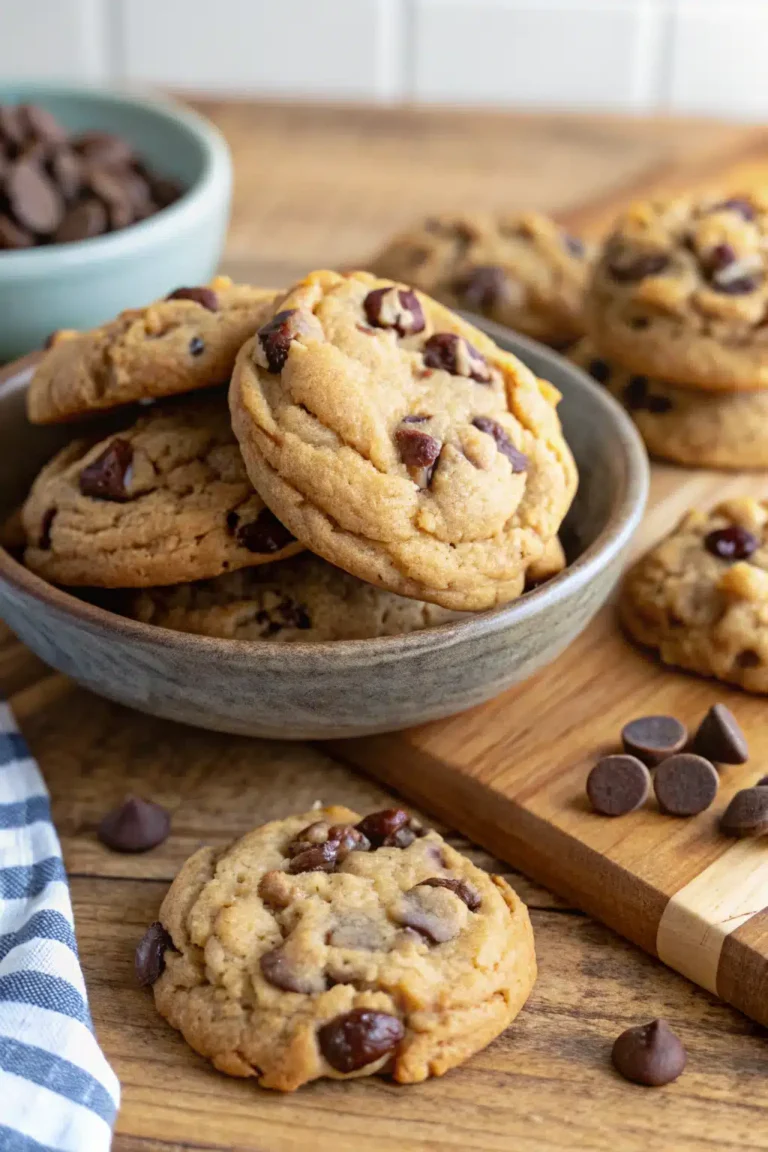
Every time I unwrap one of these homemade granola bars, I’m instantly transported back to childhood afternoons—sticky fingers, laughing with my cousins, and the warm smell of oats and honey filling the kitchen. These bars are the kind of snack that’s both comforting and energizing, the kind you can reach for whether you’re running out the door or just craving a little something sweet mid-afternoon. I’ve tried countless granola bar recipes over the years, and this one? It’s the keeper that’s never failed me. It’s not overly complicated, loaded with just the right mix of chew and crunch, and the flavors somehow taste even better than store-bought classics. If you’ve ever wished for a granola bar that’s wholesome, tasty, and made right in your own kitchen, this recipe is for you.
What is Granola bars?
Think of granola bars as bite-sized, handheld bundles of wholesome goodness—essentially compacted oats, nuts, seeds, and sweeteners you might already have in your pantry. The idea is simple: take your favorite granola ingredients, mix them with a binding agent, and typically bake or chill them until they hold together. The term “granola bar” has been around for decades, but they’re really just a clever way to turn a classic breakfast staple into a convenient snack you can carry anywhere. It’s like the grab-and-go sibling of your usual bowl of crunchy granola, perfect for when you’re hiking, at the office, or just need a little something to tide you over. What I love about making these at home is how customizable they are—you get to decide exactly what goes in, from the nuts to the sweetness level. Plus, nothing beats that fresh-from-the-oven smell wafting through your kitchen.
Why you’ll love this recipe?
What I adore most about this granola bars recipe is how it balances delicious flavor with everyday convenience. First off, the taste is fantastic—there’s a warm, nutty backbone from the toasted oats and almonds, a subtle sweetness from honey that never overwhelms, and a little burst of texture from sunflower seeds and dried cranberries. It’s like a mini celebration in every bite. Secondly, this recipe is wicked simple to make. No fancy equipment or mysterious ingredients, just stuff you probably already have. I always keep a batch in my fridge because it’s a lifesaver on busy mornings or when the kids come home starving after school. Speaking of budget, I’m always happy when a recipe works with regular pantry staples and stays light on cost—that’s a win in my book. Bonus? These bars are so versatile. You can swap out nuts, pep it up with chocolate chips, or add a sprinkle of cinnamon to match whatever mood you’re in. It’s like your granola canvas waiting for you to get creative.
How do I make Granola bars?
Quick Overview
To make these granola bars, you’ll start by toasting your oats and nuts to bring out that toasty scent and flavor that makes granola so irresistible. Then, you mix your dry ingredients together before combining them with the sweet, sticky binder—usually honey and a little melted coconut oil. The magic happens when you press the mixture firmly into a baking dish, bake it just enough to give it structure, and then let it cool completely so it cuts cleanly. Seriously, it’s one of those recipes where the aroma already has everyone hovering by the kitchen counter, and the whole process feels straightforward and even a bit therapeutic once you get into the rhythm.
Ingredients
For the Main Batter:
- 2 cups old-fashioned rolled oats (feel free to toast them lightly beforehand for extra crunch)
- 1 cup raw almonds, roughly chopped (or substitute with walnuts or pecans)
- ½ cup unsweetened shredded coconut (adds a lovely chewiness and subtle sweetness)
- ¼ cup sunflower seeds (for that lovely little crunch)
- ½ tsp ground cinnamon (optional but adds warmth)
- ½ tsp sea salt (balances the sweetness)
For the Binding:
- ⅓ cup honey (use raw honey if you can, it makes a difference)
- ⅓ cup coconut oil, melted (helps everything stick without the greasiness)
- 1 tsp pure vanilla extract (the secret touch that makes everything pop)
For the Add-Ins/Filling:
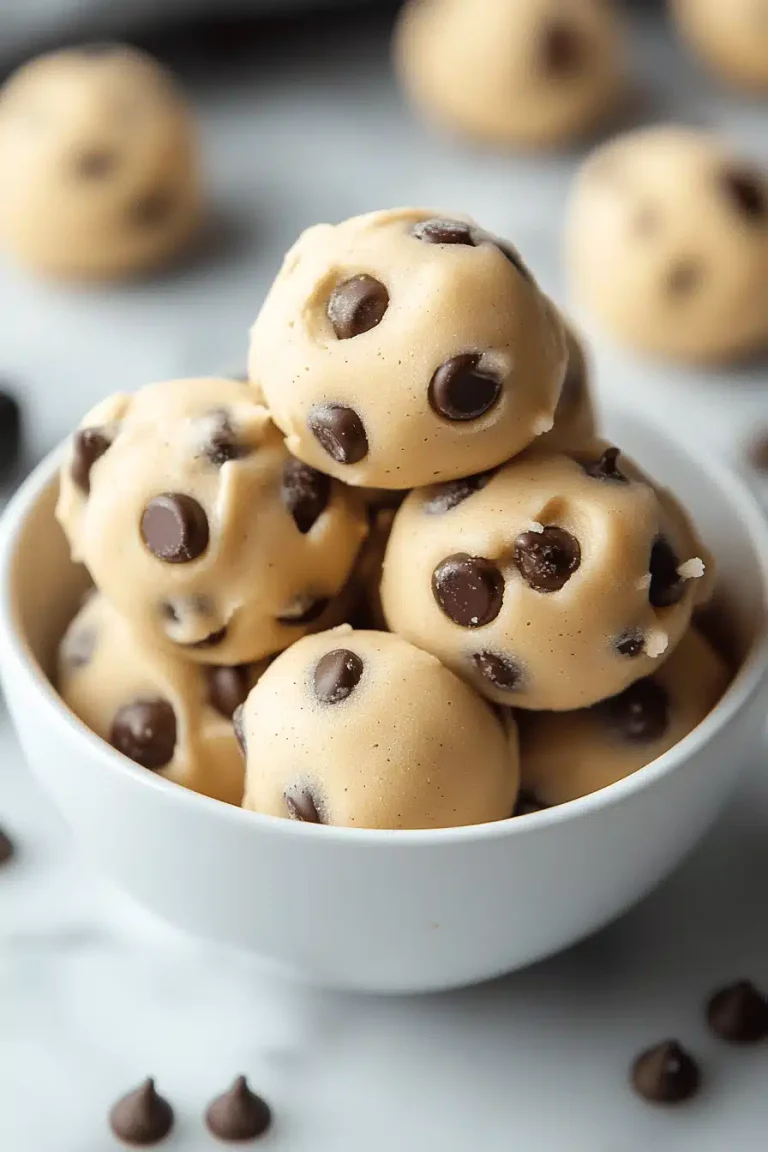
- ½ cup dried cranberries or raisins (my kids adore the tart surprise)
- ¼ cup mini chocolate chips (optional, but delightful for an indulgent twist)
- Optional: 2 tbsp chia seeds or flaxseeds for extra nutrients
Step-by-Step Instructions
Step 1: Preheat & Prep Pan
Start by preheating your oven to 325°F (160°C). Line an 8×8-inch square baking pan with parchment paper, leaving a bit hanging over the edges for easy removal later. I learned the hard way that greasing the pan alone doesn’t always let the bars come out cleanly, so parchment is a must-have for neat slices.
Step 2: Mix Dry Ingredients
In a large mixing bowl, combine the oats, chopped almonds, shredded coconut, sunflower seeds, cinnamon, and sea salt. Give it a good stir to distribute everything evenly. The dry mix should look like a hearty, rustic granola—your body can practically smell the toasted oats in this step if you pre-toast them.
Step 3: Mix Wet Ingredients
In a small saucepan over low heat or in a microwave-safe bowl, warm the honey and coconut oil until they’re runny and just melded together. Remove from heat and stir in the vanilla extract. You want it warm but not hot—that’s key to keeping the texture just right once mixed.
Step 4: Combine
Pour the wet mixture over the dry and fold gently until everything is coated. Try not to overmix here; you want the oats and nuts to stay somewhat distinct with that satisfying chew. The mixture should feel sticky and clump together when pressed—it’s your sign that it’s ready to bake.
Step 5: Prepare Filling
Fold in your dried cranberries and any optional add-ins like chia seeds or chocolate chips now. Don’t overdo it on the chips here, or they might burn a little in the oven, but a few scattered on top later can be a delicious finishing touch.
Step 6: Layer & Swirl
Transfer half of the mixture to your prepared pan and press it down firmly using the back of a spoon or your hands covered with parchment paper. Sprinkle your chocolate chips (if using) evenly over this layer, then add the remaining mixture on top and press down thoroughly. The firmer you press, the less crumbly your bars will be. If you want to get fancy, you can swirl a little extra honey or nut butter on top—though I usually keep it simple because my kids aren’t patient enough to wait for that step.
Step 7: Bake
Pop the pan in the oven and bake for 20-25 minutes. Keep an eye on the edges—they should turn a lovely golden brown, and the whole kitchen fills with a nutty, warm scent that’s impossible to resist. I poke it gently with a toothpick near the center; if it comes out clean or with just a few crumbs, it’s done.
Step 8: Cool & Glaze
This part requires patience—let the bars cool completely in the pan, about an hour or so. Trying to slice before they’re set is a rookie mistake I keep reminding myself about. Once cool, you can drizzle a simple glaze made from powdered sugar and a bit of almond milk, or just dust with a touch of cinnamon sugar for a pretty finish.
Step 9: Slice & Serve
Use the parchment overhang to lift the whole block from the pan and place on a cutting board. I like to use a sharp knife dipped in hot water for cleaner cuts. Slice them into whatever sizes you prefer—big chunky bars or more petite snack bites. Serve fresh at room temperature, or wrap individually for quick energy on the go.
What to Serve It With
For Breakfast: These bars alongside a hot cup of black coffee or your favorite latte are a simple morning ritual in my house. Try pairing with a creamy yogurt and fresh berries for a little breakfast parfait that feels special but easy.
For Brunch: Serve these on a rustic wooden board with slices of sharp cheddar, fresh apple wedges, and a pot of herbal tea. It becomes a sweet and savory combo that will surprise your guests.
As Dessert: Warm a granola bar slightly and serve it with a dollop of vanilla ice cream or a drizzle of caramel sauce. The contrast between the warm crunch and smooth cream is irresistible—and an unexpected after-dinner treat!
For Cozy Snacks: My family loves having these on hand for a quick post-school fuel-up or late-night nibble while watching TV. They go perfectly with a glass of almond milk or a comforting hot cocoa.
We’ve even made it a family tradition to pack a few bars in picnic baskets—it just makes the outdoor hangouts taste even sweeter!
Top Tips for Perfecting Your Granola Bars
Toasting Oats & Nuts: Don’t skip this if you want that deep, nutty flavor. Toast the oats and almonds in a dry skillet or oven for 10 minutes, stirring frequently, until they smell fragrant and look lightly golden.
Mixing Advice: Toss the dry ingredients first, then pour in wet ingredients slowly—this helps you avoid clumps and ensures everything is evenly coated. Overmixing can make the bars tough, so fold gently!
Pressing the Mixture: This step is crucial for your bars to hold together. Use a piece of parchment over the top and press firmly with your hands or a spatula. If the mixture is too crumbly, add a little extra melted coconut oil or honey.
Swirl Customization: If you want to add a swirl of nut butter or chocolate, do it right before baking and gently use a knife to create soft swirls. Don’t overdo it, or the bars might not hold firm.
Ingredient Swaps: No almonds? No problem! Pecans, walnuts, or even pumpkin seeds work beautifully. If you want a nut-free version, double up on seeds and sunflower butter for moisture.
Baking Tips: Every oven is a little different; if your bars brown too fast on top, cover loosely with foil halfway through. Use a toothpick to test doneness but don’t over-bake, or they dry out.
Glaze Variations: My favorite is a quick mix of powdered sugar and almond milk, but you can also skip it entirely or dust with cinnamon sugar. Sometimes, a drizzle of melted dark chocolate makes these bars feel downright indulgent!
I’ve learned the hard way that patience in cooling makes all the difference—cutting early will just lead to crumbs and tears. Trust me on this one!
Storing and Reheating Tips
Room Temperature: Store your baked granola bars in an airtight container at room temperature for up to 5 days. Cover them well to keep them from drying out—placing parchment paper between layers helps prevent sticking.
Refrigerator Storage: These bars keep really well in the fridge for up to 2 weeks. I keep mine in a glass container with a tight-fitting lid, which helps them maintain their chewiness without getting too hard.
Freezer Instructions: Wrap individual bars tightly in plastic wrap and place in a freezer-safe bag for up to 3 months. To enjoy, thaw at room temperature for about an hour or warm gently in the microwave for 10-15 seconds.
Glaze Timing Advice: If you plan to store the bars for longer periods or freeze them, wait to glaze until just before serving. The glaze can get sticky or lose its shine if applied too far in advance.
One handy trick I use is to double the batch and freeze half raw, then bake them fresh when I need a quick batch—this has saved me on many crazy mornings!
Frequently Asked Questions
Final Thoughts
If you’ve been on the hunt for a granola bars recipe that feels like it was made just for your busy life, this one might just become your go-to. The combination of nuts and oats toasted to perfection, sweet honey binding it all gently together, and the little bursts of dried fruit create a texture and flavor that’s so comforting. I love that these bars are adaptable—whether you want to keep them pure or dress them up with chocolate chips or spice, they’re forgiving and a joy to make. Plus, nothing compares to the pride of handing your kids a snack you made yourself, knowing exactly what’s inside. So grab your mixing bowl, turn on your favorite tunes, and enjoy this little homemade ritual. Happy baking! And don’t be shy—drop a comment below or share how you’ve made the recipe your own. Can’t wait to hear all about your granola bar adventures!
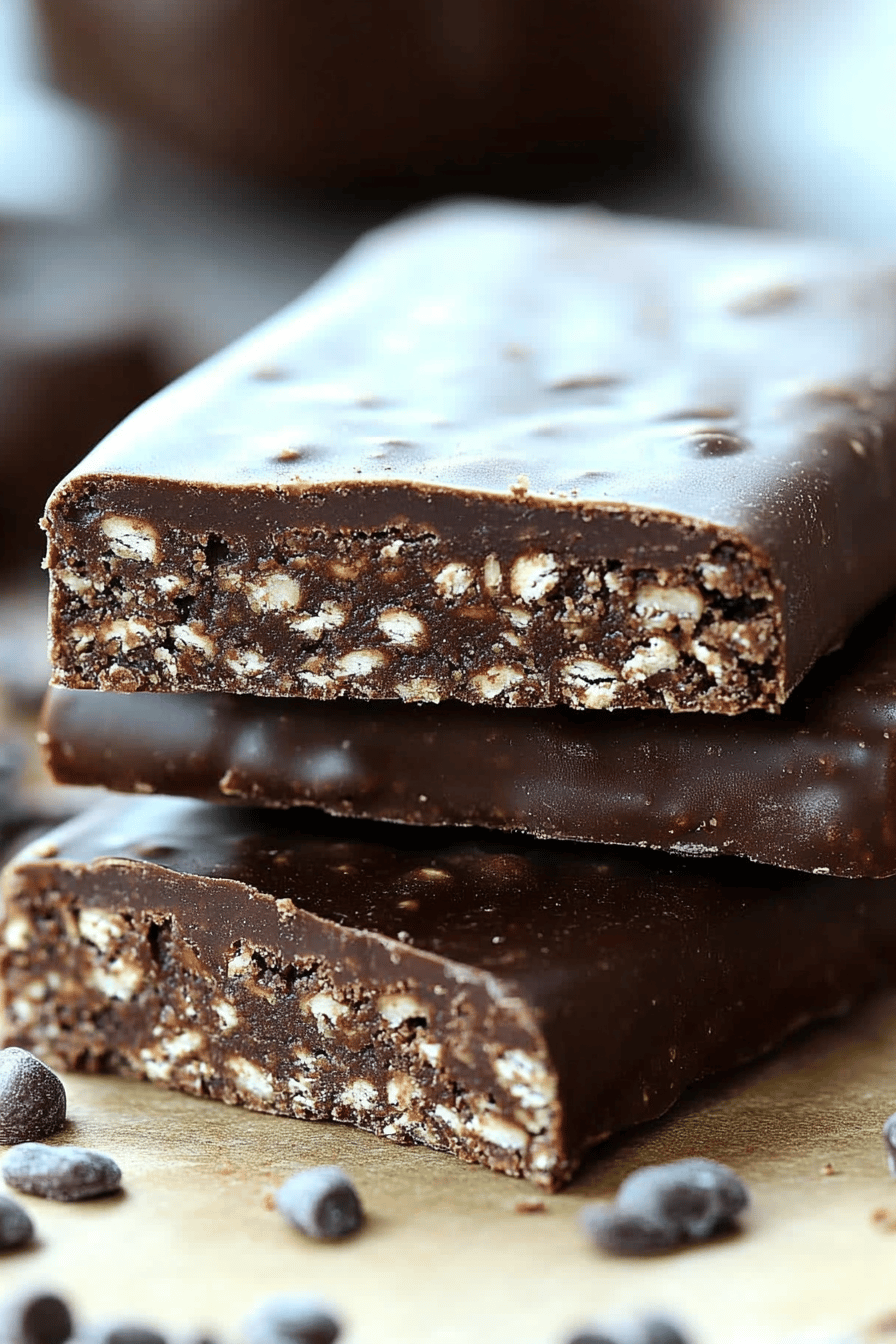
Chocolate Chip Granola Bars
Ingredients
Main Ingredients
- 3 cups quick oats
- 1 cup puffed rice cereal
- 1 cup mixed nuts, seeds, or coconut flakes choose your favorite add-ins
- 0.5 cup coconut oil
- 0.5 cup honey
- 0.5 cup peanut butter
- 1 tablespoon molasses
- 2 teaspoons vanilla extract
- 1 teaspoon salt
- 1 cup mini chocolate chips
Instructions
Preparation Steps
- Spread the oats on a baking sheet and toast at 325°F for about 3 minutes. Remove from oven and place in a large bowl.
- Line a 9 x 13 inch pan with parchment paper.
- Combine the puffed rice cereal and your choice of nuts, seeds, or coconut flakes in the bowl with the toasted oats.
- In a medium saucepan over low heat, combine coconut oil, honey, peanut butter, and molasses. Stir until well combined. Remove from heat and stir in vanilla extract and salt. Let cool for 5 to 10 minutes.
- Pour the cooled wet mixture over the dry ingredients and stir until fully coated. Allow to cool a few more minutes before folding in the mini chocolate chips.
- Press the mixture firmly into the prepared pan. Refrigerate for at least one hour.
- Cut into bars or squares and enjoy!