There’s something about a perfectly baked potato that feels like coming home, isn’t there? Growing up, my grandma used to pop a batch of these into the oven on chilly weekends, and the whole house smelled like comfort. That crispy skin, the soft inside that just melts with butter—I’m telling you, baked potatoes have this magic that mashed potatoes just don’t quite hit. They’re easy, earthy, ridiculously satisfying, and honestly, kind of addictive. I love making these when I want something uncomplicated but soulfully good—plus, they’re a total crowd-pleaser. If you’re anything like me, you’ll appreciate how this straightforward baked potato recipe turns a humble spud into a meal that feels special without any fuss.
What is baked potato?
Think of a baked potato as the all-American culinary blank canvas—it’s basically a whole potato that’s been scrubbed clean, poked with a fork, and slow-roasted in the oven until the skin’s crisp and the inside is soft and fluffy. Simple, right? The name literally comes from the method: baking. No boiling, no frying, just heat that coaxes out the best texture and flavor from the potato. It’s one of those classic dishes that’s both humble and versatile, perfect for dressing up or down. At home, it’s the reliable foodie friend who pairs well with everything—from sour cream and chives to hearty chili or melty cheese. Plus, it’s a staple for busy evenings when you want something wholesome but still crave a bit of comfort food magic.
Why you’ll love this recipe?
What I love most about this baked potato recipe is how it strikes the perfect balance between crispy exterior and tender, fluffy interior. The skin comes out golden and addictively crunchy, while the inside is steaming and soft enough to mash with a fork without any effort—trust me, the contrast is everything. I’ve made baked potatoes countless times, and this method makes it super easy without any complicated steps or long ingredient lists. It feels fancy but requires zero fuss, which always makes dinner feel like a win.
Another thing? Potatoes are budget-friendly, and this recipe celebrates that simplicity without sacrificing taste. If you’ve ever felt overwhelmed by recipes bursting with ingredients, you’ll appreciate the straightforwardness of this one. Plus, the versatility is pretty awesome—you can load it with sour cream and chives, sprinkle crumbled bacon on top, pile on steamed broccoli, or add melted cheese and chili to make it a full meal. I even like to drizzle some garlic butter on mine—something I learned from a family friend—that adds just a whisper of luxe.
Compared to mashed potatoes, I find baked potatoes more satisfying on their own and less messy to eat, especially for busy weeknights or even weekend get-togethers. The smell alone invites everyone into the kitchen, and the way they disappear fast almost makes you want to bake two batches. If you’re a fan of simple, soulful cooking, you’re going to appreciate how reliably delicious and fuss-free baked potatoes are.
How do I make baked potatoes?
Quick Overview
Making baked potatoes might just be one of the easiest kitchen triumphs to achieve. After a quick scrub and a few pokes to help steam escape, you simply rub the potato with some oil and salt to coax out that golden, crispy skin. Into the oven it goes for about an hour at a steady temperature, and the wait brings a lovely tension: that smell growing, promising comfort. The result? Crisp outside; creamy, fluffy inside—the kind you just want to tear apart with a fork and pile with your favorite toppings. Honestly, it’s a hands-off kind of magic, perfect for when you want to put minimal effort in and get maximum satisfaction out.
Ingredients
For the potatoes: For the potatoes: For the potatoes: For the potatoes: For the potatoes: For the potatoes: For the potatoes: For the potatoes
- 4 large Russet potatoes – these beauties are starchy, which means a dry, fluffy interior, perfect for baking
- 2 tbsp olive oil or melted butter – this is the secret for that crave-worthy crispy skin
- 1½ tsp coarse sea salt – rough salt helps draw out moisture and adds crunch with a sprinkle of flavor
For the Topping Ideas:
- Butter – the classic for melting into the hot potato’s creases
- Sour cream or Greek yogurt – tangy creaminess that balances the starchy base
- Chopped chives or green onions – for a fresh, mild bite
- Grated cheddar, shredded mozzarella, or crumbled feta – melty cheese heaven right there
- Bacon bits or crispy pancetta – add this if you’re feeling indulgent
- Steamed broccoli or sautéed mushrooms – get some greens in without fussing
- Salt and freshly ground black pepper – for that perfect seasoning finish
For Optional Extras:
- Garlic butter: mix softened butter with minced garlic and a pinch of parsley
- Chili flakes or smoked paprika: to sprinkle on top for subtle heat
Step-by-Step Instructions
Step 1: Preheat & Prep Pan
Pop your oven on to 425°F (220°C). This temperature is a little higher than some recipes, but trust me, it helps develop that crackling skin without drying the inside too much. While you’re waiting, line a baking sheet with foil or parchment—makes cleaning a breeze because let’s be honest, potato drippings can get messy. If you have a wire rack, placing potatoes on it lets the heat circulate all around for an even bake.
Step 2: Scrub & Dry Potatoes
Give those potatoes a good scrub with a vegetable brush under cool running water—no one wants gritty skin. After washing, pat each potato dry thoroughly; moisture is the enemy of cracking skin. You can’t skip this step or your potatoes won’t get that signature crunch.
Step 3: Poke Potatoes
Using a fork, gently poke each potato all over (around 6-8 times). This helps steam escape as they heat and stops them from bursting in the oven—definitely a lesson I learned after one too many mini kitchen disasters.
Step 4: Oil & Salt the Skins
Rub each potato with olive oil or melted butter, then sprinkle generously with coarse salt. This step is where the magic starts—salt dries out the surface and crisps up the skin just enough while adding flavor. Don’t skimp here; it’s worth the extra pinch or two.
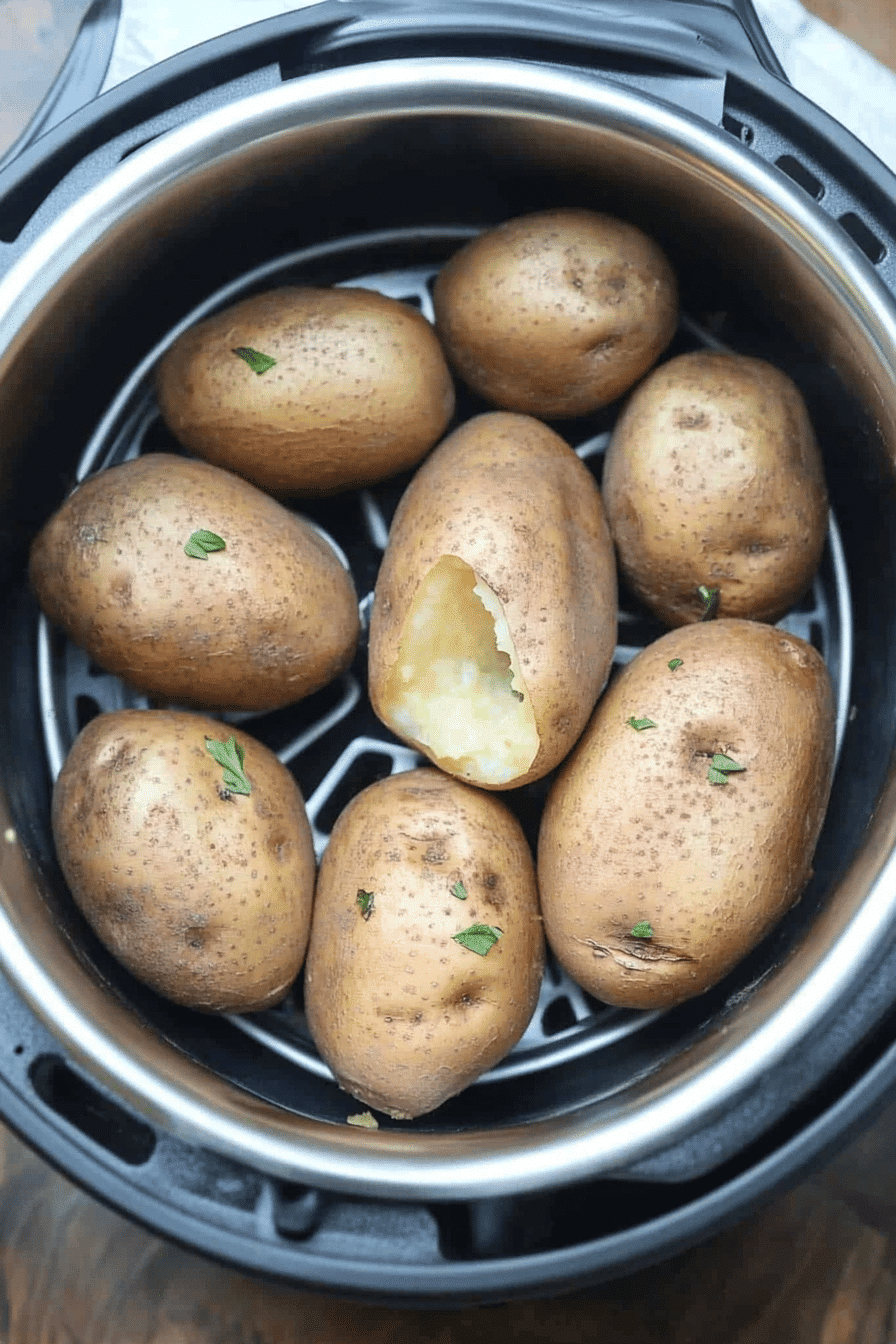
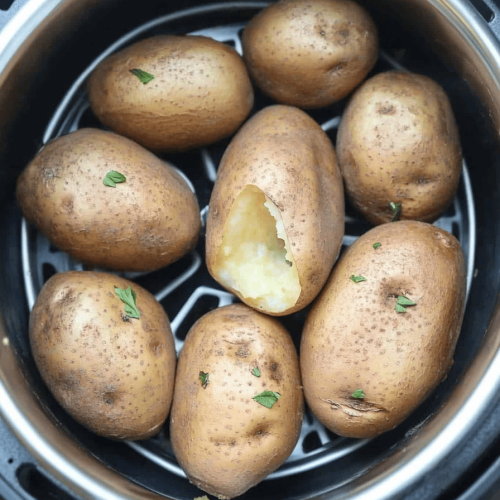
Step 5: Bake
Place your potatoes on the prepared pan or rack and bake for around 45-60 minutes. The exact time depends on the potato’s size—give them a gentle squeeze (wearing an oven mitt, of course) towards the end; a soft potato gives the telltale sign it’s done. The skin should be firm and crisp.
Step 6: Get Ready to Serve
Once they’re out of the oven, give them a few minutes to rest—this lets the steam settle and the insides fluff up even more. Then slice a deep “X” on top and press the ends gently to open the potato like a flower, ready for your toppings.
Step 7: Top and Enjoy
Load ’em up with butter, cheese, sour cream, chives—the works. My kids always go wild for just butter and a sprinkle of cheddar, but I sneak some garlic butter in there whenever they’re not looking. The smell alone brings everyone to the kitchen faster than you can say “dinner’s ready.”
What to Serve It With
For Breakfast: Baked potatoes in the morning are a game changer. Think simple butter, a sprinkle of flaky salt, and a side of sunny-side-up eggs. Pair it with your favorite coffee—strong, black, or creamy—the crispy skin and creamy interior make for a hearty start without weighing you down.
For Brunch: Elevate your baked potato by serving it with smoked salmon, a dollop of crème fraîche, fresh dill, and capers. Add a mimosa or sparkling water with a twist of lemon for a light, festive feel.
As Dessert: Yeah, it sounds wild, but you can totally play with sweet toppings. Try a drizzle of honey, a sprinkle of cinnamon sugar, and a scoop of vanilla ice cream for a cozy, unexpected treat.
For Cozy Snacks: Load your baked potatoes with chili, sour cream, and cheese for a finger-licking snack on a cold night. Pair with hot cocoa or a chai latte, and you’ve got yourself a snack-time winner. This was a late-night favorite when my college roommates and I pulled all-nighters—comfort food that really hits the spot.
Top Tips for Perfecting Your Baked Potatoes
Potato Choice: Russets are your best bet. I learned the hard way trying red potatoes—they just don’t get the right fluffy inside. If you want something creamier, Yukon Golds are decent but taste-wise won’t be as fluffy.
Scrubbing & Drying: Don’t rush this. Moisture on the skin is a direct enemy of crispiness, so dry thoroughly before oiling.
Oil & Salt: Rub generously with oil so every nook gets coated—this helps develop the irresistible crunch. Sea salt with larger grains works better than fine salt here.
Oven Temperature: I found 425°F perfect for me. Lower temps take forever; higher temps risk burnt skin. If your oven runs hot, check early.
Don’t Skip the Rest: Letting the potato rest once out of the oven makes the inside creamier. I almost always cut them right away and end up with runoff steam—and less fluffy centers!
Glaze and Toppings: For a buttery glaze, mix softened butter with a teensy bit of garlic and fresh herbs if you have any on hand. If you want more color, sprinkle chopped parsley or paprika atop—visually appealing and taste-amplifying. I sometimes swap butter for a little olive oil—less rich but still delicious.
Leftovers Revamp: Don’t toss those baked potatoes. Reheat covered in the microwave with a splash of water or break them up and crisp in a skillet for hash—instant brunch upgrade.
Storing and Reheating Tips
Room Temperature: If you’ve got leftovers, keep baked potatoes wrapped loosely in foil at room temp for up to 2 hours—beyond that, bacteria could start throwing a party, so into the fridge they should go.
Refrigerator Storage: Place cooled baked potatoes in an airtight container or wrap tightly with plastic wrap. They last about 3-4 days. Reheat in the microwave or better yet, in a 350°F oven wrapped loosely in foil for 10-15 minutes to regain crispiness.
Freezer Instructions: You can freeze baked potatoes, but texture will soften. Wrap each potato tightly with plastic wrap, then foil, and store in a freezer bag for up to 3 months. Thaw overnight in the fridge and reheat in the oven to revive that crunchy skin.
Glaze Timing Advice: If storing, I usually wait to add butter and toppings until just before serving. Glaze or creamy toppings don’t keep well and tend to make the skin soggy. But if you’re craving that buttery melt, add it after reheating—fresh every time.
Frequently Asked Questions
Final Thoughts
If you ask me, baked potatoes are the ultimate comfort food that you can dress up for a cozy night in or keep simple for a no-nonsense dinner. They deliver warmth and satisfaction every time—crispy skins, soft fluffy insides, and endless topping possibilities. I hope you’ll give this recipe a whirl and find yourself loving how easy and rewarding baked potatoes can be. It’s one of those dishes that folds into everyday meals but always feels just a bit special, and honestly, it’s hard not to smile after biting into one. Don’t forget to leave a comment and let me know your favorite toppings or any fun twists you try—I’m always here for some inspiration! Happy baking and warm kitchen vibes your way!
baked potatoes
Ingredients
Main Ingredients
- 4 large Russet potatoes
- 0.25 cup bacon grease or olive oil
- 1 tablespoon coarse sea salt or kosher salt
Instructions
Preparation Steps
- Preheat the oven to 425 degrees F.
- Wash, scrub, and dry the potatoes thoroughly.
- Rub bacon grease or olive oil all over the potatoes.
- Rub salt all over the potatoes.
- Using a fork, poke about 5-6 holes all around each potato.
- Place the potatoes directly on a baking sheet; bake for about 45 minutes.
- Right after they come out of the oven, release the steam by making a long slit in the top of each potato and squeezing it open using a clean dish towel.
- Enjoy as is or serve with your favorite toppings!