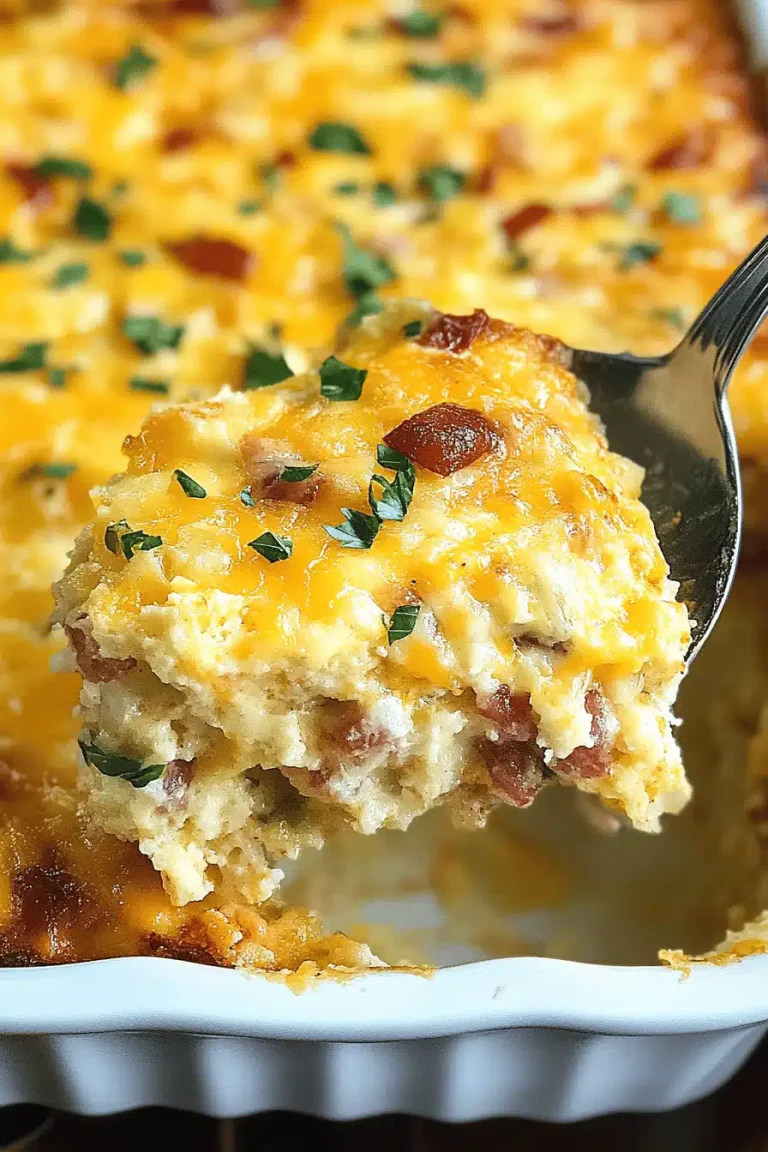
There’s something about a warm potato cake stuffed with melty cheese that just hits all the cozy notes, doesn’t it? I remember the first time I made these cheese stuffed potato cakes on a chilly Sunday afternoon when the rain was tapping softly against the windows. The smell alone—the crispy edges, the gooey cheesy center—had my whole family crowding into the kitchen like moths to a flame. They disappeared in minutes, and my kids actually asked for seconds (which, trust me, is a pretty rare event around here). If you love pancakes, but crave something a bit heartier and mashed-potato comfort level rich, these cakes are going to feel like a little homemade hug. And the best part? They’re surprisingly simple to whip up, making them a lifesaver on those busy nights when you want something delicious but don’t want to overcomplicate dinner.
What is cheese stuffed potato cake?
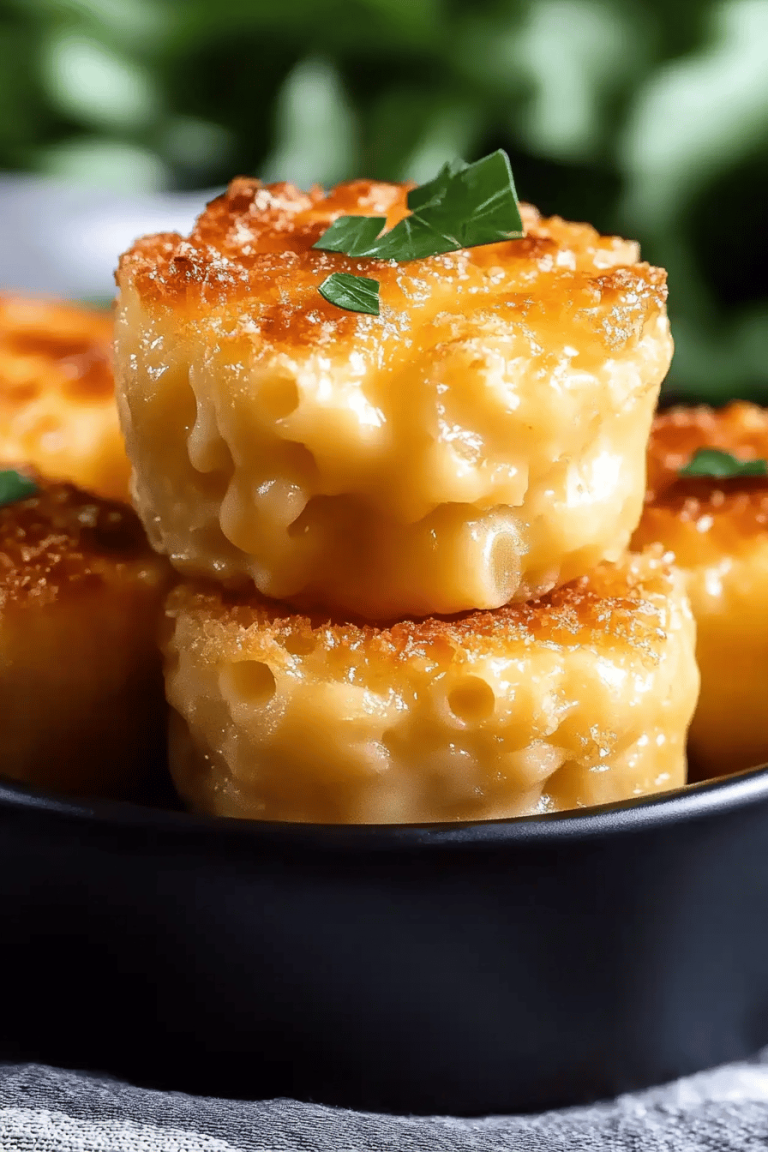
Think of cheese stuffed potato cakes as the perfect mash-up between a crispy potato pancake and a cheesy surprise center. Essentially, they’re little patties made from mashed potatoes mixed with a few simple ingredients, then stuffed with your favorite cheese before frying up until golden brown. The name is pretty straightforward: these cakes are “stuffed” with cheese, and they come out crispy on the outside with a soft, oozy center. It’s almost like these cakes took the classic comfort of mashed potatoes and cranked it up with a cheesy core that melts with every bite. Growing up, my family always called them cheesy latkes, but they’re a bit heartier and richer, especially with some extra butter mixed into the potatoes. If you’re even half as obsessed with potatoes and cheese as I am, you’re going to want to keep this recipe in your back pocket.
Why you’ll love this recipe?
What I love most about these cheese stuffed potato cakes is the mix of textures and flavors they bring to the table. First, there’s the crispy, golden-brown exterior that crunches just right when you bite into it—that satisfying sound alone gets me every time. Then, you reach the center where molten cheese oozes out like a slow delicious lava flow, mingling with soft, buttery mashed potatoes. It’s a combo that’s both indulgent and comforting in the best way.
But here’s the thing—despite how fancy they sound, these cakes couldn’t be easier to make. You don’t need any fancy kitchen gadgets or complicated techniques. If you can mash potatoes and shake together a few basic ingredients, you’re halfway there. And because you’re working mostly with humble staples—potatoes, cheese, eggs—these cakes won’t break the bank. On the contrary, they’re a wallet-friendly recipe that feels like a treat.
Versatility is another bonus. They work beautifully as a cozy breakfast option with a dollop of sour cream, a hearty side for dinner, or even as a snack to share over a weekend game day. I’ve experimented with swapping cheeses—cheddar for sharpness, mozzarella for stretchiness, or even a spicy pepper jack when I’m feeling adventurous. Each variation brings its own charm. If you’ve loved recipes like potato latkes or cheesy potato gratins, this one’s going to fit right in with your favorites, but with that extra melty surprise inside. Honestly, they’ve saved dinner more than once on those days when I stare into a sad fridge and wonder what in the world to make!
How do I make cheese stuffed potato cakes?
Quick Overview
Making these happens in a few simple stages: cook and mash potatoes, mix in your magic ingredients, prepare your cheese filling, form cozy little patties enveloping that cheesy center, then pan-fry until golden and crispy. The whole process feels wonderfully approachable, especially if you’ve ever cooked potatoes or made pancakes. The trick here is getting the balance just right—not too wet, so the cakes hold together, and ensuring the cheese is soft enough to melt but not so runny it escapes while frying. Once you figure those little details out, you’ll want to make these again and again.
Ingredients
For the Main Batter:
- 4 large potatoes (Russets are ideal for fluffy mash)
- 2 large eggs (to bind everything together)
- 1/2 cup all-purpose flour (gives structure to hold the cakes)
- Salt and freshly ground black pepper, to taste
- 2 tablespoons unsalted butter (for richness and moisture)
- Optional: 1/4 teaspoon garlic powder or onion powder for extra flavor depth
For the Filling:
- 1 cup shredded cheddar cheese (or your favorite melty cheese)
- Optional additions: chopped chives, a pinch of smoked paprika, or a sprinkle of crushed red pepper
For the Glaze:
- 2 tablespoons melted butter (brushed on after frying to boost flavor)
- Option to mix in fresh herbs like parsley or thyme for a fresh touch
- Or swap out for a dollop of sour cream or Greek yogurt when serving
Step-by-Step Instructions
Step 1: Preheat & Prep Pan
Start by heating your skillet over medium heat, adding a couple of tablespoons of oil or butter—whichever you prefer for that golden crust. Preheating the pan is key so the cakes start crisping right away without sticking. I always line up a plate with paper towels nearby for draining excess oil—keeps them from feeling greasy later.
Step 2: Mix Dry Ingredients
In a large bowl, toss together the flour, salt, pepper, and any dry spices you’re using. This step is simple but important because it ensures even seasoning throughout, so every bite is flavorful. Plus, mixing dry ingredients first means the flour won’t clump unevenly when you mix in the wet stuff.
Step 3: Mix Wet Ingredients
In a separate bowl, beat the eggs and melted butter together until they’re well combined and slightly frothy—this helps with a smoother batter. Then, add your mashed potatoes to the wet mix. You’re aiming for creamy but not runny mash here; if your mash is too loose because you’re using lots of milk or cream, try holding back a bit next time.
Step 4: Combine
Now carefully fold the dry ingredients into the wet potato mixture. Stir just until you see everything come together—overmixing can make the cakes dense and tough, which nobody wants. The mixture should feel soft and pliable but able to hold its shape when molded.
Step 5: Prepare Filling
Grab your shredded cheese and any herbs or spices you want to add. Try to keep the filling simple but flavorful. I like mixing in a little smoked paprika for a subtle smoky kick that surprises you mid-bite. The cheese should be shredded finely so that it melts evenly inside the cakes.
Step 6: Layer & Swirl
Here’s the magic moment: form a small handful of your potato batter into a flat round on your palm, then sprinkle a generous pinch of cheese in the center. Top with a bit more batter and seal the edges gently, making sure the cheese is completely encased by potato. I learned the hard way that skipping this step leads to puddles of cheese everywhere—still tasty, but messy! If you want, you can gently swirl in little herbs before sealing for a beautiful marbled look.
Step 7: Bake
I prefer shallow frying in a pan on the stove rather than baking for the crispiest crust, but if you want to bake, place the cakes on a parchment-lined baking sheet and bake at 400°F for about 20-25 minutes, flipping halfway through to get golden on both sides. For pan-frying, cook each side for about 3-4 minutes until deeply golden and crispy. The smell alone will have you hovering over the stove.
Step 8: Cool & Glaze
Once cooked, transfer the cakes to your paper towel-lined plate to soak up any extra oil. While they’re still warm, brush the tops with melted butter mixed with fresh herbs. This final touch adds that extra glossy, irresistible look and yummy aroma. If you’re serving immediately, you can skip glazing, but it does bring everything together.
Step 9: Slice & Serve
These cakes taste best warm, so slice carefully with a serrated knife or just break them apart with your hands and watch that cheese pull! Serve them with some sour cream or your favorite dipping sauce. I’ve found that a side of fresh greens cuts through the richness, making the whole meal balanced and satisfying.
What to Serve It With
For Breakfast: These cheese stuffed potato cakes pair wonderfully with a hot cup of coffee and a side of crispy bacon or your favorite breakfast sausage. A smear of herb cream cheese or a dollop of sour cream on the side really rounds out the morning plate.
For Brunch: When I’m hosting brunch, I style these on a platter with a small bowl of tangy tomato chutney, fresh avocado slices, and poached eggs on the side. Pair it with a sparkling mimosa for a touch of elegance that’s still super cozy.
As Dessert: I know it sounds odd, but swap the savory cheese for a sweet cream cheese filling mixed with a touch of cinnamon and sugar and dust the tops with powdered sugar for an indulgent after-dinner treat. Serve with a cup of spiced chai or dark roast coffee.
For Cozy Snacks: This recipe shines as a comforting snack alongside a bowl of homemade vegetable soup or chili. I love dipping the cakes into a tangy Greek yogurt and dill sauce. It’s my go-to combo on chilly nights when you want something warm and satisfying but not too heavy.
My family has made it our little tradition to enjoy these on lazy weekend afternoons while binge-watching old movies. Somehow, these cakes turn simple potatoes and cheese into a celebration on a plate.
Top Tips for Perfecting Your Cheese Stuffed Potato Cakes
Potato Prep: My rule of thumb is to cool your potatoes completely before mixing to avoid extra moisture making the batter too loose. For the fluffiest mash, use Russet potatoes and don’t overwork them—too much stirring can turn your mashed potatoes gummy.
Mixing Advice: Always mix wet and dry just until combined to keep the cakes light. Overmixing will make them dense and they won’t crisp up like you want. Trust me, I learned this the hard way after ending up with dense hockey puck patties.
Swirl Customization: When you want to get creative with filling, try swirling in fresh herbs or a dash of smoked paprika on top for that eye-catching marbling effect. Just remember to keep enough potato around the edges to fully seal the cheese in.
Ingredient Swaps: For gluten-free friends, I recommend almond flour or chickpea flour as alternatives, though you might need a little less to keep that perfect texture. I’ve also tested using vegan butter and plant-based cheese, which worked surprisingly well, especially if you’re aiming for a dairy-free option.
Baking Tips: Keep your cakes on the middle rack of the oven for even heat distribution. If pan-frying, don’t crowd the pan—let each cake have room to crisp up nicely. Use a splatter screen if you’re wary of oil spitting, and adjust your heat to medium to avoid them burning too fast.
Glaze Variations: If you want to mix things up, try brushing with a blend of melted butter and a little honey or maple syrup for a sweet-savory touch. For savory, fresh herbs like thyme or rosemary work wonders stirred into the glaze too. If you’re skipping the glaze, a sprinkle of flaky sea salt right after frying elevates them instantly.
Storing and Reheating Tips
Room Temperature: These cakes are best enjoyed fresh but can be stored at room temp for up to 6 hours if covered lightly with foil or a clean towel to keep them from drying out.
Refrigerator Storage: Pop cooled cakes into an airtight container and refrigerate for up to 3 days. I recommend reheating in a toaster oven or skillet to bring back that crispy exterior instead of the microwave, which tends to make them soggy.
Freezer Instructions: To freeze, flash chill the cakes then wrap each one individually in plastic wrap and store in a freezer-safe bag or container for up to 2 months. Thaw overnight in the fridge before reheating on a pan or oven for best texture.
Glaze Timing Advice: If you’re storing them, it’s best to apply glaze right before serving rather than beforehand. The glaze can soften the crispy crust if left on for too long. If you want to store glazed cakes, consider a light glaze or none at all, adding it again fresh after reheating.
Frequently Asked Questions
Final Thoughts
Honestly, these cheese stuffed potato cakes have become my kitchen go-to when I want something that feels special but is totally doable on any given day. They bring warmth, nostalgia, and that little hit of cheesy joy that makes the whole table smile. If you’re the kind of person who loves comfort food with a twist, this recipe really has a way of sneaking into your heart (and belly). Don’t be shy about playing around with cheeses and spices—trust me, every variation feels like a new adventure.
If you’ve made these, I’d love to hear what you tried next or how you served them up. Drop a comment, share a photo, or leave a rating if you feel like spreading the love. Happy cooking, and I can’t wait to hear how your cheese stuffed potato cakes turn out!
cheese stuffed potato cakes
Ingredients
Main Ingredients
- 2 lbs gold potatoes peeled and sliced into small chunks
- 0.67 cup potato starch can substitute with corn starch
- to taste salt and pepper
- 4 oz fontina cheese cubed small, can use mozzarella as alternative
- drizzle olive oil
Instructions
Preparation Steps
- Bring a pot of water to a boil. Add peeled and sliced potatoes along with 1 tsp salt. Cook until potatoes are tender and mashable, approximately 10 minutes.
- Drain potatoes and transfer to a large bowl. Mash mostly smooth. Add potato starch, salt, and pepper. Mix using clean hands until a smooth dough forms.
- Form about 0.25 cup size balls of the potato dough. Flatten each ball, place 2-3 small cubes of cheese in the center, fold and seal, then gently flatten into discs.
- Heat a drizzle of olive oil in a pan over medium-high heat. Fry potato cakes for 3-4 minutes on each side until golden brown. Lower heat if browning too fast. Serve warm.