There’s something so comforting about the smell of freshly baked cake wafting through the house—but what really gets me every time is when it’s light, fluffy, and guilt-free. I remember growing up watching my mom sneak in shredded zucchini to make sweet treats healthier; as a kid, I had no idea what this green stuff in cake even was. Now, years later, I swear by this low fat zucchini swirl cake. It’s got this incredible moistness and subtle sweetness, yet none of that heavy feeling you get from your usual butter-loaded desserts. If you’re anything like me and sometimes crave cake but don’t want to derail your healthy eating, this is your game changer. It’s like the classic marble cake you know and love, but with a veggie-powered twist and way less guilt on your conscience.
What is a low fat Zucchini Swirl Cake?
Think of this as a marriage between a classic marble cake and a sneaky veggie boost. The “zucchini” part might make some people pause, but it’s really just zucchini grated super finely and worked right into the batter to add moisture without any added fat. It’s essentially a low fat cake that still feels decadent and satisfying, but uses zucchini to keep things moist and naturally sweet. The “swirl” comes from a simple cinnamon-spiced filling that you drop in and swirl around to make every slice look like a little work of art. It’s light enough for a snack, but feels special enough for a weekend treat.
Why you’ll love this recipe?
I adore this cake for so many reasons—and not just because I can sneak it to my kids without them even noticing the veggie! First off, the flavor is soft, warm, and inviting—the cinnamon swirl really amps up the cozy vibes and it smells heavenly while baking. When it comes to simplicity, I’ve used this recipe on rushed mornings or as a last-minute dessert and it never lets me down. The ingredients are all pretty basic and budget-friendly, which is great when you’re trying to keep things low cost without compromising on taste. Plus, it’s incredibly versatile—you can eat it plain, with a dollop of yogurt, or even frozen as a sweet little cooler for summer. I’ve also tweaked it using almond milk once, and honestly, it got even creamier without adding fat! What I love most is that it satisfies my cake cravings without the usual heaviness—I actually feel great about serving it to friends and family. It’s sort of like a hug in cake form, but don’t tell anyone the secret’s in the zucchini!
How do I make a low fat Zucchini Swirl Cake?
Quick Overview
Making this low fat zucchini swirl cake is easier than you might think. It starts with grating zucchini and prepping a simple, sweet batter. Then, you mix up a cinnamon-spiced filling that’s swirled through the batter to create that gorgeous marbled effect we all secretly love. The best part? You don’t have to babysit it in the oven—the baking window is forgiving, so it won’t dry out if you get a little delayed. Plus, no heavy creaming of butter here, so mixing is quick and easy. Trust me, this cake has been tested on my busiest days, and it still comes out like a dream!
Ingredients
For the Main Batter:
- 1 ½ cups all-purpose flour (sifted for best texture)
- 1 tsp baking powder
- ½ tsp baking soda
- ½ tsp salt
- ½ cup granulated sugar (feel free to use organic or coconut sugar too)
- 1 cup finely grated zucchini (squeeze out excess water for best results)
- ¾ cup unsweetened almond milk (or skim milk works well)
- 1 large egg (or vegan flax egg for an eggless version)
- 1 tsp vanilla extract
- 2 tbsp plain non-fat Greek yogurt (adds moisture without fat)
For the Filling:
- ¼ cup packed brown sugar (light or dark, your call!)
- 1 tsp ground cinnamon
- 1 tbsp unsweetened applesauce (helps hold filling together)
- A pinch of nutmeg (optional, but highly recommended for warmth)
For the Glaze:
- ½ cup powdered sugar, sifted
- 1 tbsp fresh lemon juice (adjust for consistency)
- 1 tsp vanilla extract
You want the glaze thin enough to drizzle but not runny enough to pool, so add lemon juice slowly and taste as you go.
Step-by-Step Instructions
Step 1: Preheat & Prep Pan
First things first, set your oven to 350°F (175°C). I always line my 9×5” loaf pan with parchment paper on the bottom and lightly spray the sides to make sure nothing sticks—this cake can be delicate when warm and you don’t want to lose any of those gorgeous swirls when you slice it.
Step 2: Mix Dry Ingredients
In a large bowl, whisk together the flour, baking powder, baking soda, salt, and sugar until everything’s nicely combined. This dry mix is the base of your batter, so make sure to break up any lumps—sifting helps if you have time, but a good whisk does the trick.
Step 3: Mix Wet Ingredients
In a separate bowl, beat the egg gently, then stir in the almond milk, vanilla extract, Greek yogurt, and grated zucchini. You’ll notice the zucchini adds a bit of moisture and little flecks of green that promise something special inside. The key is to keep this mix smooth without overworking it.
Step 4: Combine
Pour the wet ingredients into the dry and fold just until combined. Don’t overmix here—you want to keep the batter a bit lumpy so the cake stays tender. I’ve learned the hard way that overmixing leads to a tougher, denser texture, and nobody wants that in a cake that celebrates lightness.
Step 5: Prepare Filling
Mix the brown sugar, cinnamon, applesauce, and nutmeg in a small bowl. This will be your gooey, fragrant swirl that breaks up the smooth batter. The applesauce acts like a binder to keep it from sinking straight to the bottom, a little trick I stumbled on to keep the swirl perfectly placed.
Step 6: Layer & Swirl
Pour half of the batter into your prepared pan, then dollop half the cinnamon filling on top. Repeat with the remaining batter and filling. Grab a butter knife or skewer and gently swirl it through the batter—don’t go too crazy here, a few lazy loops work best to get that marbled effect.
Step 7: Bake
Bake for 45-50 minutes or until a toothpick inserted into the center comes out clean or with just a few moist crumbs. My oven tends to run a little hot, so I start checking at 45 minutes. The smell alone here is enough to call everyone to the kitchen. If your cake peaks too quickly, tent it loosely with foil—air circulation is your friend.
Step 8: Cool & Glaze
Let the cake cool for about 15 minutes in the pan before transferring to a wire rack. Once completely cool, whisk the glaze ingredients together and drizzle over the top. I like to zig-zag the glaze so every slice gets just a hint of sweet tang. This step feels fancy but is seriously simple and elevates the cake into something a little special.
Step 9: Slice & Serve
Use a serrated knife for clean cuts and slice to your preferred thickness. This cake tastes great at room temp but is also wonderful chilled—my family is divided on which they prefer, so honestly, try both. Serve with a cup of tea or coffee, and watch those seconds disappear.
What to Serve It With
For Breakfast: Pair this cake with a hot mug of black coffee or cinnamon-spiced latte. A spoonful of Greek yogurt or cottage cheese on the side adds a touch of protein to kickstart the day.
For Brunch: Place thin slices on a pretty plate, garnish with fresh berries and a sprig of mint. Champagne or a sparkling rosé makes the whole thing feel festive—even on weekdays.
As Dessert: Serve slightly warmed alongside a scoop of vanilla frozen yogurt or drizzled with a dollop of honey. The warmth softens the glaze and makes every bite melt in your mouth.
For Cozy Snacks: This cake is a lifesaver on busy afternoons with kids. A glass of cold milk or almond milk, and you’ve got a comforting snack that’s low fat but feels indulgent. My kids actually ask for seconds, which is always my green light that it’s a winner.
Top Tips for Perfecting Your Low Fat Zucchini Swirl Cake
Zucchini Prep: Shred your zucchini finely and always squeeze out any excess moisture using a clean kitchen towel or cheesecloth—too much liquid will make the batter runny. I do this step twice if I’m in a hurry, because soggy batter is no fun.
Mixing Advice: Fold the wet and dry ingredients gently—lumps are okay! Overmixing is the most common mistake here, and it can turn your cake chewy rather than tender. Stop as soon as no more flour streaks are visible.
Swirl Customization: Want a bolder access on cinnamon? Add a bit more brown sugar or a pinch of ground cloves for a warm spicy note. For more visual drama, try adding a few drops of natural food coloring to the filling before swirling. I did a pumpkin spice version once and the swirl was thick and rich.
Ingredient Swaps: Coconut sugar works beautifully instead of granulated sugar and lends a caramel-like depth. If you want to avoid eggs, a flax or chia egg (1 tbsp ground seed plus 3 tbsp water) keeps it moist and fluffy. Dairy-free yogurt or an extra splash of almond milk keeps this cake vegan-friendly and low fat.
Baking Tips: Place your oven rack in the middle position and use an oven thermometer if you can. I’ve had ovens at home that run 25 degrees off and it really affects bake time. If the cake starts browning too fast on top, cover loosely with foil after about 30 minutes.
Glaze Variations: I sometimes swap lemon juice for orange, or add a pinch of cinnamon to the glaze for an extra punch. The consistency should be smooth but slightly thick—if it gets too runny, just add a teaspoon more powdered sugar until you hit the sweet spot. Drizzle generously and let it harden for 10 minutes before serving.
Storing and Reheating Tips
Room Temperature: Keep the cake covered loosely with a clean kitchen towel or in a cake dome for up to 2 days. It stays moist without turning soggy, but I wouldn’t leave it out longer than that as it’s fresh and lacks preservatives.
Refrigerator Storage: Transfer leftovers into an airtight container or cover the cake well with plastic wrap. It’ll keep nicely for up to 4 days. I always bring it back to room temp before serving to bring out those nuanced flavors again.
Freezer Instructions: This cake freezes beautifully for up to 3 months. Slice it first, wrap each piece tightly in plastic wrap and store in a freezer bag. To thaw, just leave slices on the counter for about an hour or pop them in the microwave for a quick warm-up.
Glaze Timing Advice: If freezing, wait to glaze until you’re ready to serve—the glaze can get a bit sticky or crack if frozen. For fridge storage, glaze right before serving to keep it fresh and shiny.
Frequently Asked Questions
Final Thoughts
This low fat zucchini swirl cake has become a staple in my kitchen because it balances that need for comfort food with a pretty healthy approach. It’s light but not boring, easy enough for a weekday treat, and it sneaks in veggies in a way that everyone—kids included—can’t argue with. I love that it’s a little different from your usual cake but still hits every note of classic homemade goodness. If you dip your toes into this recipe, I bet you’ll find yourself coming back to it over and over, especially when you want something sweet without any heavy guilt. Don’t forget to leave me a comment or share your own favorite variations—I can’t wait to hear your twist on this one. Happy baking!
low fat
Ingredients
Main Ingredients
- 0.25 cup granulated sugar
- 0.25 cup brown sugar (no packed)
- 3 tablespoons coconut oil (or butter, melted)
- 1 large egg
- 2 tablespoons applesauce
- 1 teaspoon vanilla extract
- 1 cup all purpose flour
- 0.25 teaspoon baking soda
- 0.125 teaspoon kosher salt
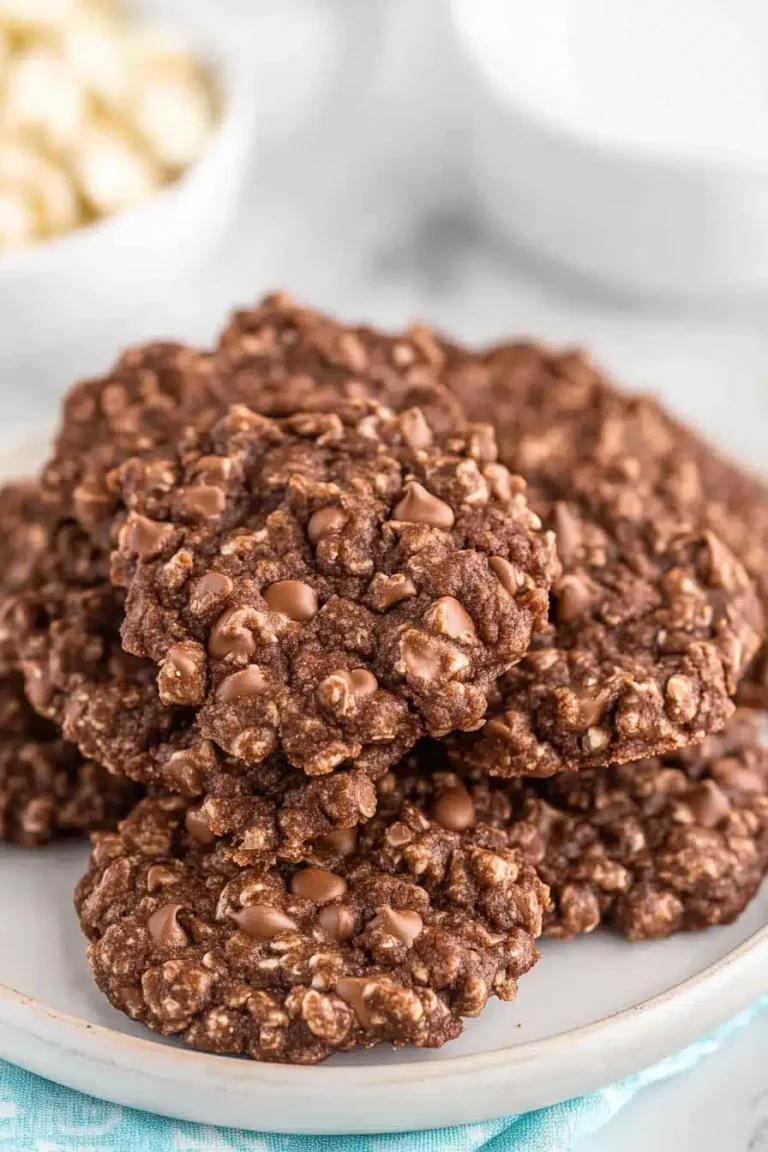
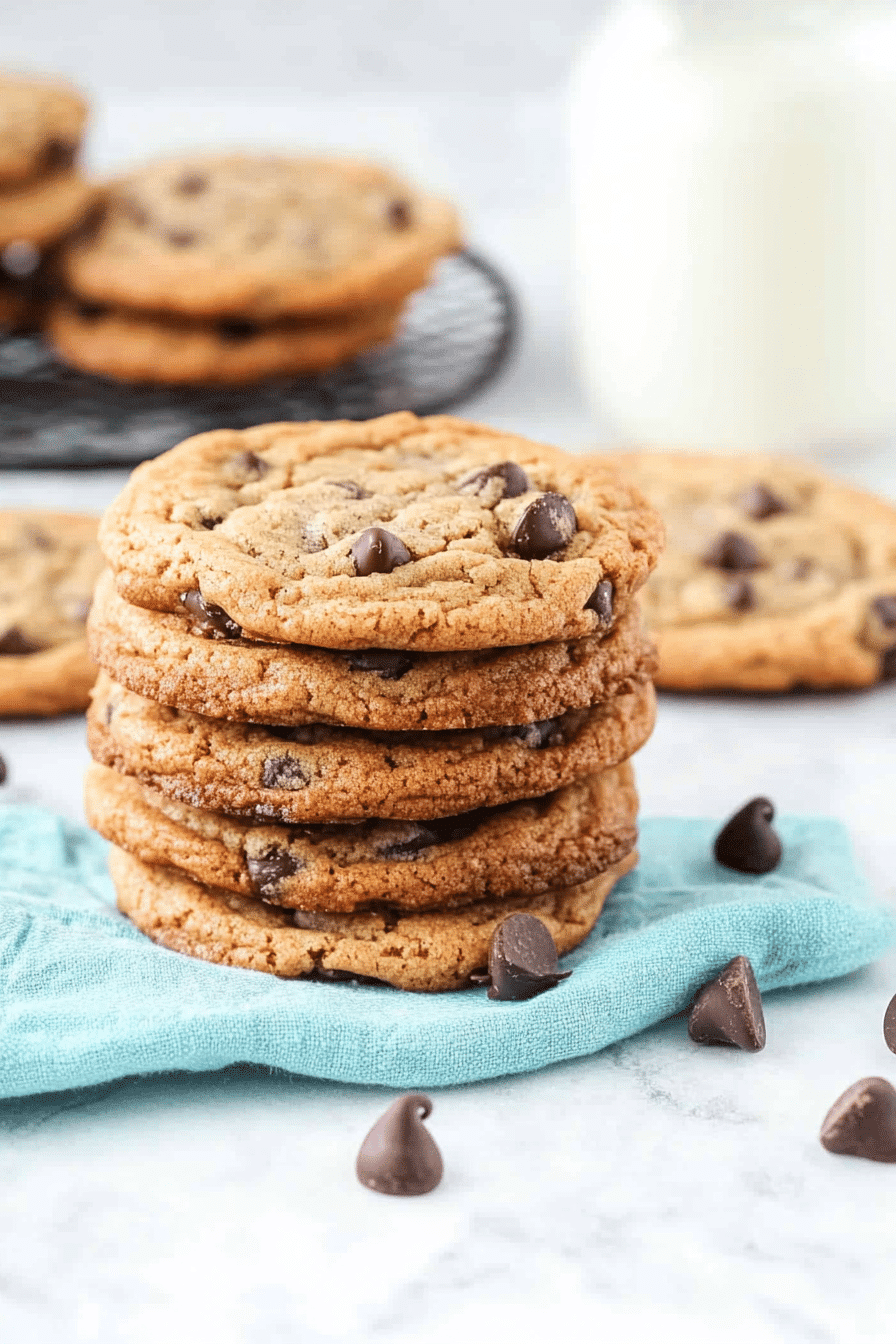
- 0.5 cup chocolate chips (sugar-free such as Lily's) 3 oz total
- sea salt optional for topping
Instructions
Preparation Steps
- Preheat the oven to 350F. Line two cookie sheets with parchment paper and lightly spray with cooking spray.
- In a large mixing bowl, combine the flour, baking soda and salt and stir to blend.
- In another bowl, whisk the sugars, coconut oil, egg, applesauce and vanilla together until light and fluffy.
- Whisk the dry ingredients into the wet ingredients in two additions until the batter is very well blended. If the batter looks crumbly, add just a drop of water at a time until smooth.
- Fold in chocolate chips. Drop by level tablespoons about 1 inch apart onto the prepared baking sheets.
- Bake 8 to 10 minutes. Remove from oven, top with sea salt if using, and let stand 5 minutes before transferring to wire racks to cool.