There are some recipes that just stick with you, you know? The ones that become your go-to, the ones you can whip up without even thinking, the ones that make your kitchen smell like pure heaven and have everyone begging for more. For me, that recipe is this Baked French Toast. It’s more than just breakfast; it’s a memory. I remember my mom making something similar on lazy Sunday mornings when I was a kid, the aroma wafting upstairs and pulling me out of bed. It’s got that perfect balance of custardy, eggy goodness and sweet, caramelized bread. Honestly, compared to wrestling with individual slices of French toast that can sometimes turn out soggy or burnt, this baked version is a total game-changer. It’s the kind of dish that feels like a special treat but is surprisingly simple to pull off, making it my absolute favorite for any occasion, really.
What is baked French toast?
So, what exactly is Baked French Toast? Think of it as all the cozy, delicious elements of classic French toast, but instead of frying each slice individually in a pan, we’re essentially creating a giant, glorious casserole of it. We take slices of bread, soak them in a rich, creamy custard, and then bake the whole thing together in one dish. It’s a bit like a bread pudding meets French toast, and oh boy, is it good. The name itself is pretty straightforward, but what it represents is pure comfort food magic. It’s less about fussing over individual pieces and more about creating a harmonious blend of textures and flavors all baked to golden perfection. It’s the ultimate crowd-pleaser, perfect for those mornings when you want something spectacular without all the individual stovetop drama.
Why you
Okay, let’s talk about why this Baked French Toast recipe is about to become your new best friend in the kitchen. First off, the FLAVOR. It’s unbelievably rich and satisfying. The bread gets perfectly custardy on the inside while developing a slightly crisp, golden-brown edge. It’s sweet, but not overly so, and the hint of cinnamon and vanilla is just divine. Then there’s the SIMPLICITY. Seriously, this is where it shines. You mix up a batter, layer it with bread, and let the oven do all the hard work. No more standing over a hot stove, flipping slices one by one. It’s the ultimate “set it and forget it” breakfast, especially on weekends. And let’s not forget COST-EFFICIENCY. It uses pantry staples like bread, eggs, milk, and a little sugar. It’s a fantastic way to use up slightly stale bread before it goes to waste, turning humble ingredients into something truly spectacular. Plus, it’s incredibly VERSATILE. You can jazz it up with different fruits, nuts, or even a swirl of jam. It’s perfect for a lazy Sunday brunch, a holiday breakfast, or even a sweet dessert when you’re craving something comforting. What I love most about this is the pure, unadulterated joy it brings. It’s the kind of dish that fills your home with the most wonderful aroma and makes everyone gather around the table, eager to dig in. It’s a hug in a baking dish, really, and that’s something truly special.
How do you bake French toast?
Quick Overview
This Baked French Toast is all about simplicity and deliciousness. You’ll whisk together a luscious custard, soak thick slices of your favorite bread until they’re wonderfully saturated, and then bake it all together until it’s puffed up and golden. It’s designed to be mostly hands-off, letting the oven create a perfectly cooked, evenly moist dish every single time. You can prep this ahead of time too, which is a lifesaver on busy mornings. It’s the kind of recipe that delivers maximum flavor and satisfaction with minimal effort, making it a true win-win.
Ingredients
For the Main Batter:
Let’s start with the heart of our dish: the custard! For this, I always go for good quality, thick-cut bread. Brioche or challah are heavenly here because they’re rich and eggy to begin with, but even a good sourdough or a sturdy white bread works beautifully. You’ll need about 8-10 thick slices. Then, for the custard itself: 6 large eggs, 2 cups of whole milk (or you can use a mix of milk and half-and-half for extra richness – I’ve tried almond milk and it works too, just a touch less creamy!), ½ cup of granulated sugar (you can adjust this a bit depending on your sweetness preference), 1 teaspoon of ground cinnamon (don’t skimp on this!), ½ teaspoon of ground nutmeg (just a whisper!), and 1 teaspoon of pure vanilla extract. A pinch of salt is crucial too, as it balances the sweetness and really makes all the flavors pop.
For the Filling:
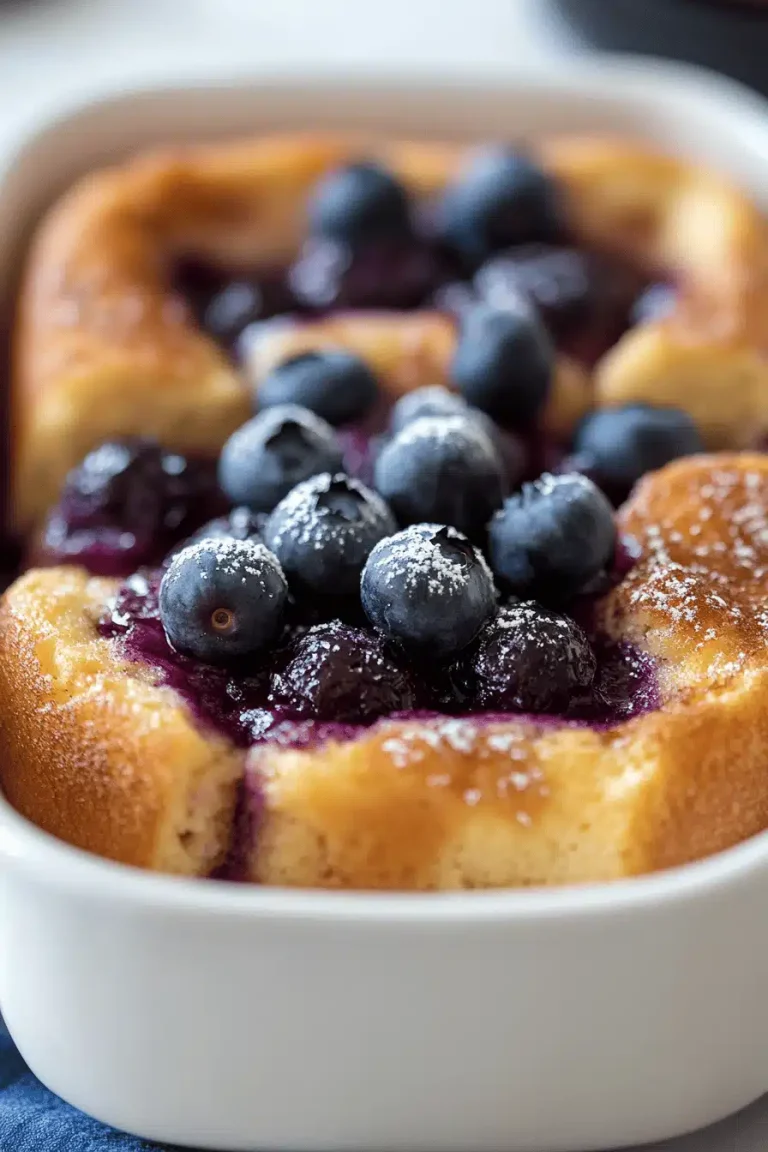
This is where you can get creative! A classic filling is simple and delicious. I often use about 1 cup of fresh or frozen berries (blueberries, raspberries, or a mix are fantastic). If using frozen, no need to thaw them first. You can also add a sprinkle of chopped nuts like pecans or walnuts for a little crunch, or even a few chocolate chips if you’re feeling indulgent! Some people like to swirl in a bit of jam or even some softened cream cheese for a richer texture.
For the Glaze:
The glaze is the crowning glory! It adds that extra touch of sweetness and shine. I usually make a simple powdered sugar glaze: 1 cup of powdered sugar, whisked with 2-3 tablespoons of milk or heavy cream until it’s smooth and pourable. You can add a tiny splash of vanilla extract to this too. For a little tang, a squeeze of lemon juice works wonders. If you want to make a maple glaze, just whisk together powdered sugar with maple syrup until you get the right consistency. Aim for something that drips nicely but isn’t too thin.
Step-by-Step Instructions
Step 1: Preheat & Prep Pan
First things first, let’s get that oven ready. Preheat it to 350°F (175°C). Now, grab a baking dish – a 9×13 inch dish is perfect for this amount. You’ll want to grease it really well. I like to use butter or cooking spray, just make sure every nook and cranny is covered so nothing sticks. This step is super important for getting that lovely golden crust all around.
Step 2: Mix Dry Ingredients
In a large bowl, we’re going to whisk together our dry custard ingredients. Add the granulated sugar, cinnamon, nutmeg, and that crucial pinch of salt. Give them a good whisk to combine everything evenly. This ensures that your spices and sugar are distributed throughout the custard, so every bite is equally delicious.
Step 3: Mix Wet Ingredients
Now, crack your 6 large eggs into the bowl with the dry ingredients. Add your milk (or milk and cream mixture) and the vanilla extract. Grab a whisk and beat everything together until it’s smooth and well combined. You want a nice, homogenous mixture – no streaks of egg white should be visible. Don’t over-beat it, just get it nicely blended.
Step 4: Combine
This is where we bring the bread and the custard together. Take your thick slices of bread and arrange them in a single layer in your prepared baking dish. Don’t worry if they overlap a little; that’s okay. Now, pour that glorious custard mixture evenly over the bread. Make sure each slice gets a good soaking. You can gently press down on the bread with a spatula to help it absorb more of the custard. Let it sit for at least 15-20 minutes to really soak in. If you have time, you can even let it soak for longer, or cover and refrigerate it overnight for an even richer flavor and more tender texture. This soaking step is key to that perfect custardy interior.
Step 5: Prepare Filling
While the bread is soaking, let’s get our filling ready if you’re using one. If you’re using berries, just have them ready to go. If you’re adding nuts or chocolate chips, give them a quick chop if needed. If you’re using jam, get a spoonful ready. This is the fun part where you can customize it to your liking!
Step 6: Layer & Swirl
Now, we’ll add our filling. If you’re using berries, gently scatter them over the soaked bread. If you’re using jam, you can dollop it randomly over the top and then use a knife or skewer to gently swirl it through the custard. For nuts or chocolate chips, just sprinkle them evenly. Don’t go too crazy with the filling; you want the bread to still bake up nicely.
Step 7: Bake
Pop that beautiful dish into your preheated oven. Bake for about 35-45 minutes, or until the French toast is puffed up, golden brown, and a knife inserted into the center comes out clean. The exact time will depend on your oven and how thick your bread is. Keep an eye on it, especially towards the end, to make sure the top doesn’t get too dark before the inside is cooked. If it’s browning too quickly, you can loosely tent it with foil.
Step 8: Cool & Glaze
Once it’s done, carefully take it out of the oven. Let it cool for about 5-10 minutes before you even think about glazing or slicing. This lets it set up a bit. While it’s cooling, whisk together your glaze ingredients until smooth. Drizzle or spread the glaze all over the warm Baked French Toast. Watch it drip down the sides – it’s mesmerizing!
Step 9: Slice & Serve
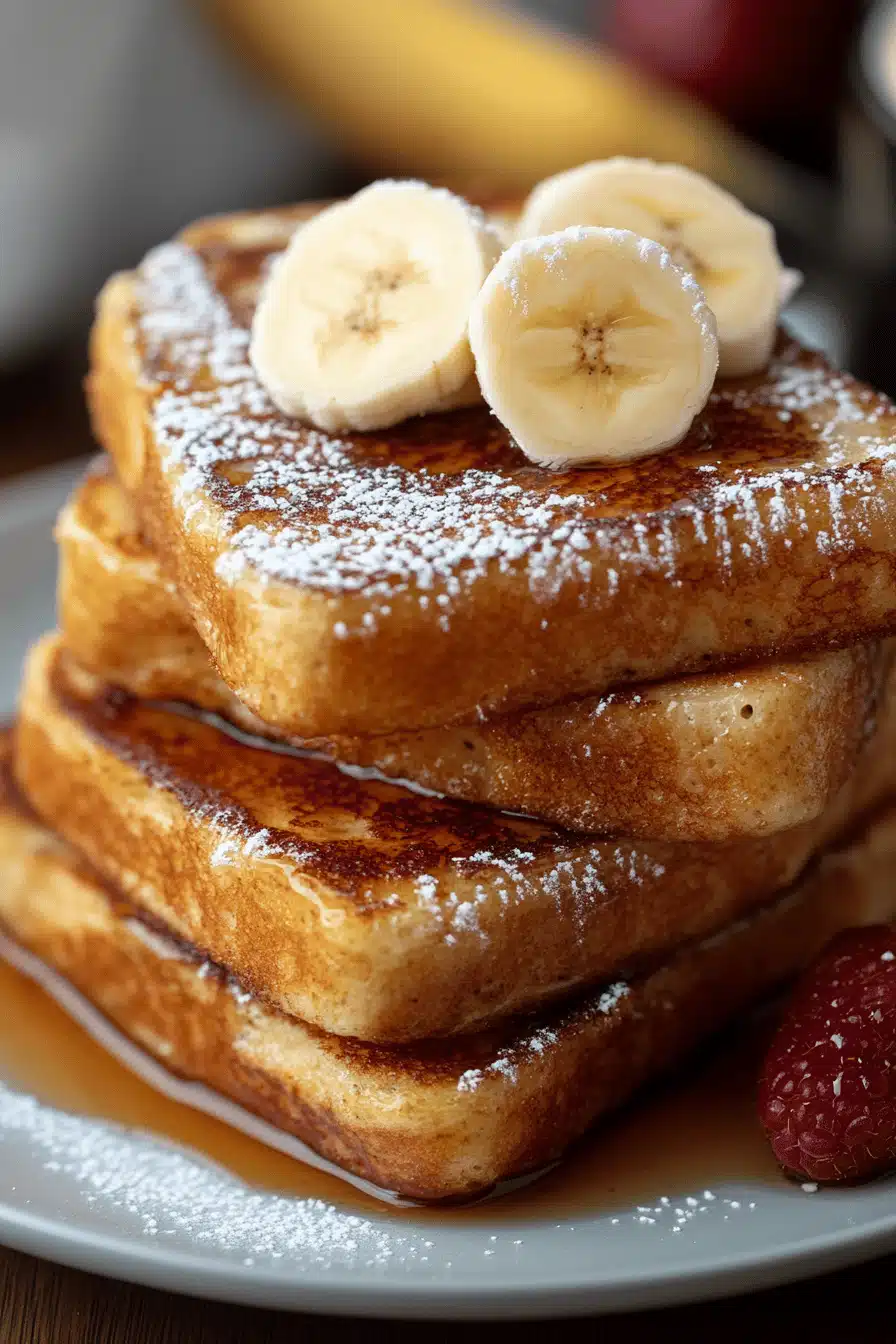
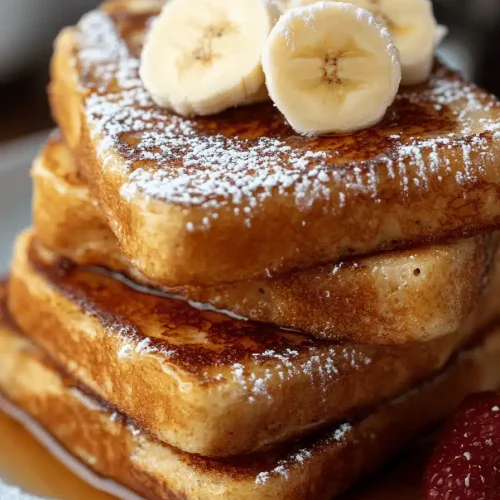
Now for the best part! Slice your Baked French Toast into generous portions. Serve it warm, perhaps with a dusting of powdered sugar, a dollop of whipped cream, or some extra fresh fruit. It’s absolute perfection on a plate.
What to Serve It With
This Baked French Toast is so versatile, it’s a dream to pair with just about anything! For a simple, cozy breakfast, a hot cup of coffee or a steaming mug of tea is all you really need. The rich, sweet flavors of the French toast are perfectly complemented by a warm beverage. For a more elegant brunch spread, I love to serve it alongside some crispy bacon or savory breakfast sausages. A fresh fruit salad also adds a lovely brightness to the meal. If you’re feeling fancy, a mimosa or a glass of sparkling rosé is always a hit! And as a dessert? Oh boy, it’s a winner. A scoop of vanilla bean ice cream or a dollop of crème fraîche is divine. For a more casual, cozy snack, especially on a chilly afternoon, I’ll often just have a small slice with a glass of cold milk. My family tradition on holidays is to serve it with a side of maple-candied bacon – the salty and sweet combination is just out of this world! We also love adding a sprinkle of toasted pecans on top for extra texture.
Top Tips for Perfecting Your [Recipe Name]
Over the years, I’ve picked up a few tricks that make this Baked French Toast absolutely foolproof. First, when it comes to the bread, don’t be afraid of it being a day or two old. Stale bread actually absorbs the custard better without becoming mushy. If your bread is super fresh and soft, consider toasting it lightly before soaking to give it a bit more structure. For the custard, I always emphasize using whole milk for the richest flavor, but I’ve tested it with 2% and even skim, and it still turns out pretty well, just a little less decadent. And don’t forget that pinch of salt – it’s a flavor enhancer! When you’re mixing the wet and dry ingredients, resist the urge to overmix once you combine them. You just want to bring everything together until it’s *just* combined. A few small lumps are perfectly fine and actually preferable to an overly tough texture. For the filling, a gentle hand is key. If you’re swirling jam, don’t overdo it, or you might end up with pockets of uncooked batter. When it comes to baking, every oven is a little different. I always recommend starting to check for doneness around the 35-minute mark. A clean knife or skewer inserted into the thickest part should come out clean. If the top is browning too quickly, simply loosely tent the dish with aluminum foil. For the glaze, the consistency is everything. You want it thick enough to coat but thin enough to drip beautifully. If it’s too thick, add milk or cream a teaspoon at a time. If it’s too thin, add more powdered sugar. My secret for a really impressive swirl? Use a toothpick or a butter knife and make gentle, figure-eight motions through the batter and filling. It creates beautiful marbled patterns. And if you want to elevate it even further, try infusing your milk with spices like cardamom or a bit of orange zest for a really unique flavor profile. These little tweaks can make a big difference!
Storing and Reheating Tips
This Baked French Toast is wonderful for leftovers, which is great because sometimes we make a little too much (though that’s rare!). If you have any that miraculously survived, you can store it at room temperature for up to two hours, but honestly, I prefer to get it into the fridge fairly quickly. For refrigerator storage, let it cool completely first, then cover the baking dish tightly with plastic wrap or transfer individual slices to an airtight container. It will stay fresh and delicious in the fridge for about 2-3 days. Make sure it’s properly sealed to prevent it from drying out or picking up other fridge odors. If you want to freeze it, this recipe freezes beautifully! Again, let it cool completely. You can either freeze the entire dish (if you have a freezer-safe one) or cut it into individual portions and wrap them tightly in plastic wrap, then place them in a freezer bag. It can be stored in the freezer for up to 2-3 months. When you’re ready to reheat, from the fridge, you can gently warm individual slices in a toaster oven or microwave until heated through. For frozen portions, it’s best to thaw them overnight in the refrigerator first, then reheat as you would the refrigerated leftovers. Alternatively, you can reheat directly from frozen in a 300°F (150°C) oven for about 15-20 minutes, or until warmed through. If you’ve already glazed your French toast, it will still be delicious, but if you plan to freeze it, I often recommend glazing it *after* reheating to ensure the glaze is fresh and shiny. That’s just a personal preference, though!
Frequently Asked Questions
Final Thoughts
I really hope you give this Baked French Toast recipe a try. It’s one of those dishes that just brings pure joy, from the moment you start smelling it bake to the last delicious bite. It’s the perfect example of how simple ingredients can come together to create something truly magical. It’s easy enough for a weeknight treat, impressive enough for company, and nostalgic enough to remind you of happy times. If you love this, you might also enjoy my recipes for Overnight Oats or my Fluffy Pancakes, as they share that same cozy breakfast vibe. I can’t wait to hear how yours turns out! Please leave a comment below and let me know your favorite variations or any tips you discovered. And if you share a picture on social media, tag me – I’d love to see it!
Baked French Toast
Ingredients
Main Ingredients
- 8 oz cream cheese softened
- 4 large eggs
- 1.25 cups whole milk
- 0.25 cup maple syrup
- 1 tsp vanilla extract
- 0.5 tsp ground cinnamon
- 1 tsp orange zest
- 1 loaf stale bread (French baguette) sliced, about 14 slices
- powdered sugar for garnish
- sliced strawberries optional garnish
- chopped nuts optional garnish
- maple syrup for serving, optional
Instructions
Preparation Steps
- Butter or lightly grease a 9x13 baking dish. Arrange the bread slices in the baking dish and set aside.
- Cream the softened cream cheese in a mixing bowl using an electric mixer. Add the eggs and continue mixing until combined. Mix in milk, maple syrup, vanilla extract, cinnamon, and orange zest until thoroughly incorporated.
- Pour the cream cheese custard mixture evenly over the arranged bread slices.
- Cover the baking dish and refrigerate overnight. If baking the same day, let the dish stand for 20 to 30 minutes before baking.
- Preheat the oven to 350°F (175°C). Remove the baking dish from the refrigerator and allow it to stand on the kitchen counter for 15 minutes.
- Place the baking dish in the oven and bake uncovered for 35 to 40 minutes, or until the custard is set and the top is golden brown.
- Remove from oven, sprinkle with powdered sugar, and optionally garnish with sliced strawberries and chopped nuts. Serve warm with maple syrup if desired.