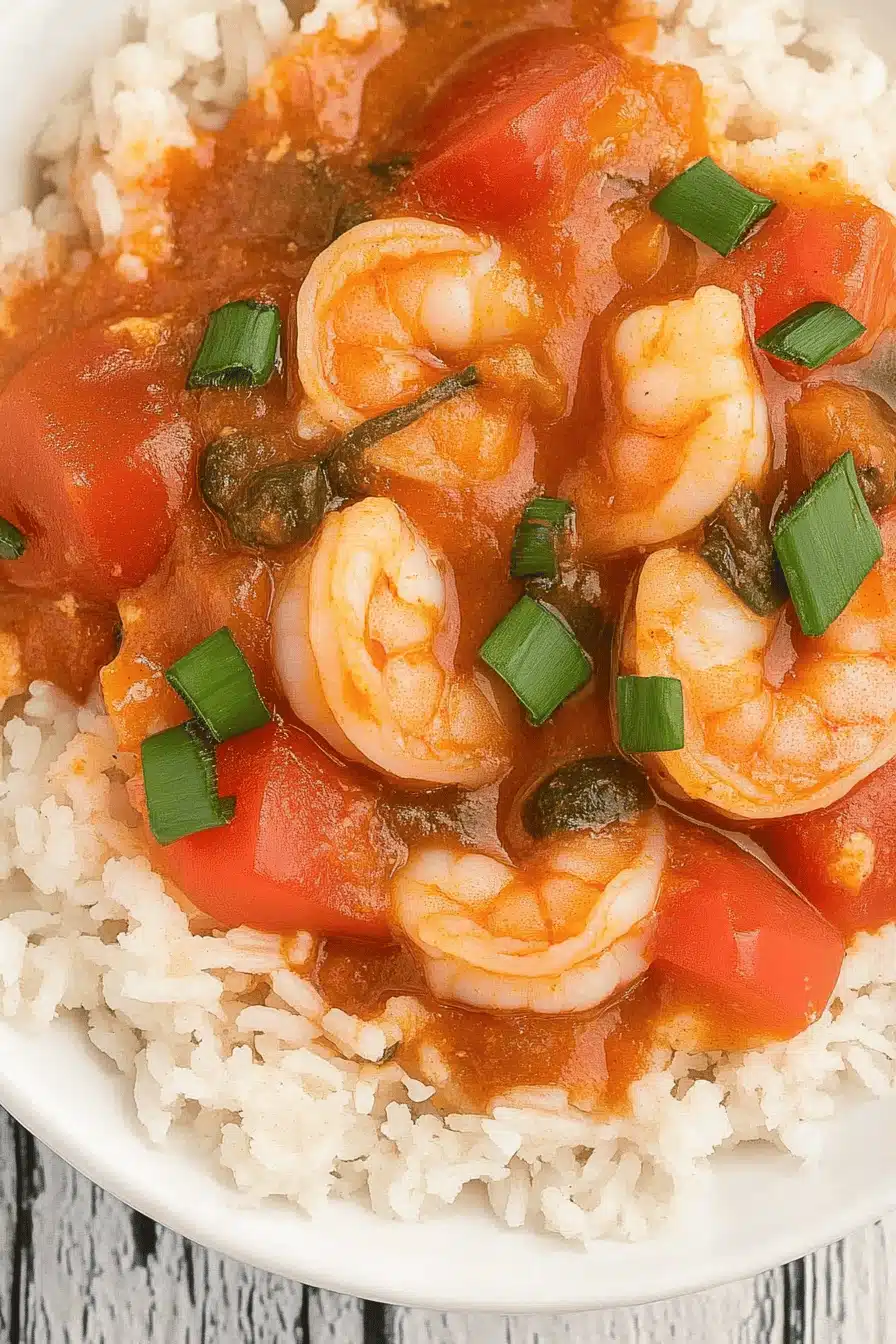
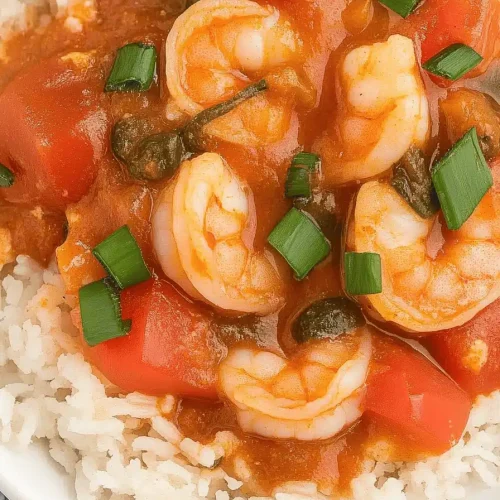
There’s something about shrimp rice that instantly takes me back to those lively Sunday dinners at my grandma’s house—when the whole family gathered around a table filled with fragrant dishes, laughter filling the air. This recipe, bursting with the warmth of sautéed shrimp, fluffy rice, and just the right touch of spices, is one I’ve made so many times I could do it with my eyes closed. It’s simple, honest food, but the flavor? Wow, it’s like a cozy hug on a plate. If you’ve ever loved a comforting shrimp stir-fry or that delicious garlic butter shrimp you find at your favorite seafood spot, then you’re going to fall hard for this homemade shrimp rice. Plus, it’s so easy to throw together on a weeknight when everyone’s starving but you’re short on time.
What is shrimp rice?
Think of shrimp rice as a one-pan wonder that blends tender shrimp and perfectly cooked rice into a dish that’s both hearty and light. It’s essentially a savory rice bowl where the shrimp are the star, seeping their briny sweetness into every grain of rice. The concept isn’t too fancy—just shrimp cooked with a mix of garlic, onions, and seasonings, folded into fluffy rice that soaks up all the goodness. In many cultures, shrimp rice is a go-to comfort food, and it’s as approachable as your favorite fried rice but with a fresher, cleaner vibe. It’s a dish that’s as homey as macaroni and cheese, but with that fresh ocean touch that shrimp brings.
Why you’ll love this recipe?
What I love most about this shrimp rice recipe is how it manages to strike that perfect balance between deeply flavorful and totally fuss-free. You really get the juicy pops of shrimp paired with the aromatic rice infused with garlic and a hint of lemon that brightens every bite. It’s one of those dishes that’s simple but feels like you put in way more effort—like you can whisper “I whipped up something special,” but it barely takes time at all. Plus, shrimp cook so fast, so dinner’s ready before you know it, and you can even customize this with whatever veggies or herbs happen to be in your fridge. I’m always amazed at how this dish comes together for a fraction of the price of takeout but tastes way better. And if you’re familiar with regular fried rice, you’ll appreciate how much lighter and fresher this shrimp rice feels, yet it still fills you right up.
My kids actually ask for seconds every single time I make this, which is kind of my favorite validation. Bonus points: it reheats beautifully for lunch the next day without drying out. I can’t tell you how many busy nights this one’s saved me, and it’s so versatile you can tweak it into a spicy, tangy, or herby version depending on your mood. Trust me, once you try this, it’ll probably become a staple in your cooking rotation, too.
How do I make Shrimp Rice?
Quick Overview
Making shrimp rice is a breeze. You start by cooking your rice separately so it’s fluffy and not mushy. Then you sauté your shrimp with garlic and onions until they’re just pink and juicy. The magic happens when you toss everything together in your pan, letting the rice soak up the flavorful juices from the shrimp and seasoning. The whole process is quick—perfect for those nights when time’s tight but you want something satisfying. Plus, this method keeps the shrimp tender and prevents the rice from turning sticky, which I’ve learned after a few failed experiments myself.
Ingredients
For the Rice:
- 1 12 cups jasmine or basmati rice (I prefer jasmine for the subtle floral aroma)
- 3 cups water or low-sodium chicken broth (broth amps up flavor without extra effort)
- Pinch of salt
For the Shrimp:
- 1 lb. medium or large shrimp, peeled and deveined (fresh is best but frozen works fine)
- 3 cloves garlic, minced (garlic is non-negotiable here for that punch)
- 1 small onion, finely chopped
- 1 tbsp olive oil or butter (butter gives a buttery richness, olive oil keeps it lighter)
- ½ tsp smoked paprika (adds gentle smokiness that you won’t want to skip)
- Salt and freshly cracked black pepper to taste
- Juice of half a lemon (just a squeeze to brighten things up)
Optional Freshness & Extras:
- Chopped fresh parsley or cilantro for garnishing
- Chili flakes or hot sauce for those who like a little kick
- Optional veggies like bell peppers or peas (great way to sneak in color and nutrition)
Step-by-Step Instructions
Step 1: Preheat & Prep Pan
Start by heating a large skillet over medium heat. Add your oil or butter—this is where your shrimp will get that lovely sear, so don’t rush this step. A hot pan ensures they cook quickly and evenly without turning rubbery. While your pan preheats, have your shrimp cleaned and seasoning ready to go.
Step 2: Cook Rice Separately
Bring your water or broth to a boil in a medium pot, add the rice and a pinch of salt, cover, and reduce to a gentle simmer. Let it cook without peeking much until the liquid’s absorbed and the rice is tender—about 15 minutes. I learned the hard way that lifting the lid too often steals the steam and could lead to dry rice.
Step 3: Sauté the Shrimp and Aromatics
Drop the garlic and onions into the hot pan first with a bit of oil or butter. Cook until softened and fragrant, about 2-3 minutes. Then add shrimp, sprinkle with paprika, salt, and pepper, and sauté until they turn opaque and pink—this usually takes just 3-4 minutes depending on size. Don’t overcook; shrimp get rubbery fast, and nobody wants that.
Step 4: Combine and Flavor
Once your shrimp are just done, squeeze in the lemon juice and give the pan a quick stir to make sure everything’s coated in those lovely flavors. If you’re adding extra veggies, toss them in now and give them a quick sauté until just tender.
Step 5: Fold in the Rice
Fluff your cooked rice with a fork to separate the grains, then add it straight to the shrimp pan. Toss everything together gently so the rice picks up the garlicky, buttery sauce left behind. This step is fun because you’ll see how fluffy the rice stays and how it glistens with flavor.
Step 6: Final Touches
Finish off by adding fresh herbs and, if you like heat, a sprinkle of chili flakes or a splash of your favorite hot sauce. Give it one last gentle toss and you’re ready to serve.
Step 7: Serve Warm & Enjoy
This dish is best eaten right away while the shrimp are juicy and the rice is fluffy. The aroma alone is a total magnet—it’ll have everyone hovering nearby eager for seconds.
What to Serve It With
For Breakfast: Although not your typical breakfast, shrimp rice makes an adventurous, protein-packed morning dish — pair it with a cup of robust black coffee or a light herbal tea to brighten your start.
For Brunch: Serve shrimp rice alongside a crisp green salad tossed with a lemon vinaigrette. A mimosa or citrus-forward white wine complements the lemony notes beautifully.
As Dinner: This shrimp rice feels just right for casual dinners—team it up with roasted asparagus, grilled corn, or even garlic butter green beans for a round, satisfying meal.
For Cozy Snacks: When you’re craving something simple and comforting, scoop this into lettuce wraps or warm tortillas for an easy handheld snack that’s both filling and flavorful.
For me, shrimp rice is a nostalgic dish, often accompanied by my favorite chipotle lime aioli or a simple squeeze of extra lemon. My family has this little tradition of pairing it with cold lemonade when the summer heat is relentless—it’s pure comfort.
Top Tips for Perfecting Your Shrimp Rice
Rice Cooking: Always rinse your rice before cooking to wash away excess starch. This keeps the grains from sticking together and gives you that perfect fluffy texture.
Shrimp Prep: Pat your shrimp dry before cooking to ensure they sear properly instead of steaming in the pan. Fresh shrimp add the best flavor, but good-quality frozen shrimp thawed properly works great.
Avoid Overcooking: Shrimp are the most sensitive part here—cook them just until pink and opaque, or they get rubbery and tough. I always set a timer to avoid distractions.
Swirling Flavors: Adding a final squeeze of lemon brightens the whole dish ridiculously well; don’t skip it. It’s that little punch of fresh acidity that really lifts everything.
Ingredient Swaps: If you want to go gluten-free, use gluten-free tamari or soy sauce if adding extra seasoning. You can swap jasmine rice for brown rice, though you’ll need to cook it longer and adjust liquids accordingly.
Baking Alternative: If you want a different twist, try incorporating the shrimp and rice into stuffed peppers or baked rice casseroles for warming variations.
Extras to Try: Sauté some diced bell peppers or snap peas with your shrimp for extra crunch and color. Also, a handful of toasted cashews tossed in at the end adds an unexpectedly delightful texture contrast.
I learned early on that stirring the rice too much after it hits the pan can overly break it down—gently folding keeps the texture intact, making your shrimp rice look as good as it tastes.
Storing and Reheating Tips
Room Temperature: If you’re serving shortly after cooking, keep the shrimp rice covered with a clean towel or lid to prevent the rice from drying out. It stays fresh for around 2 hours on the counter.
Refrigerator Storage: Store leftover shrimp rice in an airtight container and it will keep nicely for up to 3 days. To revive it, sprinkle a little water over the rice before microwaving to regain moisture without turning mushy.
Freezer Instructions: You can freeze shrimp rice in meal-sized portions for up to two months. Wrap tightly in plastic wrap and then aluminum foil to avoid freezer burn. When ready, thaw overnight in the fridge and reheat gently on the stovetop or microwave.
Glaze & Sauce Timing: If you like adding a sauce or glaze (like a garlic butter drizzle), it’s best to apply it fresh just before serving rather than storing it glazed, to keep everything at its freshest.
Having learned from my own “leftover fail” moments, gently reheating and adding a touch of freshness with herbs or a squeeze of lemon really bring this dish back to life better than just nuking it cold.
Frequently Asked Questions
Final Thoughts
Here’s the truth: shrimp rice isn’t just a quick dinner, it’s become one of those comforting meals that feels personal and full of heart. The way the shrimp and rice marry effortlessly, the little pops of garlic and lemon, and how fast it comes together makes me want to serve it on repeat. It’s one of those recipes that doesn’t show off, but quietly wins over everyone. If you’re into this, you might want to check out some of my other family favorites like garlic butter shrimp pasta or vibrant cilantro lime rice—they pair beautifully and keep dinner exciting.
Can’t wait to hear how yours turns out! Leave a comment, share your tweaks, or just tell me if your family gobbled it up like mine. Happy cooking!
Shrimp Rice
Ingredients
Main Ingredients
- 1.5 cups uncooked brown rice
- 1 cube chicken bouillon cube (Knorr)
- 2 leaves bay leaves divided
- 0.375 tsp cayenne pepper divided (1/8 + 1/4 tsp)
- 0.75 tsp paprika divided (1/8 + 1/2 tsp)
- 0.625 tsp thyme divided (1/8 + 1/2 tsp)
- 1 tbsp oil
- 1 medium onion diced
- 2 stalks celery diced
- 1 medium green bell pepper diced
- 1 clove garlic minced
- 0.5 lb 96% lean ground beef
- 1 lb medium shrimp peeled and deveined
- 2 stalks scallions chopped
- salt and fresh pepper to taste
Instructions
Preparation Steps
- Cook brown rice according to package directions in water along with chicken bouillon cube, one bay leaf, 1/4 tsp salt, 1/8 tsp cayenne, paprika, and thyme.
- When the rice is almost done cooking, heat a large heavy saucepan on medium-low heat.
- Add oil, onions, green pepper, celery, remaining bay leaf, and garlic. Sauté on medium-low heat until soft, about 5 minutes.
- Add ground beef, salt, pepper, remaining paprika, thyme, and cayenne pepper. Cook until browned, about 10-15 minutes.
- Add shrimp, cover, and cook for an additional 5 minutes until shrimp are cooked through.
- When rice is done, toss with the cooked beef and shrimp mixture. Stir well, garnish with chopped scallions, and serve.