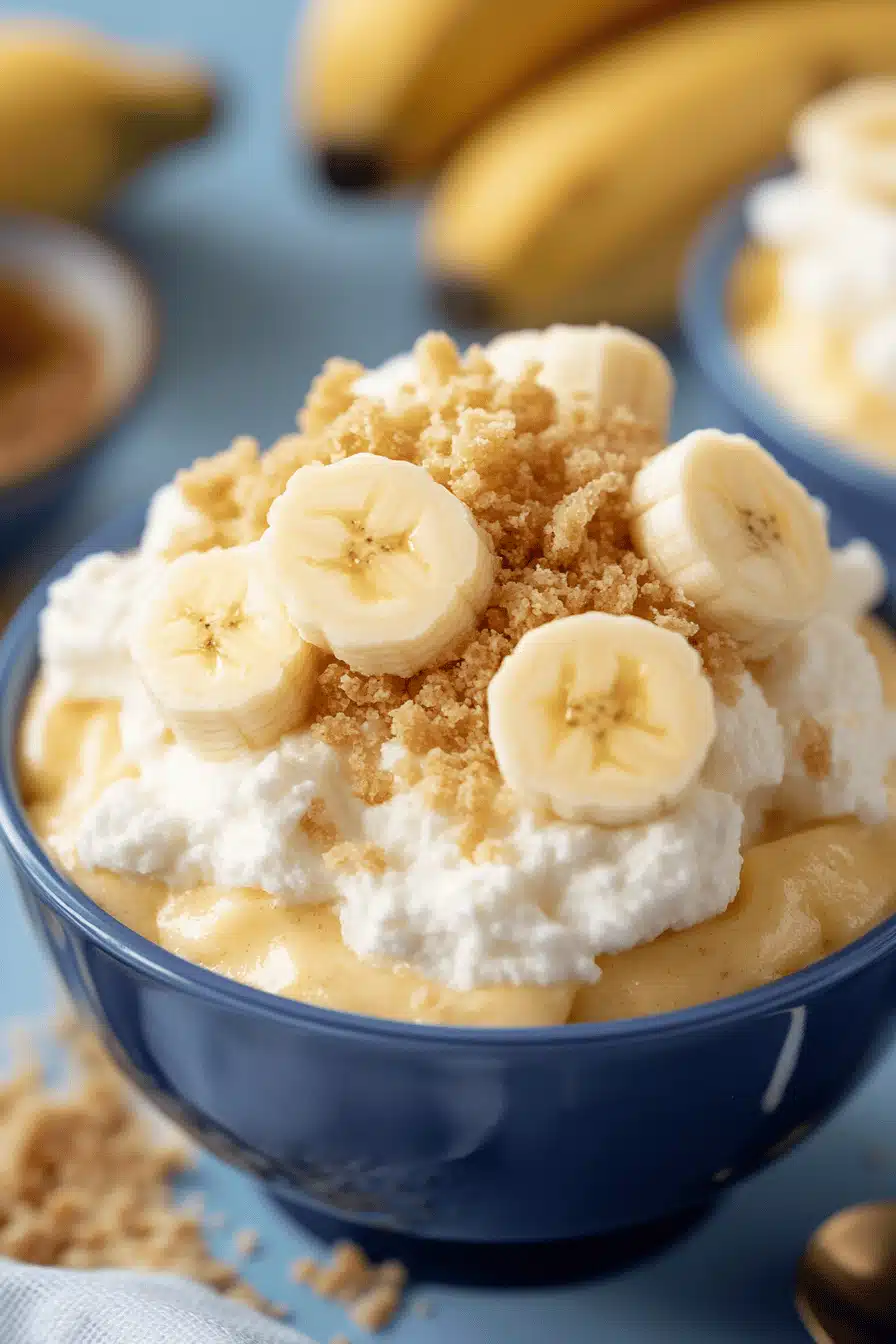
Every time I whip up this banana pudding, I’m transported back to my grandma’s kitchen on a lazy Sunday afternoon. The way the sweet, silky pudding melts into soft layers of banana and vanilla wafers — it’s pure comfort wrapped in a bowl. Honestly, it’s that kind of dessert that makes you close your eyes mid-bite just to soak in the flavors. It’s way easier to make than your classic layered cake, yet somehow feels just as indulgent. If you’re thinking of something rich yet light, this banana pudding hits all the right notes without any fuss. My kids always ask for seconds, and the smell alone has been known to drag neighbors to the porch! Whether you’re a devoted old-school fan or new to banana pudding, this recipe has a way of feeling like home in every creamy spoonful.
What is banana pudding?
Think of banana pudding as a cozy little hug in dessert form. It’s essentially a layered treat made with silky, vanilla-flavored custard or pudding, plenty of ripe bananas, and those classic vanilla wafers that add the perfect bit of crunch. The name itself comes from the key star: fresh bananas folded into the pudding and layered throughout. What really makes it special is the contrast of textures — creamy pudding, soft bananas, and crunchy wafers that slightly soak up the custard but still hold their shape. It’s one of those desserts that’s easy to make but always feels a bit fancy, like you’ve gone the extra mile without any stress. This dessert’s roots trace back to Southern kitchens, where it’s beloved for its simple ingredients and unforgettable comfort factor.
Why you’ll love this recipe?
What I love most about this banana pudding is how perfectly it balances sweet and fresh flavors without feeling over the top. The vanilla custard is so creamy and just sweet enough to let the bananas shine, not overpower them. I learned that achieving that texture is the secret — silky but firm enough to hold its shape when scooped. This recipe rounds out with layers of vanilla wafers that are like little crunchy treasures in every bite. Simplicity is key here. No fancy gadgets or obscure ingredients, just straightforward stuff you probably already have in your pantry. That’s made this pudding a lifesaver on busy nights when you want a sweet fix but don’t want to slave over the stove or oven for hours.
It’s also incredibly budget-friendly — bananas, milk, sugar, and eggs are cost-effective, and you get a generous batch that feeds a crowd or keeps your family grinning for days. I’ve even swapped in almond or oat milk for a dairy-free twist, and I swear it came out just as creamy, if not more. Versatility is another win, since you can jazz it up with toasted coconut, chocolate shavings, or even a little bourbon for grown-up gatherings. It’s sort of like a blank canvas with a million possibilities, but honestly, the classic combo of bananas and vanilla is the one my family keeps coming back to. If you’re a fan of desserts like tiramisu or trifle, think of banana pudding as a charming, Southern cousin — equally luscious and endlessly comforting.
How do I make banana pudding?
Quick Overview
Making this banana pudding is straightforward and downright fun. The magic happens by preparing a velvety vanilla pudding base, layering it carefully with ripe bananas and vanilla wafers, and then letting it chill so those flavors get all cozy together. The process doesn’t require any complicated steps or hard-to-find ingredients, making it a go-to dessert for weeknight treats or special occasions. The best part? You get creamy, luscious layers that feel homemade with very little hands-on time. Trust me, once you taste it fresh out of the fridge, you’ll wonder why you haven’t made it sooner.
Ingredients
For the Main Batter (Vanilla Pudding):
- 2 ½ cups whole milk (I prefer whole for richness, but 2% works fine too)
- ¾ cup granulated sugar
- ⅓ cup all-purpose flour (for thickening; cake flour works, but all-purpose is best)
- ¼ teaspoon salt
- 3 large egg yolks, lightly beaten (for that velvety texture and richness)
- 2 teaspoons pure vanilla extract (brands like Nielsen-Massey make a huge difference)
For the Filling:
- 4-5 ripe bananas, sliced (not too mushy, but perfectly sweet and soft)
- Approximately 45-50 vanilla wafers (I like the classic Nilla Wafers for nostalgia)
For the Glaze / Topping:
- 1 cup heavy whipping cream
- 2 tablespoons powdered sugar
- Optional: ½ teaspoon vanilla extract or a pinch of cinnamon for extra warmth
Step-by-Step Instructions
Step 1: Preheat & Prep Pan
Start by selecting a 2-quart glass or ceramic baking dish — something shallow works best for the layers. No actual baking is necessary here, but if you like, you can warm the pan slightly to help the layers meld faster, especially if you’re serving it right away. I usually just assemble it in the dish and let it chill, so no need to preheat an oven.
Step 2: Mix Dry Ingredients
Whisk together sugar, flour, and salt in a medium saucepan until they look evenly combined. Mixing these dry ingredients first helps prevent lumps later on and ensures smooth pudding. I always double-check to see that the flour is fully incorporated — a few stubborn lumps can ruin the texture.
Step 3: Mix Wet Ingredients
Gradually whisk in the cold milk to the dry mix over medium heat. Stir continuously so the flour doesn’t settle at the bottom. In a separate bowl, lightly beat the egg yolks, then temper them by slowly adding some of the hot milk mixture before whisking the yolks back into the saucepan. This prevents the eggs from scrambling and helps the custard get that velvety smoothness.
Step 4: Combine
Keep stirring constantly while the mixture thickens — about 7-10 minutes until it coats the back of a spoon. Once thickened, remove from heat and stir in vanilla extract. I always taste it here; it should be beautifully rich but not overly sweet. If it tastes runny, keep cooking a little longer.
Step 5: Prepare Filling
Slice those ripe bananas into quarter-inch rounds. Use bananas that are just starting to get spots — too green means bland, too ripe means mushy layers. The bananas should be tender but hold shape nicely when layered.
Step 6: Layer & Swirl
Begin layering in your dish: a single layer of vanilla wafers, a layer of banana slices, then a generous ladle of vanilla pudding. Repeat this layering until you run out of ingredients, finishing with pudding on top. I like to gently press wafers into the pudding’s top layer for a neat finish, and sometimes swirl a little extra vanilla extract or cinnamon on top for a warm aroma.
Step 7: Bake
Now, no baking here! Just pop your assembled banana pudding into the fridge to chill for at least 4 hours or overnight. This resting time allows the wafers to soften just a bit without turning to mush, and the flavors to really meld together. If you’re in a rush, 2 hours works okay, but patience pays off.
Step 8: Cool & Glaze
Before serving, whip the heavy cream with powdered sugar and vanilla until soft peaks form. Spread or pipe this whipped cream over the top as a luscious, light finish. This step adds a dreamy, airy texture that contrasts beautifully with the pudding’s density.
Step 9: Slice & Serve
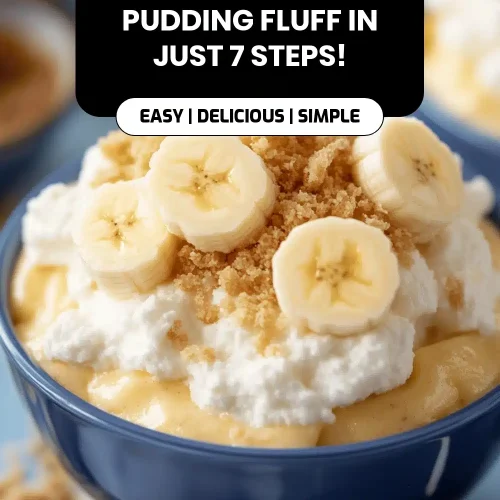
Use a large spoon or spatula to dish out generous servings. Best enjoyed cold, directly from the fridge. The layers should be distinct but melded together into a creamy, sweet harmony. A sprinkle of crushed vanilla wafers on top adds a fun little crunch and makes it look picture-perfect for guests.
What to Serve It With
For Breakfast: This pudding is a sweet, indulgent start to a slow weekend morning. Pair it with a strong coffee or chai latte and maybe some fresh fruit on the side. I love setting it out with a dollop of yogurt for a balanced plate that feels fancy but still cozy.
For Brunch: Serve banana pudding alongside a spread of savory quiches, fresh salads, or a vibrant fruit platter. A sparkling mimosa or iced herbal tea complements the creamy vanilla beautifully, and slicing the pudding into neat glasses makes it extra elegant.
As Dessert: After a big family dinner, this pudding hits the spot without making anyone feel stuffed. Add some toasted pecans or a drizzle of homemade caramel for extra indulgence. My go-to is a strong black coffee or lightly spiced chai to balance the sweetness.
For Cozy Snacks: When the afternoon slump hits, a small bowl of banana pudding is my comfort weapon. I like it with a warm mug of cocoa or a cinnamon-spiced latte — something about that combo feels like a warm blanket on a chilly day. My kids steal spoonfuls from the fridge whenever they think I’m not looking!
Top Tips for Perfecting Your Banana Pudding
Banana Freshness: Always use bananas that are ripe but still firm. Overripe bananas turn your pudding mushy and overly sweet. If you slice the bananas early, toss them in a bit of lemon juice to prevent browning while you work.
Mixing Advice: Keep whisking constantly during pudding prep to avoid lumps or burning on the bottom. Don’t rush folding the egg yolks in — tempering is critical to keep the pudding silky. Trust me, I’ve learned the hard way from curdled batches!
Layering Technique: For the best texture, alternate layers thinly. A thick banana layer can be overpowering while too few wafers leave the dish lacking crunch. I like to start and end with wafers to get crispy edges that contrast the cream.
Ingredient Swaps: I’ve swapped regular milk with almond or oat milk with great success (just watch the sweetness level), and coconut whipped cream makes a lovely, dairy-free frosting. If you want to cut back sugar, try maple syrup or honey, but reduce the liquid slightly to keep pudding thick.
Chill Time: Patience is your friend. Overnight chilling makes all the difference — the wafers soften just enough while still giving body, and the flavors marry into something magical. If in a hurry, refrigerate a minimum of two hours.
Glaze Variations: My family loves a little cinnamon or nutmeg in the whipped cream topping. You can also fold in some cream cheese for a tangy twist or sprinkle toasted coconut for texture. When life hands you bananas, get creative!
Storing and Reheating Tips
Room Temperature: Banana pudding is best enjoyed chilled, but if your kitchen is cool, it’s safe unrefrigerated for 1-2 hours. Cover loosely with foil or a clean cloth to keep debris out.
Refrigerator Storage: Store leftovers in an airtight container or cover the baking dish tightly with plastic wrap. It lasts 3-4 days, though honestly, it rarely hangs around that long at my house! Keep the whipped cream topping separate if possible to maintain its fluffiness and add just before serving.
Freezer Instructions: This dessert doesn’t freeze beautifully because the pudding and bananas lose texture, but if you must, freeze in an airtight container for up to 1 month. Thaw overnight in the fridge and stir gently before serving — expect a softer texture.
Glaze Timing Advice: Always add the whipped cream glaze right before serving for best texture and taste. If left on during storage, it tends to weep and lose its fluffiness.
Frequently Asked Questions
Final Thoughts
There’s something so warmly nostalgic about a bowl of banana pudding that makes it a staple in my kitchen — and I’m betting it will be in yours after just one try. The mix of creamy custard, fresh bananas, and crisp vanilla wafers is like a simple melody you never forget but always want to hear again. I hope you enjoy making it as much as I do; the smiles it brings are totally worth every spoonful. If you’re feeling adventurous, try adding a splash of bourbon or a handful of toasted coconut next time, but honestly, the classic recipe never fails. Don’t forget to drop me a comment and share how your dessert turns out — I love hearing your twists and tweaks! Happy baking and sweet spoonfuls ahead!
banana pudding
Ingredients
Main Ingredients
- 14 ounce sweetened condensed milk
- 12 ounce frozen whipped topping thawed
- 2 cups Milk
- 5 ounce instant French vanilla pudding mix
- 8 ounce cream cheese softened
- 6 units bananas sliced
- 12 ounce Pepperidge Farm Chessman cookies
Instructions
Preparation Steps
- Layer the bottom of a 9 x 13 inch baking dish with one bag of Chessman cookies, using any broken cookies to fill gaps.
- Arrange the sliced bananas evenly over the cookies layer.
- In a large bowl, whisk together the milk and instant vanilla pudding mix for about 5 minutes until thickened.
- In another bowl, beat softened cream cheese and sweetened condensed milk until smooth and creamy.
- Fold the thawed whipped topping into the cream cheese mixture gently until combined.
- Blend the cream cheese mixture into the pudding mixture, stirring well or using a mixer until smooth.
- Pour the combined pudding mixture over the bananas and cookie base evenly.
- Top with the remaining bag of Chessman cookies to cover the pudding layer.
- Cover with plastic wrap and refrigerate for at least 4 hours or overnight before serving.