I still remember the first time I nailed baked chicken thighs. It was one of those hectic weeknights when you want dinner on the table fast but still crave something that tastes like it took all afternoon. The smell of crispy skin roasting in the oven filled the kitchen with this warm, almost nostalgic aroma that instantly pulled my kids from their homework. This recipe has quietly become a staple in my household — my go-to when I want juicy chicken without fussing over complicated techniques. If you’ve ever wrestled with dry chicken breasts or greasy fried thighs, you’d appreciate how baked chicken thighs strike that perfect balance: tender, flavorful, and remarkably easy. Honestly, the way the skin crisps up while locking in the juicy meat reminds me a bit of roasted duck, without the fuss. This method is a total lifesaver when you’re craving a no-fail dinner that everyone asks for seconds of.
What is baked chicken thigh?
Think of baked chicken thighs as a simple, cozy comfort meal that transforms a humble cut of meat into something downright special with minimal effort. It’s essentially chicken thighs roasted in the oven until the skin is golden and crispy, while the meat stays juicy and tender inside. The magic is all in the balance—getting that wonderful crackling skin without drying out the meat beneath. The “baked” part is straightforward — no frying or deep frying, just good old oven heat which makes it perfect for busy home cooks or anyone wanting a fuss-free dinner solution. Chicken thighs themselves are known for being more flavorful and forgiving than breasts, commonly preferred by people like me who want a rich, juicy bite. This dish feels approachable, hearty, and a little bit cozy — like comfort food with a crispy twist.
Why you’ll love this recipe?
Here’s the thing: what I love most about baked chicken thighs is how forgiving and delicious they are. The flavor is rich without needing a bucket of marinade or a complicated spice blend. Just some salt, pepper, and maybe a hint of garlic or smoked paprika brings out the natural taste perfectly. Plus, you get that gorgeous golden skin, which is honestly the best part — it crackles with just the right amount of salt and fat, making each bite a tiny celebration.
It’s also super simple. If you can season the chicken and pop it in the oven, you’re halfway there. No standing by the stove, no terrible splatter mess, and best of all, it’s pretty hands-off once it’s roasting. That means you get to focus on sides, or heck, even relax for a bit while your kitchen fills with those irresistible smells.
Budget-wise, chicken thighs are usually cheaper than breasts, so this recipe is easy on the wallet without feeling “cheap.” I’ve fed a hungry family of four on this more times than I can count, and it’s always a win.
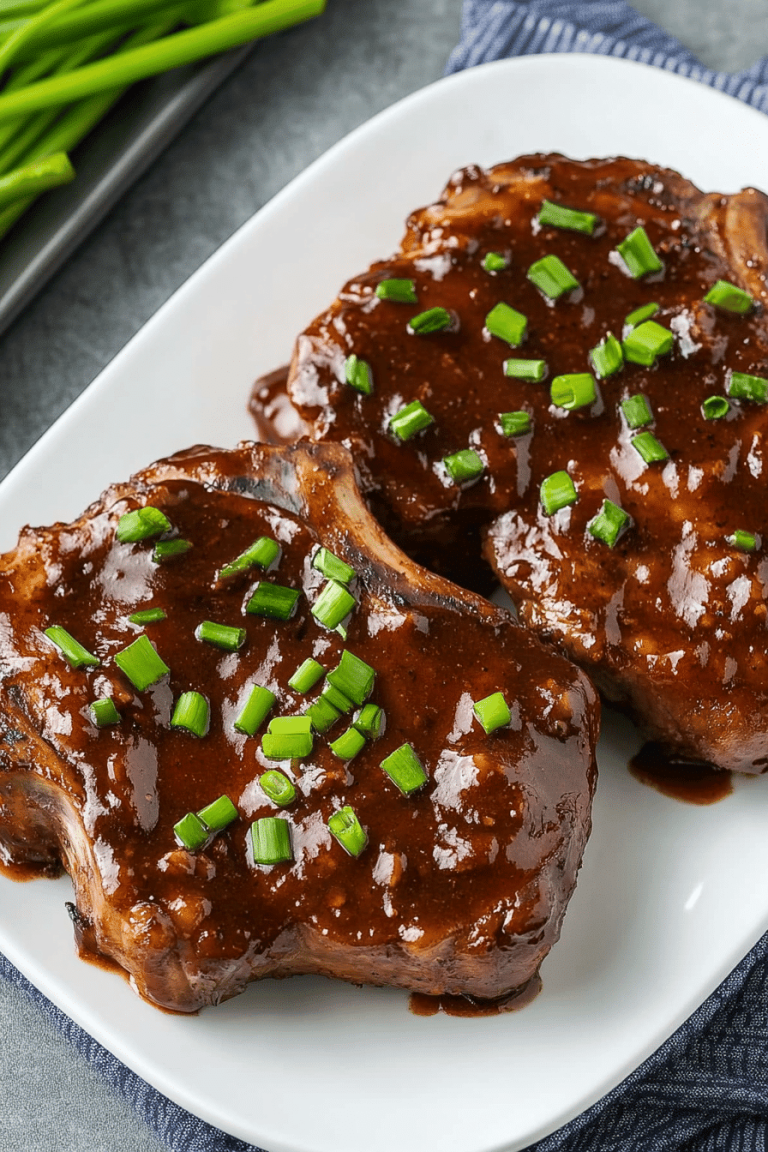
Lastly, it’s versatile. Once you master the basics, you can spice it up or keep it classic, make it spicy, sweet, or herby. Sometimes I brush on a tangy BBQ glaze for a weeknight cookout, other times just lemon and rosemary for a simple Sunday supper. It’s one of those adaptable dishes that can fit right in at a casual dinner or a more dressed-up gathering.
How do I make baked chicken thighs?
Quick Overview
Here’s the scoop: baking chicken thighs is all about prepping your chicken, seasoning it well, and roasting it at the right temperature for crisp skin and juicy meat. You’re basically giving those thighs a spa day in the oven — dry, hot heat that makes the skin golden and irresistible. The whole process feels like magic because it’s so hands-off, yet the payoff is restaurant-quality chicken you’ll brag about. I always toss the thighs on a wire rack set over a baking sheet to let air circulate underneath, which keeps that skin from getting soggy — a trick I learned after many less-than-crisp attempts!
Ingredients
For the main Batter (aka the Chicken Thighs themselves):
- 4–6 bone-in, skin-on chicken thighs – bone-in keeps it juicy, and skin-on is a must for that crunch.
- 2 tablespoons olive oil or melted butter for a richer flavor and crisping.
- 1 teaspoon coarse salt – don’t skimp here! Coarse salt helps draw out moisture and bristles the skin.
- Freshly ground black pepper – as much as you like, I’m pretty liberal with this.
- Optional: smoked paprika or garlic powder for extra warmth.
For the Filling (well, the seasoning mix):
- Fresh herbs like thyme or rosemary – finely chopped, or you can use dried in a pinch.
- 2 cloves garlic, minced – this gives a nice punch but won’t burn during baking if you mix it with oil first.
- Fresh lemon zest or a squeeze of juice – brightens and cuts through the richness.
For the Glaze:
- 2 tablespoons honey or maple syrup – for a gentle sweet glaze that caramelizes beautifully.
- 1 teaspoon Dijon mustard – adds a tangy kick.
- Optional: a dash of hot sauce or chili flakes if you want to spice things up.
Step-by-Step Instructions
Step 1: Preheat & Prep Pan
First thing, crank your oven up to 425°F (220°C). High heat is the secret to crispy skin. Next, line a rimmed baking sheet with foil for easy cleanup, then place a wire rack on top if you have one. I swear by this step — it lets air circulate and keeps the underside of the chicken from steaming, which ruins that crispy texture.
Step 2: Mix Dry Ingredients
In a small bowl, combine salt, pepper, and any dry herbs or spices. Whenever I do this, I always give it a good mix until the salt crystals coat the other spices evenly. This little bit of care ensures you don’t end up with uneven seasoning patches on your chicken.
Step 3: Mix Wet Ingredients
Combine olive oil, minced garlic, lemon zest (if using), and any fresh herbs in a small bowl. It doesn’t have to be perfectly smooth — you just want the garlic and herbs well distributed. The oil acts like a glue to hold all that delicious flavor on the skin while helping it brown beautifully.
Step 4: Combine
Pat the chicken thighs dry with paper towels — seriously, this makes all the difference for crispy skin. Rub the dry seasoning all over each piece, then brush on the wet mixture. Make sure to get under the skin if you can without tearing it — that’s where the flavor really seeps in.
Step 5: Prepare Filling
Since baked chicken thighs don’t require a filling in the traditional sense, your “filling” here is really about the additional flavor layers like garlic and herbs tucked under the skin or brushed on top. This method brings a punch of aromatic flavor amidst the juicy meat, making each bite interesting.
Step 6: Layer & Swirl
If you’re going the extra mile, you can lightly score the skin to help the seasoning sink deep and to encourage more crispiness. It’s subtle but worth it. Arrange the thighs skin-side up on the wire rack, making sure they’re spaced apart so air can do its magic.
Step 7: Bake
Slide the tray into the preheated oven and bake for 35–45 minutes, depending on the size of your thighs. About halfway through, I usually check on them and spoon a little of the rendered fat over the thighs. This isn’t essential but adds extra flavor and helps keep the meat moist. The thighs are done when the skin is a deep golden brown and the internal temperature hits 165°F (74°C).
Step 8: Cool & Glaze
Once out of the oven, if you’re using that honey glaze, brush it on immediately so it softens and caramelizes slightly with residual heat. Let the chicken rest for 5–10 minutes before serving — I learned this the hard way after losing all my juices by rushing right into eating!
Step 9: Slice & Serve
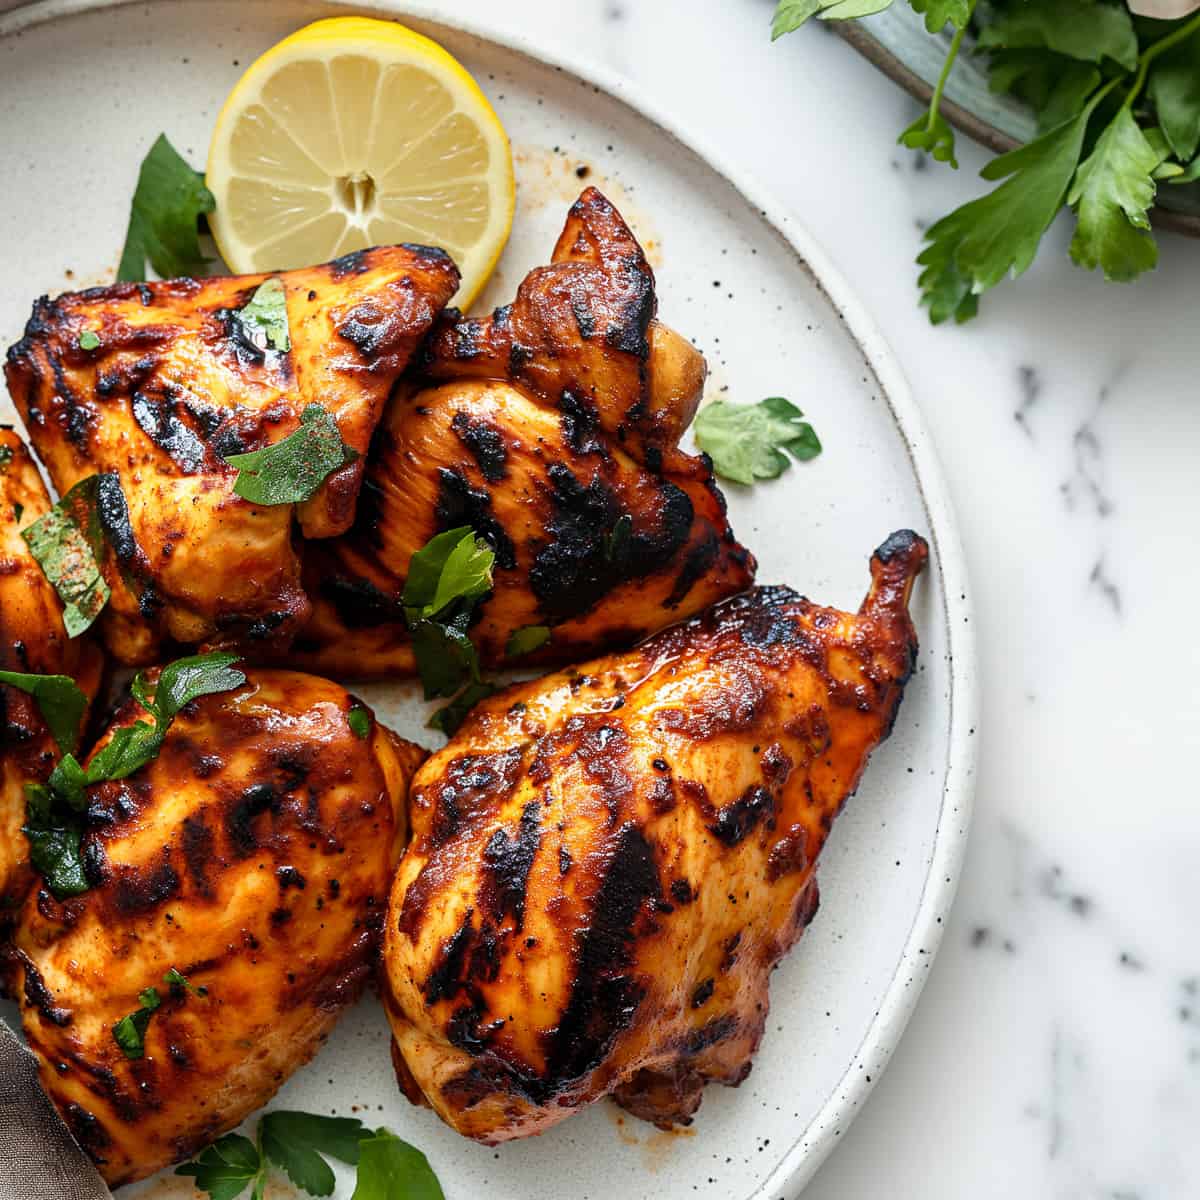
Serve the thighs whole or slice them across the bone for easy nibbling. I like to plate it with a sprinkle of fresh herbs or even a squeeze of lemon juice on top for brightness. The skin crackles delightfully under the knife, and the juicy meat just falls apart — it’s pure comfort food that feels fancy enough for company but totally doable any night.
What to Serve It With
For Breakfast: These thighs aren’t your typical breakfast fare, but if you’ve got leftover baked chicken thighs, chop them into a skillet with some eggs and sautéed greens for an epic savory breakfast scramble. Pair with a rich, bold coffee — trust me on this combo.
For Brunch: Serve alongside roasted potatoes and a simple herb salad. A chilled mimosa or lemonade makes the meal feel a little festive without needing a ton of fuss. My friends always comment on how “grown-up” this feels but it’s ridiculously easy.
As Dinner: This is my personal favorite way to enjoy baked chicken thighs — paired with creamy mashed potatoes, garlic sautéed green beans, and a drizzle of pan sauce from the drippings. It’s hearty, satisfying, and oh-so-warming on cooler nights.
For Cozy Snacks: Leftover chicken thigh meat shredded on crackers or tossed into a quick chicken salad with mayo and a touch of Dijon is a snack my kids fight over. Add some crunchy pickles on the side, and you’ve got a winner for game day or movie night.
Top Tips for Perfecting Your Baked Chicken Thighs
Pat Them Dry: Moisture is the enemy of crispy skin. I learned this through burnt disappointments—always take the extra minute to thoroughly dry your chicken with paper towels before seasoning.
High Heat is Your Friend: Baking at 425° ensures skin crisps up without drying out the meat. Lower temps create tender meat but soggy skin, which I find disappointing.
Use a Wire Rack: Elevate those thighs on a rack when baking. It lets the heat dance evenly around the chicken, producing that all-over crispiness every time.
Don’t Overcrowd: Give each piece space. Crowding traps steam, which softens the skin and ruins the texture.
Season Generously: Chicken thighs are robust and can handle a good amount of seasoning. I’ve leaned too light before and regretted it. Don’t be shy with the salt and pepper.
Glaze Timing Matters: Brush on any sweet or tangy glaze right after baking, so the heat can work its caramelizing magic without burning sugars during cooking.
Experiment with Flavors: Smoked paprika, curry powder, chili flakes — I’ve tried them all. My personal favorite is garlic and thyme with a splash of lemon, but you can’t go wrong with an herb combo you love.
Storing and Reheating Tips
Room Temperature: You can safely leave baked chicken thighs out covered loosely for up to 2 hours before refrigerating. This is great when serving buffet-style. Just remember to keep them in a warm spot, not near drafts.
Refrigerator Storage: Pop leftovers into an airtight container and keep them for about 3–4 days. The skin won’t be as crispy but the meat stays juicy. Reheat gently to avoid drying out—cover loosely and warm in a 350°F oven for about 10–15 minutes.
Freezer Instructions: Wrap each thigh tightly in plastic wrap, then aluminum foil, and freeze for up to 3 months. Thaw overnight in the fridge before reheating. To refresh the skin, reheat uncovered in a hot oven for a few minutes.
Glaze Timing Advice: I always wait to add glaze until the moment of serving or after reheating. If you glaze before freezing or refrigerating, the sugars can get sticky or hard, which changes the texture unfavorably.
Frequently Asked Questions
Final Thoughts
Honestly, baked chicken thighs have quietly conquered my dinner routine—and I’m pretty sure they can take over yours too. They’re easy, forgiving, and part of what I’d call “comfort food that doesn’t compromise.” Every time I serve this recipe, the crispy skin and juicy meat disappear in minutes, leaving everyone smiling and asking for leftovers. What’s even better is how the recipe flexes with whatever herbs or spices I have on hand. If you’re intrigued by this, be sure to check out some of my other simple yet flavorful chicken dishes — there’s a whole world beyond just baked thighs! I can’t wait to hear how yours turn out and what twists you put on it. Drop a comment, rate the recipe, and share your own little tricks — cooking’s always better together. Happy baking!
baked chicken thighs
Ingredients
Main Ingredients
- 8 pieces large bone-in skin-on chicken thighs about 3.5 - 4 lbs
- 0.25 cup olive oil
- 1 tbsp lemon zest zest of 1 large lemon, wedges reserved for serving
- 5 cloves garlic minced or substitute 1.5 tsp garlic powder
- 4 tsp Italian seasoning store-bought or homemade
- 2 tsp paprika
- to taste kosher salt and freshly ground black pepper
Instructions
Preparation Steps
- Position oven rack one level above center and preheat oven to 400°F.
- Line a rimmed 18 by 13-inch baking sheet with aluminum foil and top with an oven-safe wire cooling rack. Spray the rack with non-stick cooking spray.
- In a large bowl, whisk together olive oil, lemon zest, minced garlic, Italian seasoning, and paprika.
- Pat chicken thighs dry with paper towels and toss them in the oil mixture to coat evenly.
- Place chicken thighs skin side down on the rack and season with salt and pepper. Then flip skin side up and season again. Make sure to leave space between each thigh for even cooking.
- Bake until skin is browned and chicken reaches 175°F in the thickest part, about 35 to 45 minutes. For crispier skin, broil for the last 1-2 minutes while watching closely.
- Serve warm with lemon wedges for spritzing. Optionally garnish with chopped parsley.