Okay, so imagine this: it’s a chilly evening, you’ve had a long day, and all you want is something warm, comforting, and utterly delicious. For me, that usually means one thing – a slice of something chocolatey. But sometimes, the thought of baking a whole elaborate cake feels… well, a bit much, right? That’s where this incredible hot chocolate bundt cake swoops in like a cozy blanket on a winter’s day. It’s rich, deeply chocolatey, and honestly, it tastes *exactly* like your favorite mug of hot cocoa, but in cake form. It’s the kind of dessert that makes everyone in the house stop what they’re doing and gather around the kitchen. I swear, the aroma alone is enough to make even the grumpiest person crack a smile. It’s not just a cake; it’s a hug in every single bite, and let me tell you, it’s become an absolute staple in my baking repertoire. It’s pretty much the bundt cake version of that ridiculously popular chocolate zucchini bread, but with an extra layer of pure, unadulterated cocoa bliss.
What is hot chocolate bundt cake?
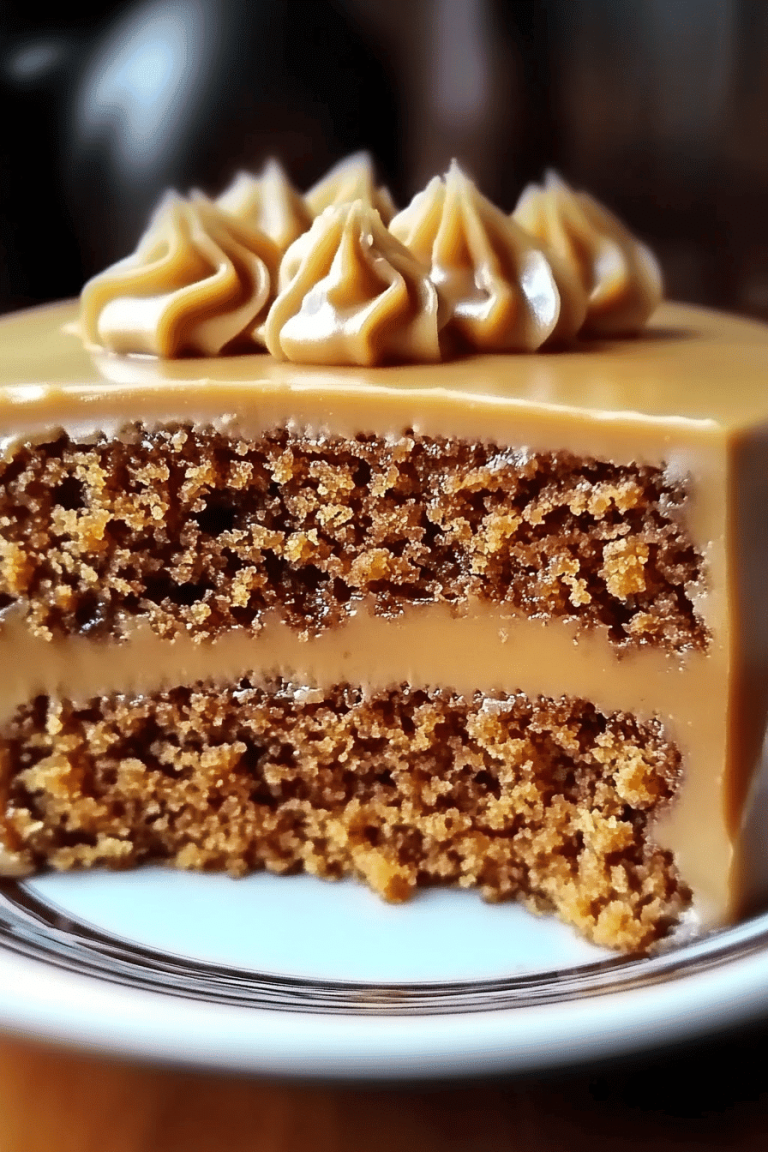
So, what exactly *is* this magical creation? Think of it as your beloved, steaming mug of hot chocolate, but elevated into a stunning, shareable cake. It’s essentially a moist, tender cake infused with the deep, rich flavor of cocoa powder, often with a touch of coffee or espresso to really make that chocolate pop. The magic really happens with the glaze – usually a luscious chocolate drizzle that hardens slightly on top, mimicking that perfect slightly-set layer you get on a really good hot cocoa. It’s designed to be comforting and decadent, without being overly fussy. The “bundt” part just means it’s baked in that iconic ring-shaped pan, which not only makes it look super impressive with minimal effort (seriously, just dust it with powdered sugar or drizzle that glaze and *boom*, instant elegance!), but it also helps it bake up so beautifully, with those lovely tender edges. It’s that easy-to-love, crowd-pleasing dessert that feels special enough for company but is totally do-able for a weeknight treat.
Why you’ll love this recipe?
Honestly, where do I even begin? This hot chocolate bundt cake is the kind of recipe that makes you feel like a baking superstar, even if you’re just starting out. First off, the **flavor** is out of this world. It’s not just sweet; it’s that deep, satisfying, slightly bitter-sweet chocolate flavor that you crave. It reminds me so much of my childhood, coming in from playing in the snow and being greeted by the smell of hot cocoa my mom would make. It has that same comforting essence, but amplified. Then there’s the **simplicity**. I know some bundt cakes can be intimidating, especially getting them out of the pan perfectly. But this recipe? It’s incredibly forgiving. The batter comes together so easily, and with a few key steps (which I’ll get into!), you’ll have a beautiful cake every single time. It’s a lifesaver when you need a dessert in a pinch. And let’s talk **cost-efficiency**. Most of the ingredients are pantry staples – flour, sugar, eggs, cocoa powder. You probably already have most of them on hand! It’s a decadent treat that doesn’t break the bank, which is always a win in my book. Plus, it’s so **versatile**. You can dress it up with a simple dusting of powdered sugar, go all out with a rich chocolate glaze, or even add some chocolate chips to the batter for extra pockets of gooey goodness. It’s perfect on its own, but also fantastic served with a dollop of whipped cream or a scoop of vanilla bean ice cream. What I love most about this specific recipe is that it stays incredibly moist for days. Unlike some chocolate cakes that can turn dry, this one somehow just gets better, which is a huge plus for leftovers (if you even have any!). It’s truly a no-fail recipe that consistently delivers deliciousness.
How do I make a hot chocolate bundt cake?
Quick Overview
This cake is all about layering flavors and creating that perfect tender crumb. We’ll start by whisking together our dry ingredients, then our wet ingredients, and finally combining them until just mixed. The magic really happens when we pour this luscious batter into our prepared bundt pan and bake it until it’s beautifully golden and fragrant. A simple, yet decadent chocolate glaze finishes it off, making it look as good as it tastes. It’s designed to be straightforward, so don’t be intimidated by the bundt pan – a little prep goes a long way!
Ingredients
For the Main Batter:
- 2 ½ cups all-purpose flour: This is your base. Make sure it’s spooned and leveled, not scooped directly from the bag, to avoid a dense cake.
- 1 ½ cups granulated sugar: For sweetness and moisture.
- ¾ cup unsweetened cocoa powder: Use a good quality one for the best chocolate flavor! Dutch-processed often gives a richer color and smoother taste.
- 1 ½ teaspoons baking soda: This helps with leavening and gives the cake its lift.
- ¾ teaspoon baking powder: Works with the soda for an extra boost of fluffiness.
- ¾ teaspoon salt: Crucial for balancing sweetness and enhancing chocolate flavor.
- 2 large eggs: At room temperature, they incorporate better into the batter.
- 1 cup buttermilk: This is key for tenderness and moisture! If you don’t have buttermilk, you can make your own by adding 1 tablespoon of white vinegar or lemon juice to 1 cup of milk and letting it sit for 5-10 minutes.
- ½ cup vegetable oil or melted unsalted butter: Oil keeps the cake super moist; butter adds a lovely flavor. I’ve tested both and they work wonderfully!
- 1 teaspoon vanilla extract: Enhances all the other flavors.
- 1 cup hot brewed coffee or hot water: This is the secret ingredient that intensifies the chocolate flavor and creates a super tender crumb. Coffee is my personal favorite here, as it doesn’t make the cake taste like coffee, but rather makes the chocolate taste like the *best* chocolate you’ve ever had.
For the Glaze:
- 1 ½ cups powdered sugar: Sifted for a smooth glaze.
- ⅓ cup unsweetened cocoa powder: Again, good quality makes a difference.
- ⅓ cup milk or heavy cream: Use heavy cream for a richer, slightly thicker glaze.
- 1 teaspoon vanilla extract: For that extra touch of flavor.
- Pinch of salt: To balance the sweetness.
Step-by-Step Instructions
Step 1: Preheat & Prep Pan
First things first, let’s get your oven preheated to 350°F (175°C). This is super important for even baking. Now, grab your beautiful bundt pan. The *absolute* most crucial step for a bundt cake is proper greasing and flouring. Don’t skimp here! I like to use a pastry brush to generously coat every nook and cranny with softened butter or vegetable shortening. Then, I dust it thoroughly with cocoa powder (instead of flour, for a chocolate cake!) or all-purpose flour, tapping out any excess. This ensures your cake slides out like a dream, saving you from any heart-stopping moments of it sticking.
Step 2: Mix Dry Ingredients
In a large mixing bowl, whisk together the flour, granulated sugar, cocoa powder, baking soda, baking powder, and salt. Whisking them together well ensures everything is evenly distributed, which means no surprises of pockets of baking soda or salt in your finished cake. You want it to look like a uniform, dark brown mixture.
Step 3: Mix Wet Ingredients
In a separate medium bowl, whisk together the eggs, buttermilk, oil (or melted butter), and vanilla extract until they’re well combined. Give it a good whisk; you don’t want streaks of egg white.
Step 4: Combine
Pour the wet ingredients into the bowl with the dry ingredients. Now, this is where you need to be a little gentle. Mix on low speed with an electric mixer (or by hand with a whisk) until *just* combined. It’s okay if there are a few small lumps; we don’t want to overmix! Overmixing develops the gluten in the flour, which can lead to a tough cake. Once it’s *almost* mixed, slowly and carefully pour in the hot coffee (or hot water). The batter will become quite thin – don’t panic! This is exactly what you want. Continue mixing on low speed until the batter is smooth and combined. Scrape down the sides and bottom of the bowl to make sure everything is incorporated.
Step 5: Prepare Filling
(Wait, there’s no filling in this recipe as written, but if you’re thinking of adding one, this is where you’d prepare it! For this specific hot chocolate bundt cake, we’re focusing on the pure chocolate flavor of the cake itself and the glaze, so we skip this step. If you wanted to add a chocolate ganache filling, you’d make that now while the cake bakes or cools.)
Step 6: Layer & Swirl
(Again, this step is more for swirled cakes. For our pure hot chocolate bundt, we just pour the batter evenly into the prepared pan.)
Pour the thin batter evenly into your prepared bundt pan. I like to give the pan a gentle tap on the counter a couple of times to release any large air bubbles. This helps ensure a smooth, even bake.
Step 7: Bake
Bake for 50-65 minutes, or until a wooden skewer or toothpick inserted into the thickest part of the cake (avoiding the center tube) comes out clean. Oven temperatures can vary, so start checking around the 50-minute mark. If the top starts to brown too quickly, you can loosely tent it with foil.
Step 8: Cool & Glaze
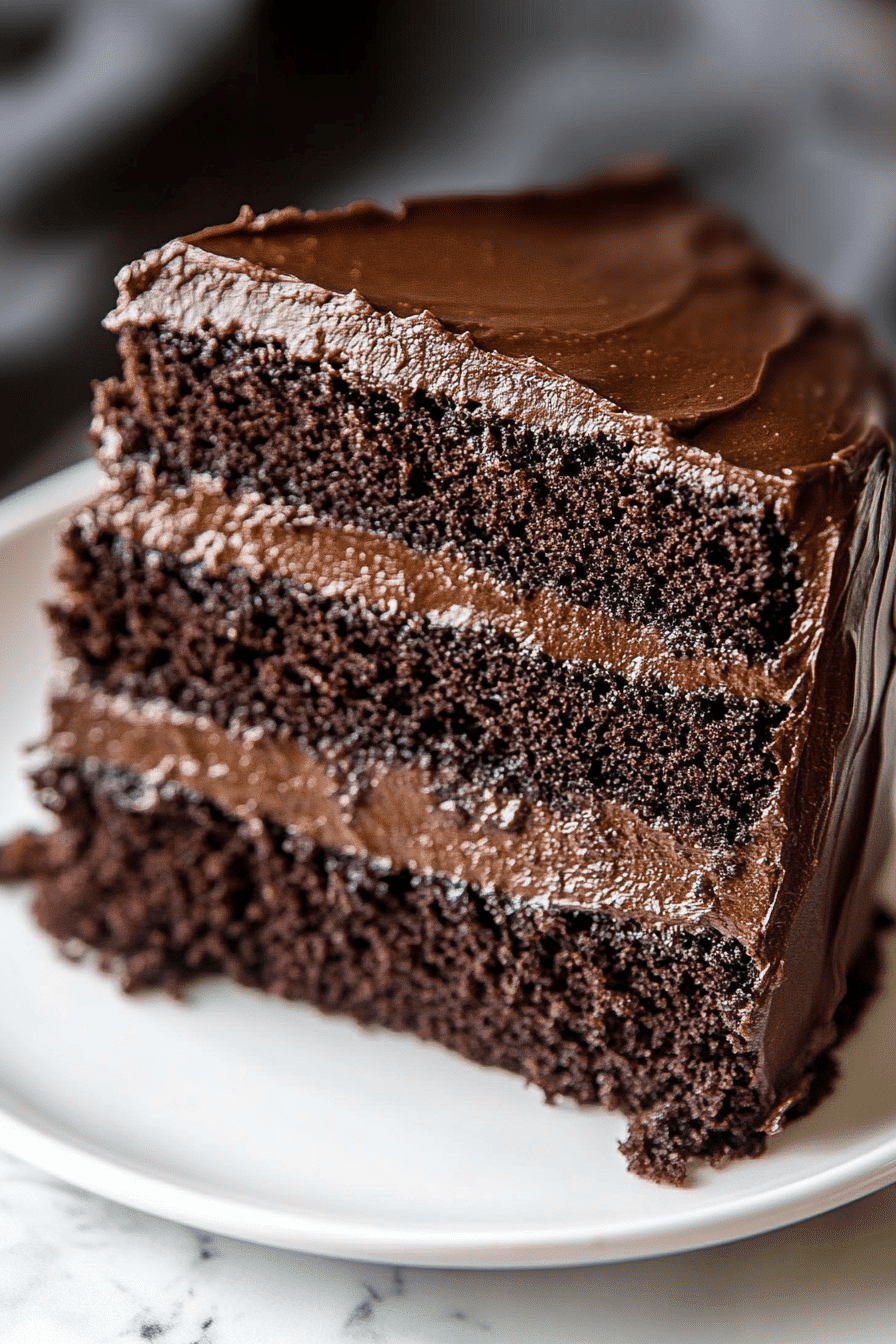
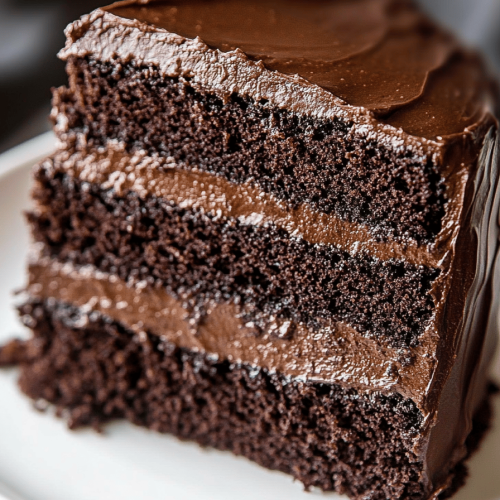
This is another crucial step for bundt cake success! Let the cake cool in the pan on a wire rack for about 15-20 minutes. This allows it to set up a bit. Then, carefully invert the pan onto the wire rack. If you greased and floured it well, it should release easily. If it seems stuck, gently tap the bottom and sides of the pan. Let the cake cool completely before glazing. For the glaze, whisk together the sifted powdered sugar, cocoa powder, milk (or cream), vanilla, and salt in a medium bowl until smooth. If it’s too thick, add a tiny bit more milk; if it’s too thin, add a bit more powdered sugar. Drizzle the glaze over the cooled cake, letting it drip down the sides. It’s okay if it’s not perfectly even; that’s part of its charm!
Step 9: Slice & Serve
Once the glaze has set slightly (or is still a little gooey, your preference!), slice the cake with a sharp knife. It’s wonderful served at room temperature, or slightly warmed for an extra decadent treat. A tall glass of milk or a hot coffee on the side is pure perfection.
What to Serve It With
This hot chocolate bundt cake is so versatile, it fits right into any occasion. For **breakfast**, I love a slightly less sweet version (maybe a bit less sugar in the cake and a lighter glaze) served with a strong cup of black coffee or a creamy latte. It’s like a decadent morning pastry that’s surprisingly easy to whip up. For **brunch**, I like to make it a bit more elegant. I’ll use a richer glaze, maybe even add a sprinkle of flaky sea salt on top, and serve it on a pretty cake stand. It pairs wonderfully with mimosas or a sparkling cider. As a **dessert**, this is where it truly shines. A dollop of homemade whipped cream, a scoop of really good vanilla bean ice cream, or even some fresh raspberries to cut through the richness are all fantastic options. It’s perfect for ending a dinner party on a high note. And for those cozy **snack** moments, when you just need a little something sweet? This cake is it. I love having a slice with a warm mug of tea or just on its own while curled up with a good book. My family tradition is to have a slice with a glass of cold milk after Sunday dinner – it’s simple, comforting, and always hits the spot.
Top Tips for Perfecting Your Hot Chocolate Bundt Cake
Over the years, I’ve definitely learned a few tricks to make this hot chocolate bundt cake absolutely foolproof. Let’s talk about getting that perfect moist crumb first. The key really is the hot liquid – whether it’s coffee or water. It blooms the cocoa powder, making it more soluble and releasing more flavor, and it also gelatinizes some of the starches in the flour, leading to a tenderer cake. Don’t be afraid of the thin batter; it’s supposed to be that way! When it comes to **mixing**, the cardinal rule is: don’t overmix. Seriously, once you add the wet ingredients to the dry, mix until *just* combined, and then stop. A few tiny lumps are totally fine. Overmixing is the enemy of tender cakes. For the bundt pan, I cannot stress enough the importance of proper greasing and flouring (or cocoa powdering!). I even go the extra mile sometimes and use a baking spray that has flour or cocoa in it. If your pan is old or has intricate details, make sure you get into every single crevice. It’s better to over-grease than under-grease! For **baking**, always trust your skewer test. Ovens can be so different, so the time is just a guideline. I usually start checking mine around 50 minutes. If the top is browning too quickly, just loosely tent it with foil. It won’t affect the texture much. When it comes to the **glaze**, I find that a slightly thinner glaze that drizzles down the sides looks more rustic and appealing than a thick, opaque one. If you want a thicker glaze, just use a bit less liquid. Conversely, if it’s too thick, add liquid a teaspoon at a time until you get it right. Some **ingredient swaps** I’ve experimented with include using melted coconut oil instead of vegetable oil – it adds a subtle tropical note that’s lovely! I’ve also tried using a mix of cocoa powder and melted dark chocolate in the batter for an extra decadent chocolate kick, though you might need to adjust the liquid slightly if you do that. For **flavor variations**, a dash of cinnamon or a pinch of cayenne pepper in the batter can add a wonderful warmth and complexity. And if you’re feeling fancy, a swirl of peanut butter or caramel in the batter before baking adds another dimension. My biggest lesson learned? Patience! Letting the cake cool properly in the pan before inverting and allowing it to cool completely before glazing makes all the difference in the world for presentation and texture.
Storing and Reheating Tips
One of the best things about this hot chocolate bundt cake is how well it keeps. At **room temperature**, I find it stays wonderfully moist for about 2-3 days, as long as it’s stored properly. I usually keep it in an airtight container or a cake keeper. If you’ve glazed it, the glaze will help seal in some of that moisture. For longer storage, **refrigerator storage** is your friend. It can last up to a week in the fridge, although I think the texture is best within the first 4-5 days. Just make sure it’s in an airtight container to prevent it from drying out or absorbing other fridge odors. When you want to enjoy a slice from the fridge, I recommend letting it come to room temperature for about 30 minutes for the best flavor and texture. If you want to **reheat** it, you can pop a slice in the microwave for about 10-15 seconds – just enough to warm it through and make it extra fudgy. Honestly, it’s delicious cold too, but a little warmth can be pure magic, especially if you serve it with some whipped cream! For **freezer instructions**, this cake freezes beautifully. Wrap it tightly in plastic wrap, then in a layer of aluminum foil, or place it in a freezer-safe container. It should stay good in the freezer for up to 3 months. To thaw, remove the foil and plastic wrap and let it thaw completely at room temperature. For the **glaze timing**, I always recommend glazing the cake *after* it has completely cooled. If you glaze a warm cake, the glaze will just melt and drip off, creating a mess. If you’re freezing the cake, you can either glaze it before freezing (make sure the glaze is fully set) or freeze the plain cake and glaze it once it’s thawed. I often prefer to glaze it after thawing, as it ensures the most fresh-looking glaze.
Frequently Asked Questions
Final Thoughts
So there you have it – my absolute favorite hot chocolate bundt cake recipe. I truly hope you give this one a try. It’s more than just a cake; it’s that warm, fuzzy feeling you get from a perfect mug of hot cocoa, baked into a beautiful, shareable form. The way the chocolate flavor just envelops you, the incredible moistness, and the stunning presentation with minimal fuss – it’s a winner in every sense. It’s the kind of recipe that brings people together, sparks smiles, and makes ordinary days feel a little bit more special. If you love this recipe, you might also enjoy my recipe for rich chocolate brownies or my decadent flourless chocolate cake. They all share that same comforting chocolate goodness. I can’t wait to hear how your hot chocolate bundt cake turns out! Please leave a comment below and let me know what you think, or share your own favorite chocolatey creations. Happy baking!
hot chocolate bundt cake
Ingredients
Main Ingredients
- 2.25 cups all-purpose flour
- 1 teaspoons baking soda
- 0.25 cups cocoa powder preferably Hershey’s Special Dark
- 0.5 cups dry hot chocolate mix
- 1 cups butter room temperature
- 8 ounces cream cheese 1 block
- 2 cups granulated sugar
- 3 ounces milk chocolate melted
- 5 whole eggs
- 2 teaspoons vanilla extract
- 6 ounces milk chocolate
- 2 tablespoons dry hot chocolate mix
- 0.25 cups heavy cream
- 1 tablespoon butter
Instructions
Preparation Steps
- Preheat oven to 325°F. Spray a 10-inch bundt pan liberally with baking spray.
- Sift together the flour, baking soda, cocoa powder, and dry hot chocolate mix. Set aside.
- In a large mixing bowl or stand mixer, cream together the butter and cream cheese until smooth. Add sugar and beat on medium speed for about 2 minutes until light and fluffy.
- Melt 3 ounces of milk chocolate in a microwave-safe bowl at 50% power in 30-second increments, stirring after each. Add melted chocolate to the butter mixture and mix until incorporated.
- Add eggs one at a time, mixing well after each addition, then stir in vanilla extract.
- Slowly add the sifted dry ingredients to the batter while mixing on low speed. Mix just until combined, do not overmix.
- Pour batter into prepared bundt pan and bake for 60 minutes, or until a toothpick inserted into the center comes out clean.
- Allow cake to cool in the pan for about 10 minutes, then transfer to a wire rack to cool completely.
- To make the glaze, melt 6 ounces of milk chocolate, 2 tablespoons dry hot chocolate mix, 0.25 cups heavy cream, and 1 tablespoon butter together in a small saucepan over low heat, stirring frequently until smooth.
- Remove glaze from heat and let it sit for 10 minutes to thicken slightly.
- Pour the glaze over the cooled bundt cake and garnish with mini marshmallows or marshmallow bits.