What do you do when the sun is just starting to peek out of your window? Through the blinds, and you desperately want something comforting and delicious, but the thought of putting on a blind makes you sick. Is it too much work to stand at the stove flipping individual slices of French toast? Yeah, I’ve been there. Is it true that most of the time, that craving for French toast would just get pushed aside for a while? What can I do faster I discovered the magic of sheet pan french toast, and it was a total game changer. Is it like my childhood Sunday mornings, but without the fuss? Imagine a whole batch of perfectly golden, custardy, slightly crisp French toast all ready at once. Is it easier than you think to do a pan-flipping marathon? How do you bring the whole family together around one pan?
What is a sheet pan French toast?
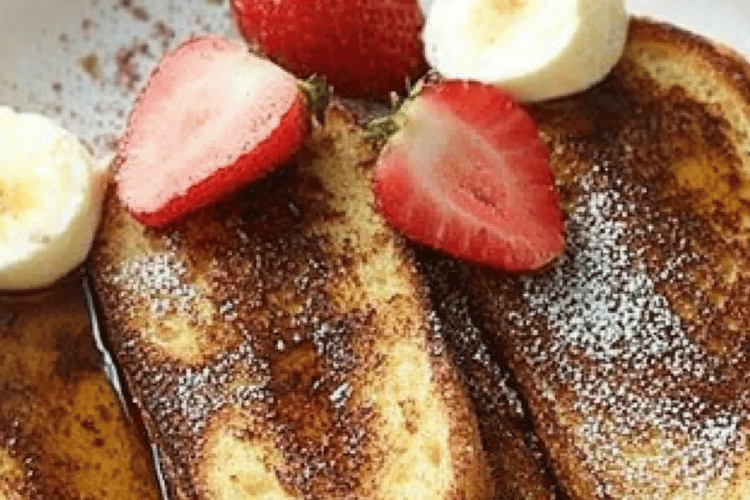
What exactly is this French Toast? What is your favorite French toast recipe? Instead of soaking and frying each slice individually, we’re talking about arranging bread slices on a plate. a large baking sheet, drenching them in that classic custardy mixture, and then baking it all. If you like, you can use ice cubes instead of icing. Is it really irresistible? What is essentially a giant, baked casserole of French toast goodness? The bread gets this incredible texture – soft and custardy on the inside, with delightfully crispy. Is it the kind of thing that feels super fancy, but is honestly one of the easiest breakfasts or snacks? What are some of the best brunches you can cook for a crowd? How do I get all that French toast flavor without the usual attention to detail?
Why you’ll love this recipe?
There are so many reasons why this Sheet Pan French toast has become a staple in my kitchen, and I just know you’re going to adore it too. First off, the flavor is out of this world. The bread soaks up all that eggy, cinnamon-spiced goodness, and when it bakes, it develops this incredible custardy interior with perfectly golden, slightly crisp edges. It’s pure comfort in every bite. But what really seals the deal for me is the simplicity. Seriously, it’s almost ridiculously easy. You mix up the batter, arrange the bread, pour it over, and bake. No more hovering over the stove, no more burnt edges or undercooked centers. Plus, it’s incredibly cost-effective. You’re using basic pantry staples that most of us already have on hand, making it a budget-friendly way to create a seriously impressive breakfast or brunch. And talk about versatility! You can customize it with different breads, add-ins like berries or chocolate chips, and of course, serve it with a million different toppings. What I love most about this recipe, though, is how it brings everyone together. Instead of one person being stuck in the kitchen, we can all gather around the table, anticipating that delicious aroma. It’s a stress-free way to enjoy a classic, and that, my friends, is gold.
How do I make sheet pan French toast?
Quick Overview
The beauty of this Sheet Pan French toast is its straightforward approach. How do you make a custard base for bread? How do I make custard over the top and bake it until it’s golden brown? What’s a hands-off approach to breakfast? What are some good meals to eat on a weekday without the fuss? What are the best flavors in French toast, but with a fraction of the calories? What is the difference between effort and cleanup
Ingredients
For the Main Batter:
* 8-10 slices of sturdy bread (brioche, challah, or even day-old sourdough work wonderfully), about 2 hours. Stale bread is actually better here, as it soaks up the custard without getting too soggy.
* 4 large eggs. Make sure they’re at room temperature for the best emulsion.
* 1 ½ cups milk (whole milk or 2% works best for richness; I’ve even tested this with almond milk and it actually made it even creamier!).
* 12 cup heavy cream (optional, but it adds an extra layer of decadence).
* 13 cup granulated sugar. You can adjust this based on how sweet you like things.
* 1 teaspoon ground cinnamon. This is essential for that classic French Toast warmth!
* ½ teaspoon ground nutmeg. A little goes a long way and adds a lovely depth.
* 1 teaspoon vanilla extract. For that sweet, comforting aroma.
* Pinch of salt. This really helps to balance all the sweetness.
For the Filling: For filling
* 12 cup fresh berries (blueberries, raspberries or chopped strawberries). These add a lovely burst of color.
* Optional: Chocolate chips, sliced bananas, or chopped nuts. Get creative with what you have!
For the Glaze:
* ½ cup powdered sugar.
* 1-2 tablespoons milk or cream. You want a pourable, but not watery, consistency.
* 12 teaspoon vanilla extract. To enhance the sweetness.
What are the steps for
Step 1: Preheat & Prep Pan
First things first, preheat your oven to 375 degrees Fahrenheit (190 degrees Celsius). While the oven is heating up, grab a large rimmed baking sheet – I usually use a standard 9×13 inch pan, but a half-sheet pan is great if you’re making a big batch. To prevent any sticking and make cleanup a breeze, I always generously grease the pan with butter or cooking spray. You can even line it with parchment paper for extra insurance, leaving a little overhang to help lift it out later. This step is crucial for that lovely golden-brown finish without any drama.
Step 2: Mix Dry Ingredients
In a large bowl, whisk together the granulated sugar, cinnamon, nutmeg, and that pinch of salt. It might seem like a small step, but mixing these dry ingredients thoroughly ensures that the spices and sugar are evenly distributed throughout the custard. This means you won’t get any pockets of pure cinnamon or bland bites. I always give it a good whisk until everything looks uniform. This ensures that every slice of bread gets that perfect warm, sweet flavor.
Step 3: Mix Wet Ingredients
In the same large bowl (less dishes, hooray!), crack in your eggs. Add the milk, heavy cream (if you’re using it), and vanilla extract. Now, grab a whisk and beat everything together until it’s well combined and frothy. You want a smooth, uniform mixture. I usually whisk until there are no streaks of egg yolk or white visible, and the whole thing looks nicely emulsified. This creates that rich, custardy base that is the heart and soul of amazing French toast.
Step 4: Combine
Now it’s time to bring it all together. Gradually add the dry ingredients to the wet ingredients in the bowl. What is the key here? Overmixing can develop the gluten too much and result in a tougher texture. You want a smooth batter with no lumps, but it doesn’t need to be perfectly smooth like an ice cream maker. Is there a magic potion that can transform bread?
Step 5: Prepare Filling
If you’re adding fresh fruit like berries, this is the time to prep them. Gently rinse your berries and pat them dry. If you’re using larger fruits like strawberries, give them a quick chop. If you’re going the chocolate chip or nut route, have those ready to go. What are some extras to make a French toast? What are some of the best ways to add flavor and texture to a dish?
Step 6: Layer & Swirl
Arrange your bread slices on the prepared baking sheet in a single layer. Can you fit them snugly, but don’t overlap them too much, as this can lead to uneven cooking. If you’re adding berries or other fillings, gently scatter them over the bread slices. Now, slowly and evenly pour the custard mixture over the bread, making sure to get some into all the pockets. What are nooks and cra If you want to create a beautiful swirl or marbling effect, you can gently use the toothpick or the pliers. How do you swirl chocolate chips into custard? What do you do with a cake when it comes out of the oven?
Step 7: Bake
What is the best way to put a baking sheet in the preheated oven? Bake for 25-35 minutes, or until the French toast is puffed up, golden brown around the edges, and crispy. When the custard is set, it is ready How do I test for doneness by inserting a knife or toothpick into the center of the mouth? How long will it take for a bread to be baked? I usually start checking around the 25-minute mark. The aroma that fills your kitchen during this time is just heavenly!
Step 8: Cool & Glaze
Once it’s baked to perfection, carefully remove the sheet pan from the oven. Let it cool on a wire rack for about 5-10 minutes. This allows the custard to fully set. While it’s cooling, whisk together the powdered sugar, vanilla extract, and 1 tablespoon of milk or cream in a small bowl. Add more liquid a teaspoon at a time until you reach your desired drizzling consistency. Once the French toast has cooled slightly, drizzle the glaze generously over the top. If you want a thicker glaze, use less liquid; for a thinner glaze, add a bit more.
Step 9: Slice & Serve
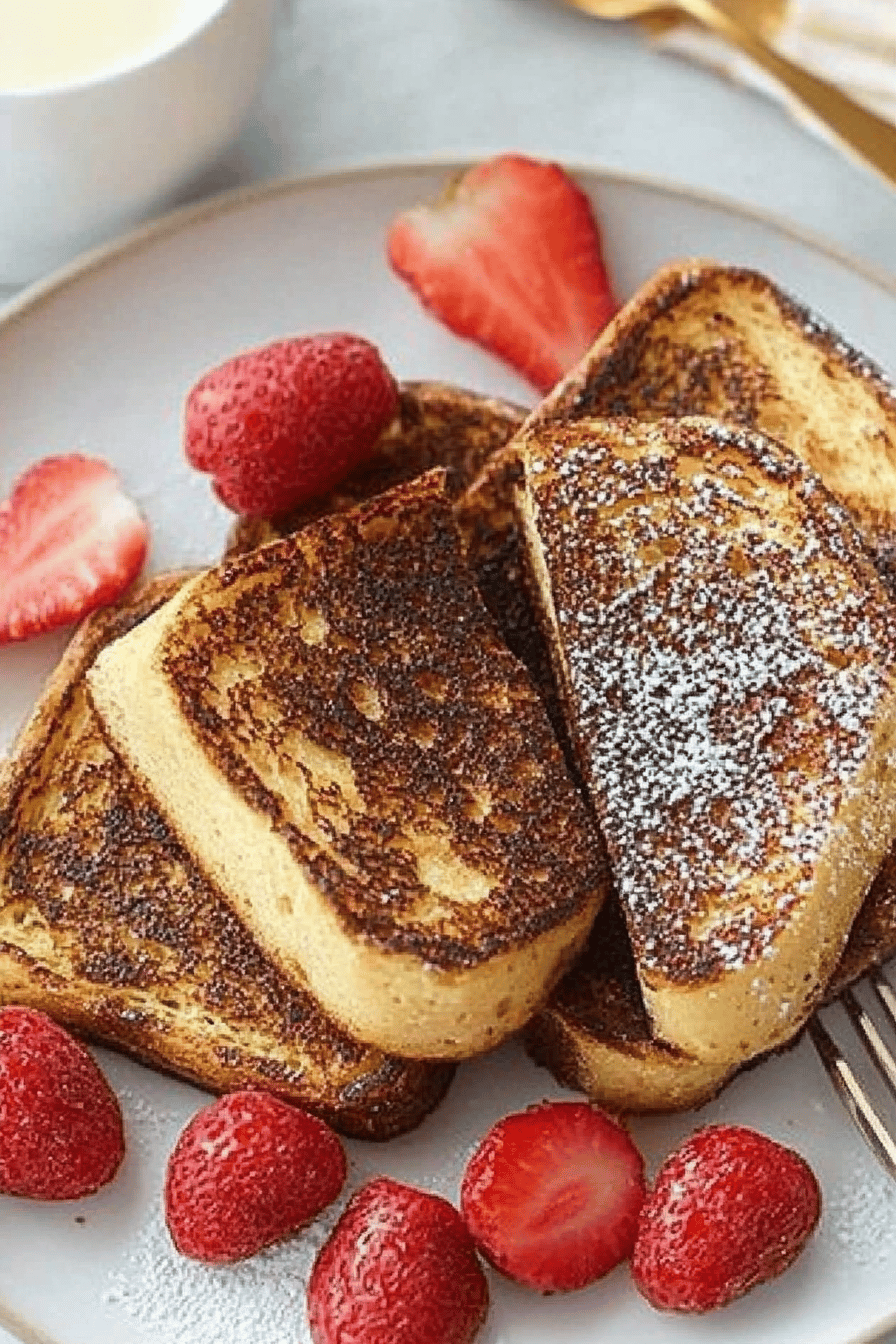
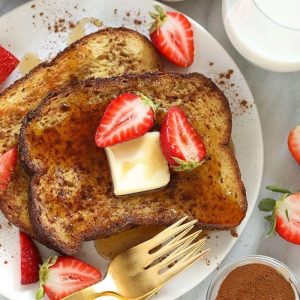
What’s the best part about French toast? I usually cut it into squares or rectangles. Serve it warm, right off the pan. I love to add a little something extra to my recipe. Fresh fruit, a dollop of whipped cream, or maple syrup are always winners. Enjoy every single bite!
What should I serve it with?
This sheet pan French toast is incredibly versatile and pairs beautifully with so many things. What vibe do you want to get?breakfastA good strong cup of coffee is a must, and maybe some fresh berries or powdered sugar. Or both. When I’m hosting a breakfast, it’s simple, comforting, and starts the day off right.brunch, I love to make it feel a bit more elegant. I’ll arrange slices on a nice platter, maybe with a side of crispy bacon or sausage, and offer a variety of toppings like fresh fruit compotes, yogurt, and a small pitcher of pure maple syrup. A mimosa or a sparkling juice pairs perfectly with this too! And honestly, don’t overlook this as a quick dessertA warm slice with a scoop of vanilla ice cream and dipped in chocolate sauce is divine. What is a delicious dessert after dinner? How do you bake a whole cake?cozy snacksIs it good on its own, maybe with a warm glass of milk or hot chocolate? My kids ask for this all the time, especially when we have leftover bread, and it always disappears. Is it good to serve this with a side of Greek yogurt? What is the best breakfast
How do I make a perfect French toast using sheet pan?
I’ve made this sheet pan French toast more times than I can count, and over the years, I’ve picked up a few tricks that make it even better. First, about the bread: don’t use super soft, fresh bread. It will just turn into mush. Day-old, slightly stale bread is your best friend here because it has the structure to soak up all that custard goodness without disintegrating. My go-to is brioche or challah because they’re rich and have a wonderful texture, but a good sourdough adds a nice tang. When mixing the batter, remember my earlier tip: don’t overmix! Just combine the wet and dry ingredients until they’re incorporated. A few tiny lumps are fine. Overmixing develops the gluten too much and can make the final product dense rather than light and custardy. For the filling, if you’re adding berries, be gentle when scattering them over the bread before pouring the custard. You don’t want to mash them up too much. For the swirl effect, a light hand is key. Just a gentle drag of a toothpick can create beautiful patterns. When it comes to baking, every oven is a little different, so start checking for doneness around the 25-minute mark. You’re looking for that beautiful golden-brown color and a set custard. If the top is browning too quickly but the center isn’t set, you can loosely tent it with foil. For the glaze, the consistency is everything. Start with the minimum amount of liquid and add more only as needed, stirring until it’s pourable but not runny. A thicker glaze is easier to control and looks so pretty. If you want to make this gluten-free, I’ve had success using a good quality gluten-free bread and it still turns out wonderfully, though you might need to adjust the baking time slightly. Trust me, these little tweaks make a big difference!
Storing and Reheating Tips
This sheet pan French toast is definitely best enjoyed fresh, right out of the oven, but life happens, and sometimes you have leftovers! If you find yourself with any (which is rare in my house!), storing it properly is key. For room temperature storage, I wouldn’t leave it out for more than two hours, as per food safety guidelines. If you’re planning to eat it later that day, you can leave it covered loosely on the counter, but it’s always safest to refrigerate it. For refrigerator storage, once it’s cooled down completely, store it in an airtight container or wrap the baking sheet tightly with plastic wrap. It should stay good in the fridge for about 2-3 days. The texture might change slightly, becoming a bit softer, but it will still be delicious. When it comes to freezer instructions, this is a great make-ahead option. Once completely cooled, cut it into individual portions and wrap each piece tightly in plastic wrap, then place them in a freezer-safe bag or container. It can stay in the freezer for up to 2-3 months. To reheat, the best way is to thaw it overnight in the refrigerator and then warm it up in the oven at around 350°F (175°C) for about 10-15 minutes until heated through and slightly crisp. You can also reheat individual slices in a toaster oven or a dry skillet. For glaze timing advice, if you know you’ll be storing leftovers, it’s often best to drizzle the glaze *after* reheating. If you glaze it before storing, the glaze can sometimes become sticky or the moisture from the French toast can make it too liquidy. My kids often just re-warm a slice and eat it as is, no glaze needed, and they still love it!
Frequently Asked Questions
Final Thoughts

So there you have it – my absolute favorite way to make French toast! It’s the kind of recipe that just makes life a little bit sweeter and a whole lot easier. The way the bread gets perfectly tender on the inside while the edges get delightfully crisp is just so satisfying. It’s the perfect solution for those mornings when you want something special but don’t have hours to spend in the kitchen. Plus, the minimal cleanup is a dream! If you love this recipe, you might also enjoy my easy overnight oats or my fluffy pancake recipe – they’re both great for busy mornings too! I really hope you give this sheet pan French toast a try. It’s a guaranteed crowd-pleaser, and I can’t wait to hear how yours turns out! Let me know in the comments below what your favorite toppings are, or if you’ve added any fun twists to this classic.
Sheet Pan French Toast
Ingredients
Main Ingredients
- 1 loaf Challah or Brioche bread cut into 1-inch thick slices
- 4 large eggs
- 1.5 cups milk any kind
- 1 teaspoon vanilla extract
- 0.5 teaspoon cinnamon
- 0.25 teaspoon nutmeg
- 2 tablespoons butter melted, plus more for greasing the pan
- maple syrup for serving
- fresh berries for serving (optional)
Instructions
Preparation Steps
- Preheat oven to 375°F (190°C). Grease a large baking sheet or rimmed baking pan with butter.
- Arrange the bread slices in a single layer on the prepared baking sheet. Don't overlap them.
- In a large bowl, whisk together the eggs, milk, vanilla extract, cinnamon, nutmeg, and melted butter until well combined.
- Pour the egg mixture evenly over the bread slices, making sure to soak both sides.
- Let the bread soak for about 5 minutes, then carefully flip the slices to soak the other side.
- Bake for 20-25 minutes, or until the French toast is golden brown and cooked through. You can flip them halfway through baking for extra crispiness.
- Serve immediately with maple syrup and fresh berries, if desired.