There are some dishes that just *feel* like home, aren’t there? For me, that’s always been a slow-cooked, impossibly tender beef brisket. It’s the kind of meal that brings everyone to the table, where conversations flow easily and the aroma fills every corner of the house. I remember my grandma making it for Sunday dinners, and the anticipation building all afternoon. It’s so much more than just meat; it’s a tradition, a comfort, a culinary hug. While a perfectly grilled steak has its place, and a quick weeknight pasta is a lifesaver, nothing compares to the deep, smoky, melt-in-your-mouth goodness of a well-made beef brisket. It’s the ultimate crowd-pleaser, and honestly, the secret is in letting time and low heat do all the heavy lifting. If you’ve ever been intimidated by cooking a large cut of beef, think of this as your friendly guide to unlocking brisket perfection. It’s truly a labor of love, but one that rewards you tenfold.
What is Smoked Beef Brisket?
So, what exactly are we talking about when we say “smoked beef brisket”? In its simplest form, it’s a cut of beef taken from the chest of the cow. It’s known for being a bit tough and having a good amount of connective tissue and fat, which might sound daunting, but trust me, this is where the magic happens! When you cook it low and slow, usually with smoke involved, those tough tissues break down into pure, unadulterated tenderness and incredible flavor. Think of it as nature’s way of saying “patience is a virtue.” This isn’t a quick sear-and-serve situation; it’s about coaxing out the best possible texture and taste over many hours. The smoking process adds a layer of complexity – that distinct, smoky aroma and taste that’s just addictive. It’s the heart and soul of barbecue for so many people, and for good reason!
Why you’ll love this recipe?
Oh, where do I even begin with why this beef brisket recipe is my absolute favorite? First off, the FLAVOR. It’s a symphony of smoky, savory, slightly sweet, and deeply beefy notes. That bark – the dark, flavorful crust that forms on the outside from the rub and smoke – is utterly addictive. Then there’s the SIMPLICITY. While it takes time, the active work is minimal. You prep it, you let it smoke, and then you let it rest. It’s the kind of recipe that makes you look like a culinary wizard without requiring you to be glued to the stove. It’s incredibly COST-EFFECTIVE too. Brisket is often more affordable than other premium cuts, and when you consider how much incredible food you get from one piece, it’s a fantastic value. And let’s talk about VERSATILITY! This brisket isn’t just for sandwiches (though oh my goodness, the sandwiches!). You can serve it sliced for a classic dinner, chop it up for tacos, or even shred it for chili. What I love most about this recipe is that it’s forgiving. Even if you’re a little off on timing or temperature, it usually turns out beautifully. It’s the kind of dish that impresses everyone from seasoned foodies to picky kids. It really is a lifesaver for gatherings, holidays, or even just a special weekend meal when you want something truly memorable.
How do I make Smoked Beef Brisket?
Quick Overview
The beauty of this smoked beef brisket lies in its straightforward process. We start by generously coating a whole brisket with a simple yet potent rub that locks in moisture and builds flavor. Then, it’s into the smoker (or oven, if you prefer!) to cook low and slow for hours until it’s incredibly tender. The key is patience – allowing the connective tissues to break down fully. We’ll wrap it partway through to push through the “stall” and then let it rest properly, which is crucial for juiciness. It’s a hands-off approach for most of the cooking time, making it surprisingly manageable.
Ingredients
For the Brisket & Rub: For the Brisket & Rub: For
- One whole beef brisket (about 12-15 lbs), preferably a “packer” cut which includes the flat and point. Look for good marbling – those little flecks of fat throughout the meat are flavor gold!
- 1/2 cup coarse kosher salt
- 1/2 cup packed dark brown sugar
- 1/4 cup smoked paprika (this is key for that gorgeous color and smoky essence!)
- 2 tablespoons black pepper, freshly ground
- 1 tablespoon garlic powder
- 1 tablespoon onion powder
- 1 teaspoon cayenne pepper (optional, for a little kick)
For the Smoking Process (optional, but highly recommended):
- Wood chunks or chips – hickory, oak, or mesquite are fantastic choices.
For the Braising Liquid (if using oven method):
- 2 cups beef broth
- 1 cup dry red wine (like Cabernet Sauvignon or Merlot)
- 1/4 cup Worcestershire sauce
Step-by-Step Instructions
Step 1: Preheat & Prep Brisket
First things first, let’s get that brisket ready. Take it out of the fridge about an hour before you plan to start. You want it closer to room temperature so it cooks more evenly. Trim any excess hard fat from the top, leaving about a quarter-inch of the softer fat cap. This fat renders down and keeps the brisket moist. Pat the entire brisket dry with paper towels – this helps the rub adhere better. Don’t skip this part; a dry surface is your friend!
Step 2: Mix the Rub
In a medium bowl, whisk together the kosher salt, brown sugar, smoked paprika, black pepper, garlic powder, onion powder, and cayenne pepper (if you’re using it). This rub is my secret weapon – it’s simple, but it packs a punch and creates that amazing dark, flavorful bark. You can make a big batch of this rub and store it in an airtight container for future briskets or other smoked meats!
Step 3: Apply the Rub
Now for the fun part! Generously coat the entire brisket with the rub, making sure to get it into all the nooks and crannies. Don’t be shy! You want a good, thick layer. Gently press the rub into the meat with your hands to help it stick. I usually do this the night before and let the brisket sit, uncovered, in the fridge overnight. This allows the salt to work its magic, tenderizing the meat and drawing out moisture, which then gets reabsorbed with all the rub flavors. It’s a game-changer for tenderness and flavor!
Step 4: Prepare Smoker (or Oven)
For Smoker: If you’re using a smoker, preheat it to 225-250°F (107-121°C). Add your wood chunks or chips according to your smoker’s instructions. You want a nice, consistent smoke going. Place the brisket directly on the grates, fat side up, if your smoker tends to cook hotter on the bottom, or fat side down if you want the fat to shield the meat from intense heat.
For Oven: If you don’t have a smoker, no worries! You can achieve fantastic results in the oven. Preheat your oven to 275°F (135°C). Place the brisket in a heavy-duty roasting pan. Pour the beef broth, red wine, and Worcestershire sauce around the brisket. Cover the pan tightly with foil. We’re essentially braising it at a low temperature, which mimics the slow cooking process.
Step 5: The Long Cook Begins
This is where the waiting game starts. In a smoker, this can take anywhere from 8-12 hours, depending on the size of the brisket and the smoker’s consistency. In the oven, it will likely take about 6-8 hours. Resist the urge to constantly check on it! The best thing you can do is set it and forget it (mostly). The internal temperature is your guide. You’re aiming for around 160-165°F (71-74°C) for the first stage of cooking.
Step 6: The Wrap (The “Crutch”)
Once the brisket reaches that 160-165°F mark and you’ve got a nice dark bark forming, it’s time to wrap it. This is often called “the crutch” in the BBQ world. It helps the brisket push through the “stall” – that point where the internal temperature seems to stop rising for hours due to evaporation. Take the brisket out, wrap it tightly in a double layer of heavy-duty aluminum foil, or butcher paper if you have it (butcher paper allows a bit more bark formation). Place the wrapped brisket back into the smoker or oven. This stage is all about breaking down the connective tissue, and you’re aiming for an internal temperature of around 195-205°F (90-96°C). This can take another 3-5 hours, or even more.
Step 7: The Rest is History (and Crucial!)
This is perhaps the MOST important step that many people rush. Once your brisket hits that magical 195-205°F internal temperature and feels probe-tender (a thermometer probe or skewer should slide in with very little resistance, like butter), it’s time to rest it. Take it off the heat, still wrapped, and let it rest for at least 1-2 hours, but ideally 3-4 hours. You can even do this in a cooler wrapped in towels to maintain its temperature. This resting period allows the juices to redistribute throughout the meat. If you cut into it too soon, all that delicious moisture will just run out onto the cutting board, leaving you with dry brisket. I know it’s torture to wait, but trust me, it is SO worth it!
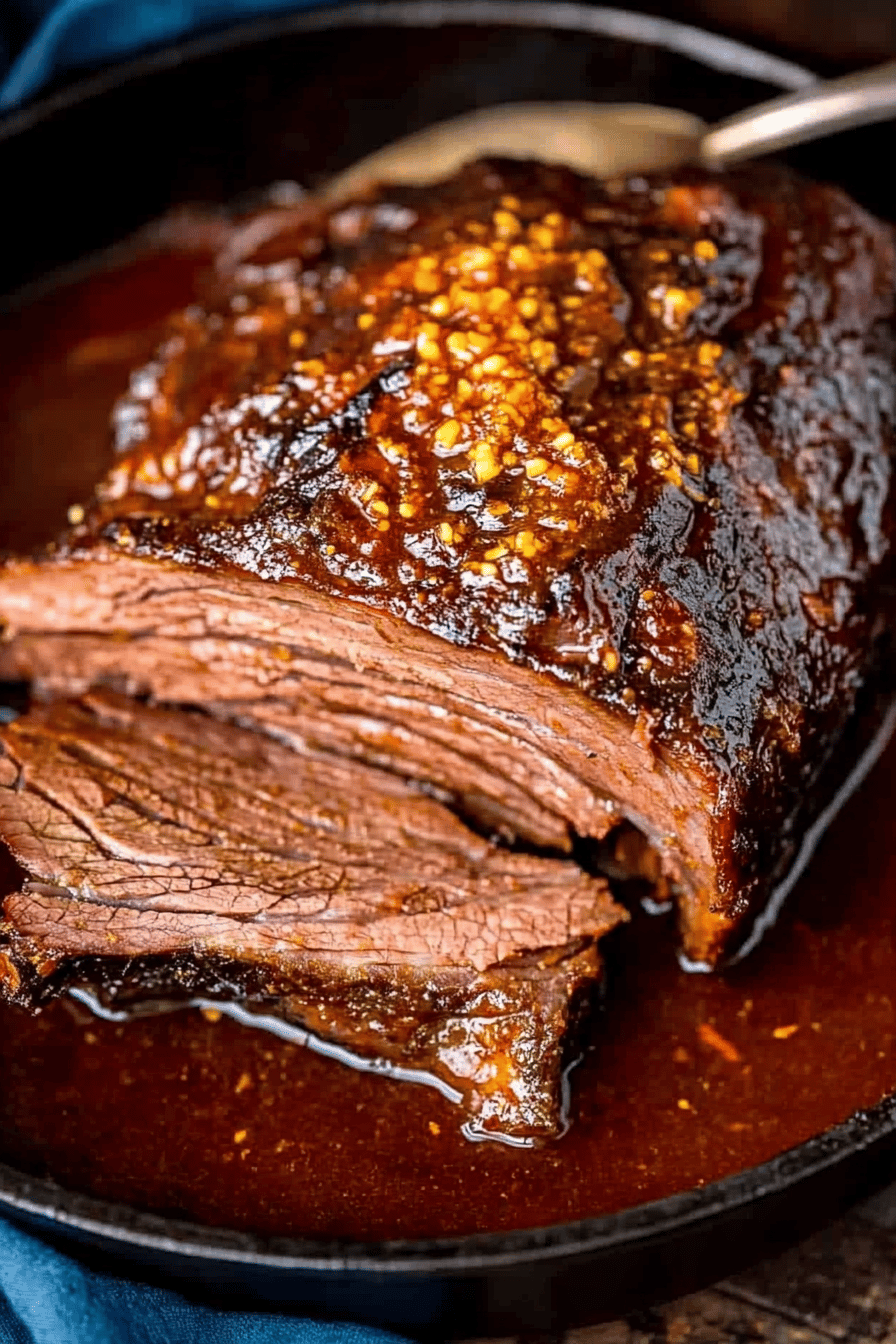
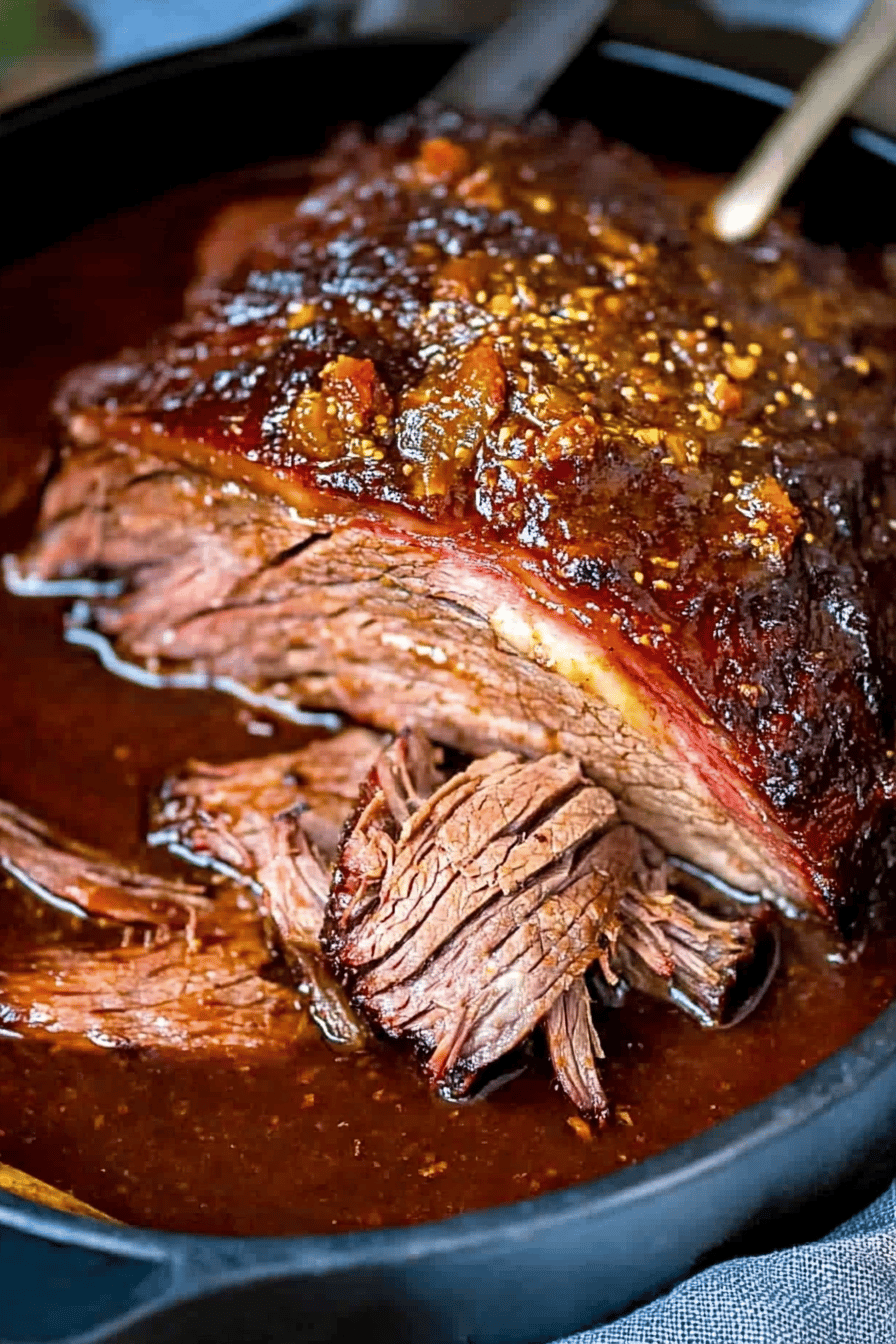
Step 8: Slice and Serve
Finally, the moment of truth! Unwrap your beautiful brisket. The meat should be incredibly tender and juicy. Slice it against the grain. You’ll want to separate the flat from the point if they cooked unevenly, and you can often tell where the grain changes direction. For the flat, slice about pencil-thick pieces. The point is usually fattier and more tender, so you can slice it thicker or even chop it for burnt ends (a whole other delicious adventure!). Serve immediately and bask in the glory of your perfectly cooked beef brisket!
What to Serve It With
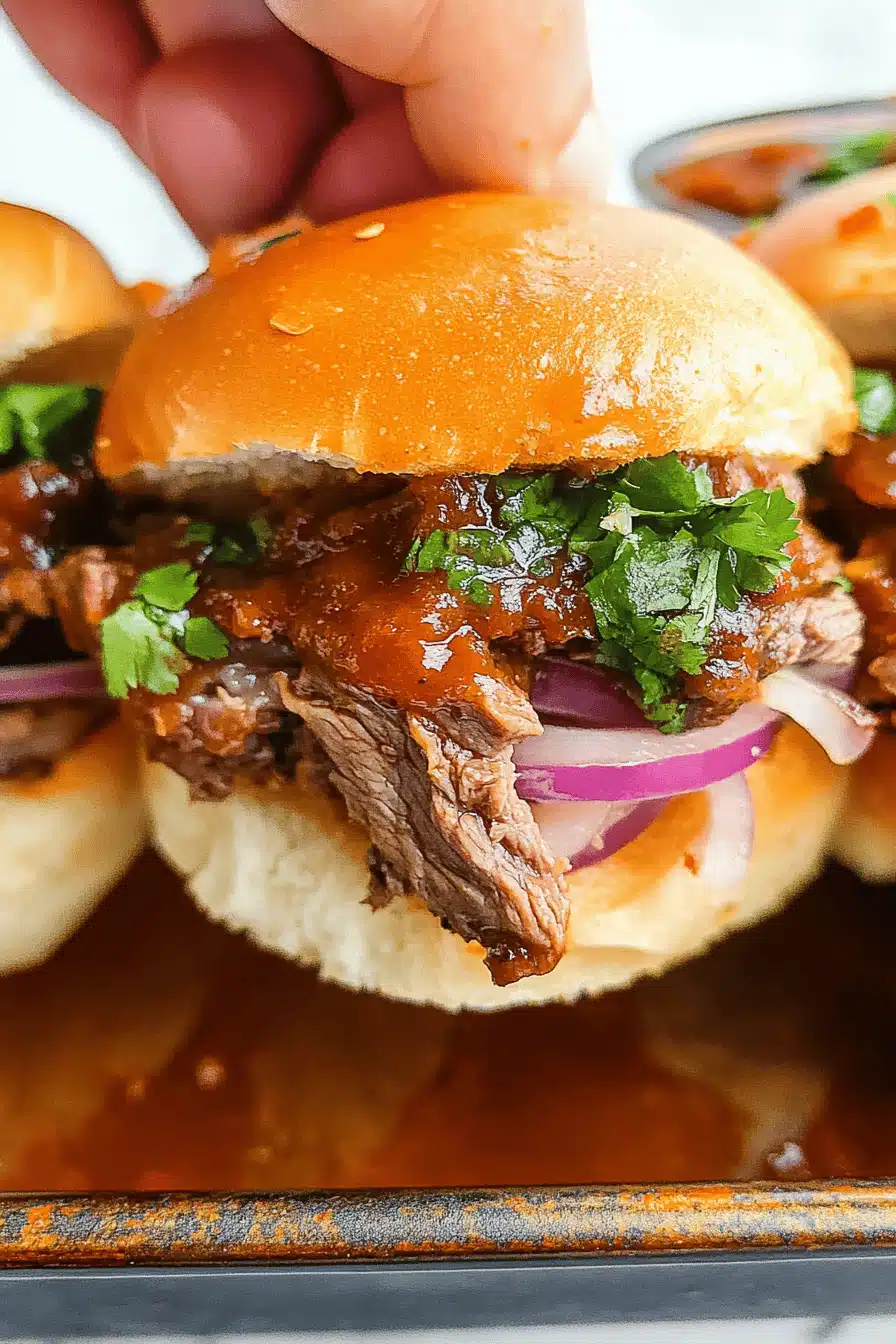
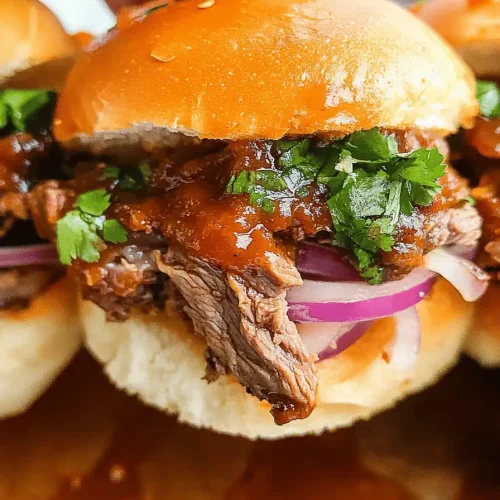
This glorious beef brisket is truly a centerpiece, and it pairs beautifully with so many things! For a classic BBQ breakfast, I love serving some shredded brisket alongside scrambled eggs and a side of crispy home fries. It’s hearty and flavorful, the perfect start to a leisurely weekend. Brunch is another fantastic opportunity – think brisket tacos with a fresh salsa and avocado crema, or nestled into a savory breakfast burrito. For a more formal dinner, it’s excellent with classic sides like creamy mashed potatoes, a tangy coleslaw, or some garlicky green beans. And if you’re feeling decadent, brisket sliders on little brioche buns with a smoky BBQ sauce are always a huge hit. My family loves it chopped up and added to mac and cheese for an extra layer of deliciousness. Honestly, once you have this brisket, you’ll find yourself looking for excuses to make it and finding new ways to enjoy every last bite!
Top Tips for Perfecting Your Smoked Beef Brisket
Over the years, I’ve learned a few tricks that really elevate a brisket from good to absolutely unforgettable. First, about the fat trim: don’t trim *all* the hard fat. Leave about a quarter-inch of the softer fat cap on top. This melts and bastes the meat as it cooks, adding incredible moisture and flavor. If you’re smoking, use a blend of wood chunks for a more complex smoke. Hickory is classic, oak is milder and wonderful, and a bit of mesquite can add a punch. Don’t be afraid of the rub; a generous, even coating is essential for that perfect bark. I always do my rub the night before and let it sit uncovered in the fridge – this dry brining makes a huge difference in tenderness and flavor infusion. For oven braising, don’t skip the red wine in the liquid; it adds a fantastic depth of flavor that complements the beef beautifully. When it comes to the “stall,” wrapping is your friend. I prefer butcher paper for its breathability, which helps maintain the bark, but heavy-duty foil works perfectly well if that’s what you have. Just make sure it’s wrapped tightly. The absolute biggest tip, though, is the rest. I cannot stress this enough! Resting for at least 2-4 hours in a cooler or a warm oven (turned off) allows the juices to redistribute. Cutting too soon is the number one mistake that leads to dry brisket. I’ve made that mistake myself, and believe me, the wait is worth it. Finally, invest in a good meat thermometer; it’s your best friend for knowing exactly when your brisket is perfectly done.
Storing and Reheating Tips
Once your magnificent beef brisket is cooked, you’ll likely have some leftovers (though I can’t guarantee it!). For storing, the key is to keep it moist. If you’ve wrapped it in foil, you can actually store it in the foil and place that inside an airtight container or a heavy-duty resealable bag. At room temperature, it’s best to eat it within a couple of hours, but for longer storage, pop it straight into the refrigerator. In the fridge, it will last for about 3-4 days. If you want to freeze it, this is also totally doable! Wrap the sliced or chopped brisket very tightly in plastic wrap, then in foil, and then place it in a freezer-safe bag or container. It can stay frozen for up to 3 months. When it comes to reheating, the goal is to gently warm it through without drying it out. The best method is to reheat it in a low oven (around 250-300°F or 120-150°C) with a little bit of liquid – either beef broth, water, or some of the juices saved from resting. Place the brisket in an oven-safe dish, add about 1/4 to 1/2 inch of liquid, cover tightly with foil, and reheat until warmed through, usually about 20-30 minutes depending on how much you’re reheating. You can also reheat smaller portions gently in a skillet over medium-low heat with a splash of liquid. Avoid microwaving it if you can, as it tends to make the meat tough and rubbery. For the glaze, if you’re planning to store and reheat, it’s often best to apply the glaze *after* reheating, unless you’re reheating a large batch that will be consumed quickly, in which case a light glaze before reheating can be nice.
Frequently Asked Questions
Final Thoughts
There you have it – my ultimate guide to making a show-stopping smoked beef brisket. I truly hope this recipe inspires you to give it a try. It’s more than just a meal; it’s an experience, a chance to gather loved ones and create lasting memories around a table filled with incredible food. The satisfaction you get from pulling a perfectly tender, flavorful brisket out of the smoker (or oven!) is unmatched. Remember, patience is your best friend here, and that long, slow cook is what transforms a humble cut of beef into something truly extraordinary. If you loved this recipe, you might also enjoy my Slow Cooker Pulled Pork or my Cedar Plank Salmon for more delicious low-and-slow cooking inspiration. Please, if you make this, let me know how it turns out in the comments below! I’d also love to hear about any unique twists or serving suggestions you come up with. Happy cooking, and happy eating!
Slow Cooker Beef Brisket
Ingredients
Main Ingredients
- 1.5 pounds Beef Brisket
- 1 cup Diced Tomatoes undrained
- 0.5 cup Beef Broth
- 2 tablespoons Worcestershire Sauce
- 1 teaspoon Smoked Paprika
- 0.5 teaspoon Garlic Powder
- 0.25 teaspoon Cayenne Pepper optional
- 1 teaspoon Salt
- 0.5 teaspoon Black Pepper
Instructions
Preparation Steps
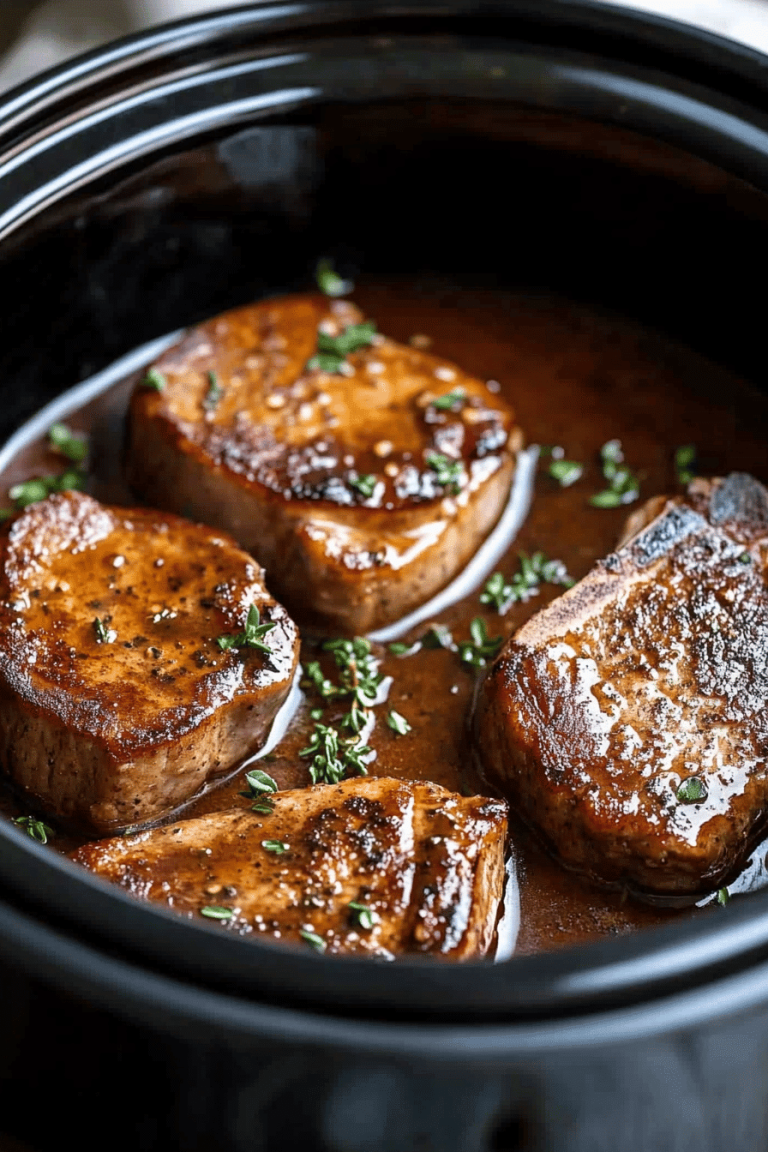
- Place the beef brisket in the slow cooker.
- In a medium bowl, whisk together the diced tomatoes (undrained), beef broth, Worcestershire sauce, smoked paprika, garlic powder, cayenne pepper (if using), salt, and black pepper.
- Pour the tomato mixture over the brisket in the slow cooker.
- Cover and cook on low for 8-10 hours, or on high for 4-5 hours, until the brisket is fork-tender.
- Remove the brisket from the slow cooker and let it rest for 10 minutes before slicing against the grain.
- Serve the sliced brisket with the sauce from the slow cooker.