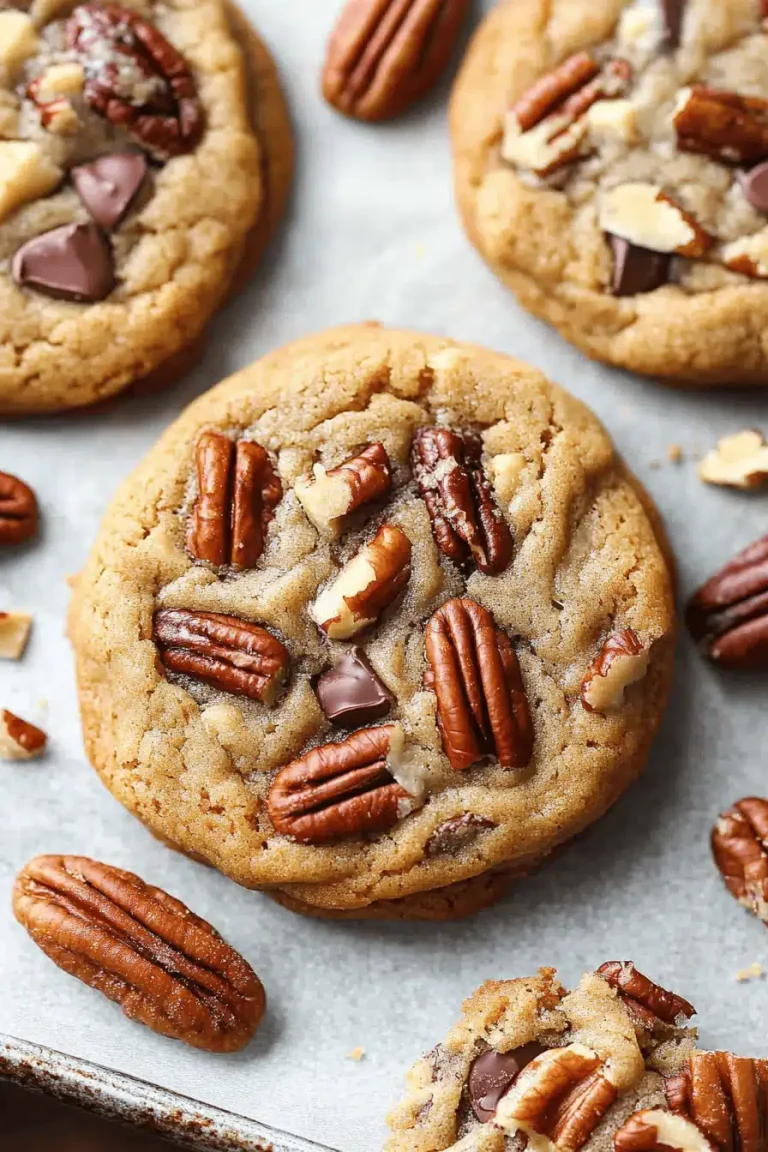
What are cookies that transport you back in time? What are thumbprint cookies? I was talking to my neighbor the other day about how the smell of warm butter and cinnamon was amazing. Sugar baking always makes me think of my Grandma’s kitchen. She used to make these during the holidays, and the whole house would just be filled with this. Sweet, comforting aroma. My version is a little bit of her classic recipe but I’ve picked up some twists over the years. What are the perfect little bites of happiness? What is a sweet center that melts in your mouth? They’re not overly complicated, which is a huge plus when you’re busy, but they taste like you spent your time. How many hours do you spend slaving away in the kitchen? What is your favorite cookie and why? Is Chocolate Chip one worth it? If you love shortbread cookies, you are going to love these thumbprints.

What are thumbprint cookies?
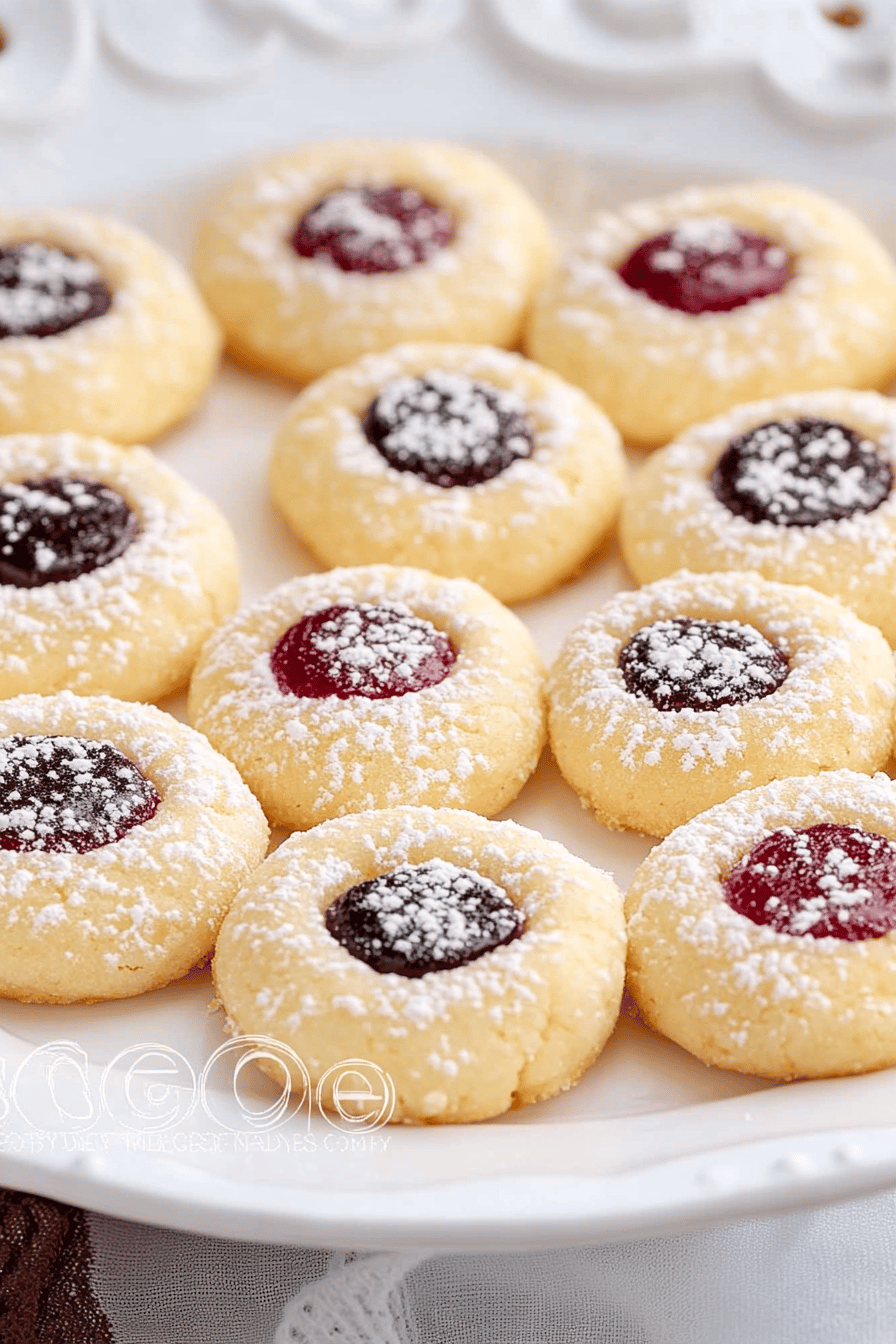
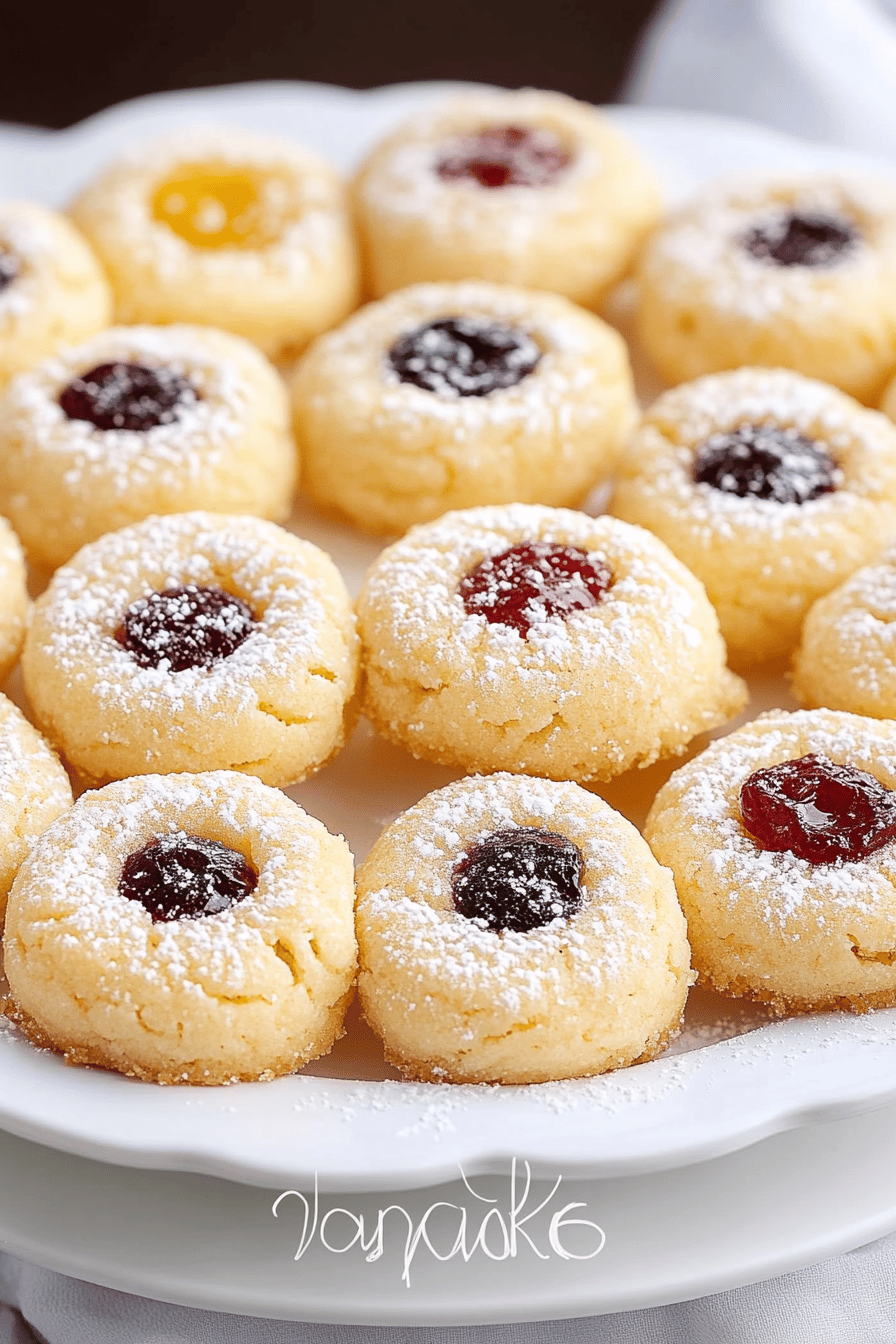
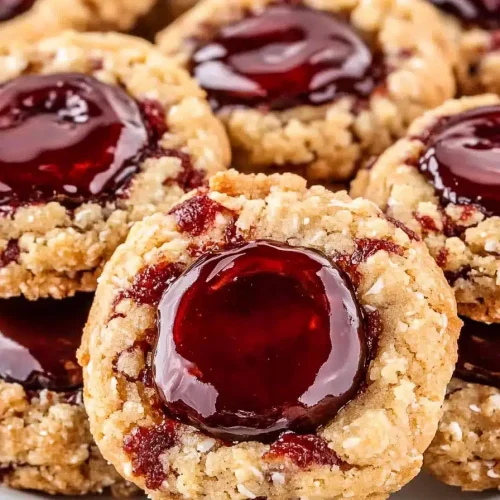
So, what exactly are thumbprint cookies? Well, at their heart, they’re a wonderfully simple yet utterly delightful cookie that gets its name from the way you make them. You create a small indentation, or “thumbprint,” in the center of a ball of dough before baking. This little well then gets filled with something delicious, usually jam, preserves, or sometimes even a caramel or chocolate ganache. It’s this delightful little surprise waiting for you with every bite. The cookie itself is typically a buttery, melt-in-your-mouth shortbread-style dough that holds its shape beautifully while baking. It’s the perfect canvas for whatever sweet filling you choose. They’re like little edible jewels, really! The beauty of thumbprint cookies is their versatility; you can customize the filling to match your mood or the season, making them a truly adaptable treat. It’s essentially a hug in cookie form!
Why do I love this recipe?
There are so many reasons why I keep coming back to this thumbprint cookie recipe, and I just know you will too! First off, the flavor is just divine. The cookie itself is wonderfully tender and buttery, with just a hint of sweetness that doesn’t overpower the star of the show – the filling. Speaking of the filling, using a good quality jam makes all the difference; it bursts with fruity flavor and creates this lovely contrast with the rich cookie. What I love most about this recipe, though, is how surprisingly easy it is. Seriously, you can whip these up with basic pantry staples, and the actual hands-on time is minimal. They’re so much simpler than many other fancy cookies, but they deliver big on taste and appearance. Plus, they’re incredibly cost-effective; you don’t need any expensive or exotic ingredients to make a batch of these gorgeous treats. And the versatility! Oh my goodness. You can use raspberry jam, apricot preserves, even a dollop of lemon curd. It makes them perfect for any occasion, from a casual afternoon tea to a more formal dessert spread. They’re also fantastic for bake sales because they look so professional but are so easy to make in large batches. I’ve tested this recipe with different jams, and they all turn out beautifully. It’s truly a lifesaver when you need a crowd-pleasing dessert that’s both delicious and forgiving. If you’re a fan of simple, elegant baking that yields maximum flavor with minimal fuss, these thumbprint cookies are an absolute must-try.
How do I make thumbprint cookies?
Quick Overview
What’s the fun part about making thumbprint cookies? You’ll simply mix up a tender, buttery dough, roll it into balls, create the thumbprint, fill it with water and bake it until golden brown. What’s your favorite jam, and bake until golden brown. The aroma that fills your kitchen while they’re baking is absolutely heavenly. Is it a simple process that requires minimal fuss but yields incredibly impressive results? I don’t need any special equipment, just my hands and a good old baking sheet. What are some of the best cookies ever made?
Ingredients
What you need to make these little gems?
For the Main Batter:
– 1 cup (2 sticks) unsalted butter, softened: Make sure it’s nice and soft, but not melted. This is key for a tender cookie.
– 1/2 cup granulated sugar: For that perfect sweetness.
– 1 large egg: Helps bind everything together.
– 1 teaspoon vanilla extract: A classic for a reason, it adds depth.
– 2 1/2 cups all-purpose flour: Sifted, if you want extra lightness, though it’s not strictly necessary.
– 1/4 teaspoon salt: Balances the sweetness beautifully.
For the Filling:
– About 1/2 cup your favorite jam or preserves: What are some good choices for a strawberry, raspberry, or blackberry? Make sure it’s a good quality one with nice fruit chunks!
For the Glaze (Optional, but I love it!): Is there a recipe for it?
– 1 cup powdered sugar: For a smooth, sweet finish. 1-2 tablespoons milk or cream: Just enough to reach a drizzly consistency. A splash of vanilla extract can be nice too.
Step-by-Step Instructions
Step 1: Preheat & Prep Pan
How do I get my oven to start? If you are baking on a baking sheet, line it with parchment paper. Is this a lifesaver for easy cleanup? Why don’t cookies stick?
Step 2: Mix Dry Ingredients
In a medium bowl, whisk together the flour and salt. This just ensures the salt is evenly distributed throughout the flour, so you don’t get any salty surprises in one bite. Set this aside for now.
Step 3: Mix Wet Ingredients
In a large bowl, cream together the softened butter and granulated sugar until it’s light and fluffy. Set aside. This usually takes a few minutes with an electric mixer, and it’s important for getting that tender. What is cookie texture? Then, beat in the egg and vanilla extract until everything is well combined and smooth. It should look pale yellow and airy.
Step 4: Combine
Now, gradually add the dry ingredients to the wet ingredients. Mix on low speed, or gently by hand, until just combined. Be careful not to overmix here! Overmixing can lead to tough cookies, and we definitely don’t want that. Stop mixing as soon as you no longer see streaks of flour. The dough will be soft and a little sticky, which is exactly what we’re aiming for.
Step 5: Prepare Filling
If your jam is particularly thick, you might want to give it a good stir. Some jams, especially those with whole fruit, can be a bit chunky. You want it spreadable but not so runny that it spills out during baking. If it seems a bit firm, a tiny splash of water or lemon juice can help loosen it up. I usually just use it straight from the jar!
Step 6: Layer & Swirl
This is the fun part! Scoop about 1 tablespoon of dough and roll it into a ball between your palms. Place the ball onto your prepared baking sheet, leaving about 2 inches between each cookie. Now, using your thumb (or the back of a small spoon), gently press an indentation into the top of each dough ball. Make it deep enough to hold the jam, but don’t press all the way through to the bottom. Then, spoon about 1/2 teaspoon of your chosen jam into each little well. Don’t overfill, or it will bubble over!
Step 7: Bake
Bake for 12-15 minutes, or until the edges are lightly golden and the cookies are set. The centers might look a little soft, and that’s okay! They’ll continue to cook a bit as they cool on the baking sheet. Keep an eye on them, as oven temperatures can vary. Mine usually take about 13 minutes.
Step 8: Cool & Glaze
Let the cookies cool on the baking sheet for about 5 minutes before carefully transferring them to a wire rack to cool completely. If you’re adding a glaze, whisk together the powdered sugar with 1 tablespoon of milk or cream and a splash of vanilla. Add more liquid, a tiny bit at a time, until you have a smooth, drizzle-able consistency. Once the cookies are completely cool, drizzle the glaze over them. It’s so pretty!
Step 9: Slice & Serve
Once the glaze has set (if you used it), your beautiful thumbprint cookies are ready to be devoured! They’re best served at room temperature, but honestly, I’ve never been able to wait that long.
What should I serve it with?
These thumbprint cookies are so wonderfully versatile; they fit in anywhere! For breakfast, I love pairing them with a strong cup of coffee or a creamy latte. They’re not overly sweet, so they make a lovely morning treat without being too heavy. For brunch, they’re just perfect alongside a fruit salad or a light yogurt parfait. I sometimes arrange them on a tiered stand with other pastries, and they always look so elegant. As a dessert, they’re a classic. They’re fantastic served on a dessert platter with other cookies and brownies, or simply on their own after a nice meal. My kids also love them as a cozy afternoon snack with a glass of cold milk – they disappear in minutes at my house! We’ve also had them at holiday gatherings, and they’re always a hit, especially when I use a festive red jam. They really do complement almost any beverage, from tea to Hot Chocolate, making them a go-to for any sweet craving.
Top Tips for Perfecting Your Thumbprint Cookies
What are some of the best thumbprint cookies you’ve ever tried? What are some of my best tips?
Zucchini Prep:I mean zucchini? Oh my goodness, I’ve gotten so ahead of myself! I meant to say cookie prep. I was just thinking about my zucchini Bread Recipe. What are thumbprint cookies?
Mixing Advice: The biggest thing with these cookies is not to overmix the dough once you add the flour. Seriously, just mix until it’s combined. If you overwork the gluten, you’ll end up with a tougher cookie, and we want them to be melt-in-your-mouth tender. I usually stop mixing as soon as I see the last bit of flour disappear.
Swirl Customization While I usually just use a classic jam, don’t be afraid to get creative with the filling! Apricot preserves give a lovely tangy flavor, and raspberry is always a winner. For a richer cookie, try a caramel or a good quality dulce de leche in the center. You can even mix a tiny bit of lemon zest into the dough for an extra zing. I’ve also experimented with a bit of finely chopped nuts mixed into the jam for texture.
Ingredient Swaps: If you find your dough is a bit too soft to handle, you can pop it in the fridge for about 15-20 minutes before rolling. This makes it easier to work with. And if you’re out of regular sugar, you can use an equal amount of brown sugar for a slightly deeper, caramel-like flavor, though it might make the cookies a bit chewier.
Baking Tips: It’s really important to keep an eye on your cookies while they’re baking. Ovens can be tricky, and you want those edges to be just lightly golden, not deeply browned. If you notice one side is baking faster than the other, you can rotate the baking sheet halfway through. Also, remember that the cookies will continue to bake a little on the hot baking sheet after you take them out of the oven, so pulling them out when they look *almost* done is the secret to a perfect texture.
Glaze Variations: If you’re not a fan of the powdered sugar glaze, you can absolutely skip it! The cookies are delicious on their own. Another option is to simply dust them with powdered sugar once they’ve cooled. Or, for a more decadent touch, you could melt some good quality chocolate and drizzle that over the cooled cookies. Whatever you do, let the cookies cool completely before adding any glaze or topping, otherwise, it will just melt and become a mess.
What are some Storing and Reheating Tips?
Properly storing these thumbprint cookies is key to keeping them delicious. At room temperature, they’ll stay fresh in an airtight container for about 3-4 days. Just make sure they’re completely cooled before sealing them up. If you’ve got a really humid day, or if you’ve added a glaze that needs a bit more time to set, popping them in the fridge might be a good idea, but I find they’re best at room temp. For longer storage, you can definitely freeze them! Place them in a single layer on a baking sheet in the freezer until firm, then transfer them to a freezer-safe bag or container. They’ll keep well in the freezer for up to 2-3 months. When you want to enjoy them, just let them thaw at room temperature. If you’ve glazed them, the glaze might get a little sticky upon thawing, but the cookie itself will be perfectly fine. I usually avoid glazing cookies that I plan to freeze, and just add the glaze after they’ve thawed and returned to room temperature.
What are some frequently asked questions?
Final Thoughts
Honestly, I could eat these thumbprint cookies every single day and never get tired of them. They’re just that good. They have that perfect balance of buttery richness and sweet, fruity goodness, and the texture is just spot-on – tender and melt-in-your-mouth. I love that they look so elegant and special, but they’re honestly one of the easiest cookies I make. They’re a testament to how simple, quality ingredients can create something truly magical. If you’re looking for a cookie that will impress your friends, delight your family, or just treat yourself, you really can’t go wrong with these thumbprint cookies. Give them a try, and I have a feeling they’ll become a favorite in your kitchen too! I can’t wait to hear how yours turn out, so be sure to leave a comment below with your favorite jam or any fun twists you tried. Happy baking!
thumbprint cookies
Ingredients
Main Ingredients
- 0.5 cup unsalted butter softened
- 0.33 cup granulated sugar
- 1 large egg yolk
- 1 teaspoon vanilla extract
- 1.5 cup all-purpose flour
- 0.5 teaspoon salt
- 0.5 cup jam or preserves any flavor
Instructions
Preparation Steps
- Preheat oven to 350 degrees F (175 degrees C). Line baking sheets with parchment paper.
- In a large bowl, cream together the softened butter and granulated sugar until light and fluffy.
- Beat in the egg yolk and vanilla extract until well combined.
- In a separate medium bowl, whisk together the all-purpose flour and salt.
- Gradually add the dry ingredients to the wet ingredients, mixing until just combined. Do not overmix.
- Roll the dough into 1-inch balls and place them on the prepared baking sheets, about 2 inches apart.
- Using your thumb or the end of a wooden spoon, make an indentation in the center of each cookie.
- Fill each indentation with about 1/2 teaspoon of jam or preserves.
- Bake for 10-14 minutes, or until the edges are lightly golden brown. The centers may look soft.
- Let the cookies cool on the baking sheets for a few minutes before transferring them to a wire rack to cool completely.